Connect with us

Cooking

The Hidden Influence of Utensil Shape on Flavor Perception

Amidst the culinary world, the shape of your utensils secretly shapes your flavor perception—discover how these subtle influences can transform your dining experience.

Published

on

utensil shape affects flavor

The shape of your utensils greatly influences how you perceive flavors, often in subtle ways. For instance, deeper spoons can hold more liquid, intensifying taste experiences, while wider bowls help distribute flavors more evenly. You might notice that the weight of a utensil affects your enjoyment; heavier utensils often feel more luxurious, increasing satisfaction. Additionally, the visual appeal of your utensils also sets expectations for taste. Understanding these factors can enhance your overall dining experience and lead to surprising discoveries about your food. There's much more to uncover about how the dining environment affects your taste.

Key Takeaways

  • The shape of utensils affects liquid capacity, influencing the intensity of flavors experienced during meals.
  • Deeper spoons can hold more liquid, altering the taste experience by delivering more flavor at once.
  • Wider bowls distribute flavors evenly across dishes, enhancing overall taste perception compared to narrow shapes that concentrate flavors.
  • Utensil shape impacts the tactile experience, which can amplify or dampen flavor enjoyment during dining.
  • The design of cutlery can shape initial flavor expectations, with elegant forms often leading to higher perceived meal quality.
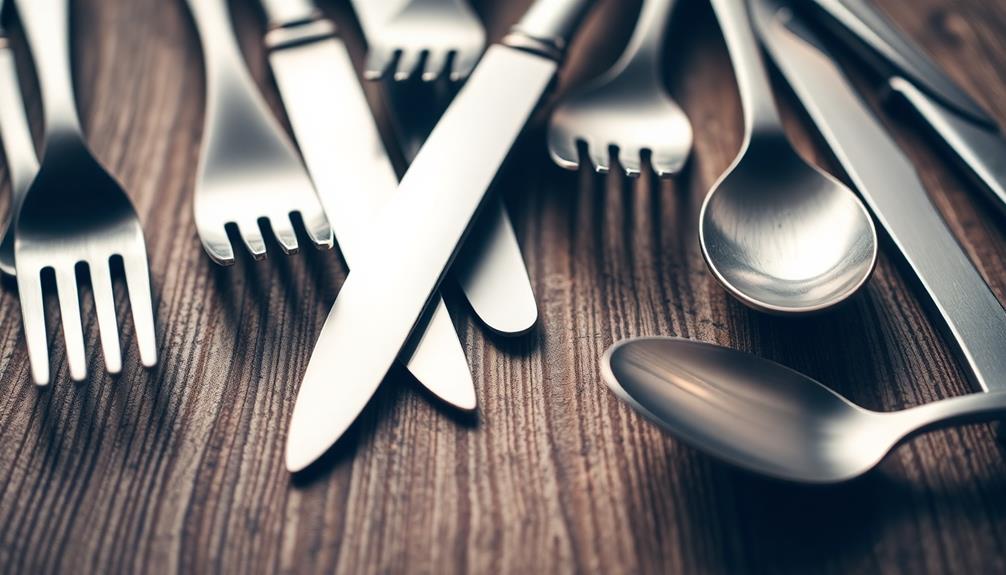
The Role of Material

importance of material selection

The material of your cutlery plays an essential role in how you perceive the flavors of your food. Studies show that stainless steel utensils are among the best choices for minimizing unwanted tastes. Unlike lower-quality metals or plastic, stainless steel doesn't alter the flavor profile of your meals. This is particularly important when enjoying rich dishes like Red-Braised Pork Belly, which rely on the delicate balance of flavors.

On the other hand, using zinc or copper spoons can amplify bitterness and metallic tastes, which mightn't be what you want when enjoying a delicate dish.

Interestingly, the weight of your cutlery can also affect your overall dining experience. Participants in research rated food served with heavier metallic spoons as more pleasant and higher quality. This suggests that both the material and weight of your utensils can enhance your enjoyment of food.

Conversely, light plastic spoons may lead you to perceive food as denser and more expensive, which can skew your flavor perception in dishes like yogurt.

Color and Its Effects

impact of color psychology

You might be surprised at how color affects your taste experience, from the contrast between your food and utensils to the emotional responses colors evoke.

The appearance of comfort foods, like a loaded baked potato, can be enhanced by the colors of the plates or utensils used, influencing not only how the dish looks but also how it tastes.

Advertisement

For instance, a white spoon can make yogurt taste sweeter, while a black one might do the opposite.

As you explore different color combinations, you'll notice how they can greatly shift your perception of flavor.

Color Contrast Effects

When it comes to enjoying a meal, color contrast between food and utensils plays an essential role in how flavors are perceived. Research shows that the hue of your cutlery can greatly impact flavor perception. For instance, white yogurt served with a white spoon is often rated as sweeter than when served with a contrasting color spoon. Similarly, using black spoons can diminish the perceived sweetness of sweet foods.

Here's a quick overview of how color contrast can influence your dining experience:

Cutlery Color Food Type Effect on Flavor Perception
White Sweet Yogurt Sweeter
Black Sweet Yogurt Less Sweet
Contrasting Any Food Enhances Flavor Experience

These findings indicate that the visual context set by color combinations can alter your expectations and enhance the flavor experience. So next time you set the table, remember that the color contrast between your food and cutlery can make a difference in how you perceive flavors. It's not just about what you eat, but how it looks!

Advertisement

Emotional Responses to Color

Colors have a powerful influence on our emotions and can greatly shape our dining experience. The way you perceive flavors can be markedly impacted by the colors surrounding your food. For instance, a dish like Dorayaki might look even more delightful when presented on a vibrant plate, enhancing its appeal.

When you consider the following aspects of color, you can enhance your meal:

  1. Red: This color often increases appetite and makes food look more appealing, which can elevate your overall enjoyment.
  2. Blue: In contrast, blue tends to reduce appetite, making food less enticing. You might notice that your craving for snacks diminishes in a blue-themed setting.
  3. Yellow: This cheerful color is linked to happiness, enhancing the vibrancy of your food's presentation and evoking positive emotional responses.

Additionally, color contrast plays an essential role in flavor perception. For example, if you serve white yogurt on a white spoon, it may taste sweeter compared to when it's on a black spoon.

Your expectations are shaped by the visual context, and this can greatly influence how you rate the taste. Ultimately, being mindful of color can heighten your dining experience, proving that emotional responses to color are just as important as the food itself.

Color Combinations Impact Taste

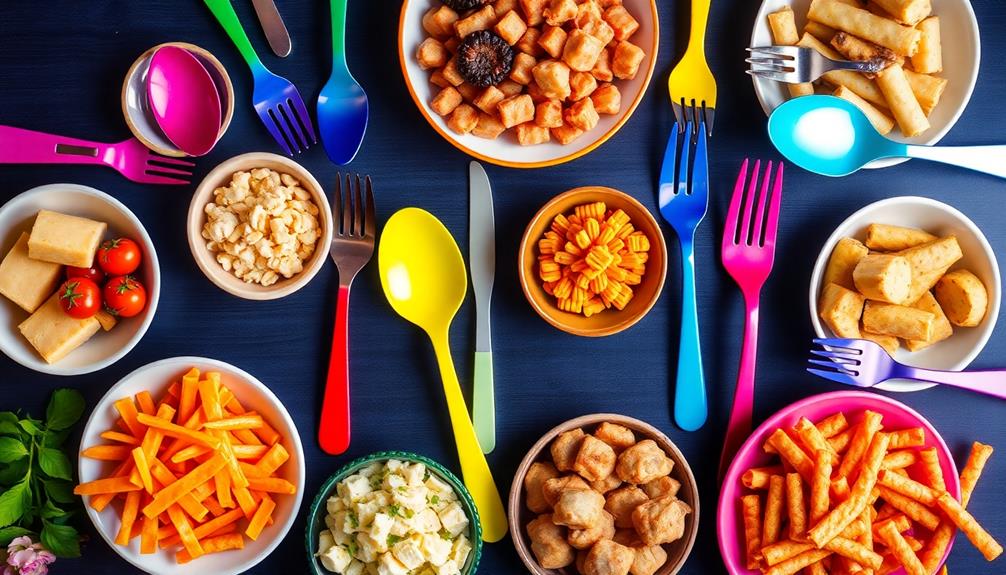
Experiencing a meal isn't just about the food itself; the colors of the utensils you use can dramatically alter your perception of taste. Research shows that color combinations play an essential role in flavor perception. For instance, using cold-colored glass can enhance thirst-quenching ratings for beverages, making your drink feel more invigorating.

Similarly, serving a vibrant dish like Caruru on colorful plates can elevate its appeal and enhance the dining experience. On the other hand, contrasting colors between your utensils and food can change how salty or sweet your meal tastes. In one study, white yogurt served with a white spoon was rated sweeter than when paired with other colors.

Advertisement

Emotional responses to colors also influence your taste ratings. For example, red utensils can enhance the perceived flavor and appeal of your food, while blue utensils might dampen your appetite. This means that the way you set your table can create varied flavor expectations, impacting your overall enjoyment.

Next time you dine, think about the color combinations on your plate and in your hands. The right hues can elevate your meal, transforming your experience and altering your perception of flavor in surprising ways.

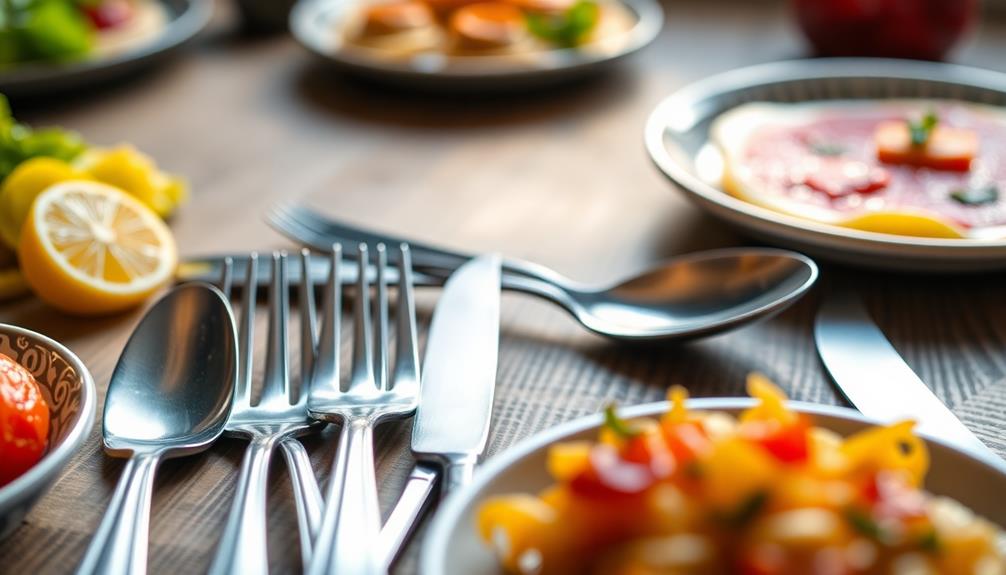
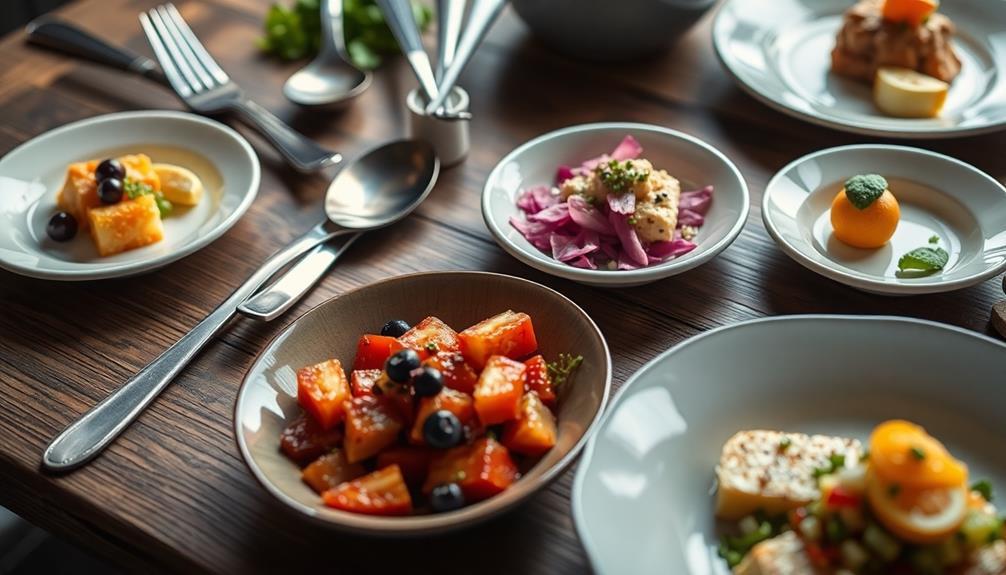
Shape and Size Importance

significance of shape and size

Utensil shape and size play an essential role in how you perceive flavor during meals. The design of your utensils can notably shift your flavor experience, making it vital to take into account both aspects when dining.

For instance, when enjoying traditional Greek dishes, the right utensils can amplify the experience of flavors like the rich aroma of Retsina or the satisfying crunch of Tomato Fritters.

Here are three key points to keep in mind:

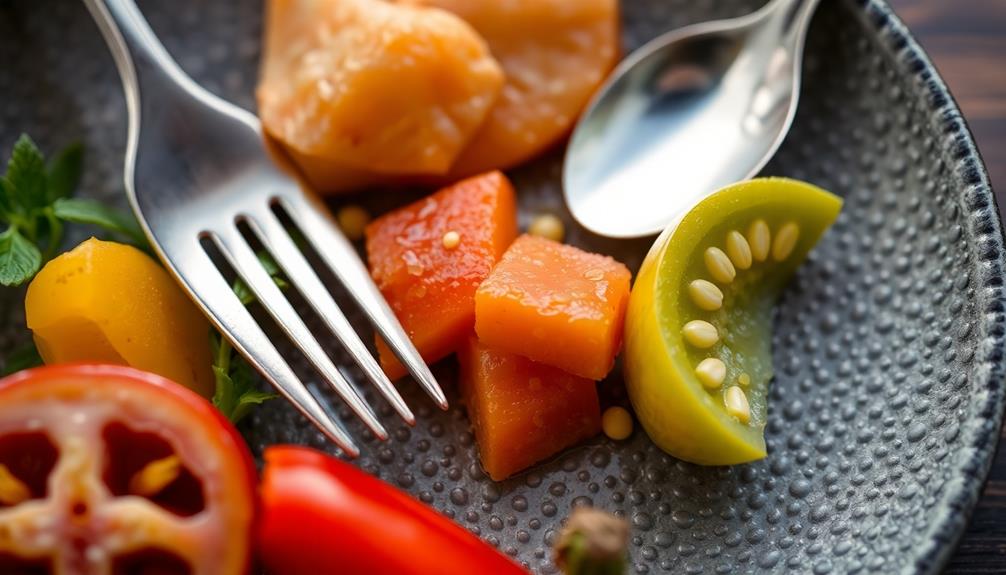
  1. Spoon Shape: Deeper spoons hold more liquid, enhancing flavor intensity. Shallower spoons may not convey the same richness, altering your perception of taste.
  2. Plate Size: Larger plates often lead to larger portion sizes, impacting your sense of abundance and satisfaction. Smaller plates can help control your intake, enhancing your overall dining experience.
  3. Glassware Shape: The shape of your glass can affect aroma release. Wider glasses allow for better aroma diffusion, which can notably alter the flavor perception of your drinks.

Impact of Texture

influence of surface detail

When you think about your dining experience, texture plays a vital role in how you perceive flavors.

For instance, the tactile sensation of enjoying traditional Ethiopian dishes like Yekolo (Roasted Barley) enhances the nutty flavor, making the experience more enjoyable.

Advertisement

From the roughness of clay bowls to the smoothness of glassware rims, each texture can enhance or alter your enjoyment of food and drink.

Texture's Role in Dining

Texture plays an essential role in how you perceive flavors during a meal. The way food feels in your mouth can greatly enhance or alter your overall dining experience. For instance, a dish like Nettle and Potato Soup can feel more comforting when served in a rough clay bowl, as the texture amplifies the creamy richness of the soup.

From the texture of your cutlery to the dishes you use, each element contributes to your perception of taste.

Here are three key aspects of texture's impact on dining:

  1. Bowl Material: Rough clay bowls create friction, amplifying taste sensations, whereas smooth porcelain can dull them.
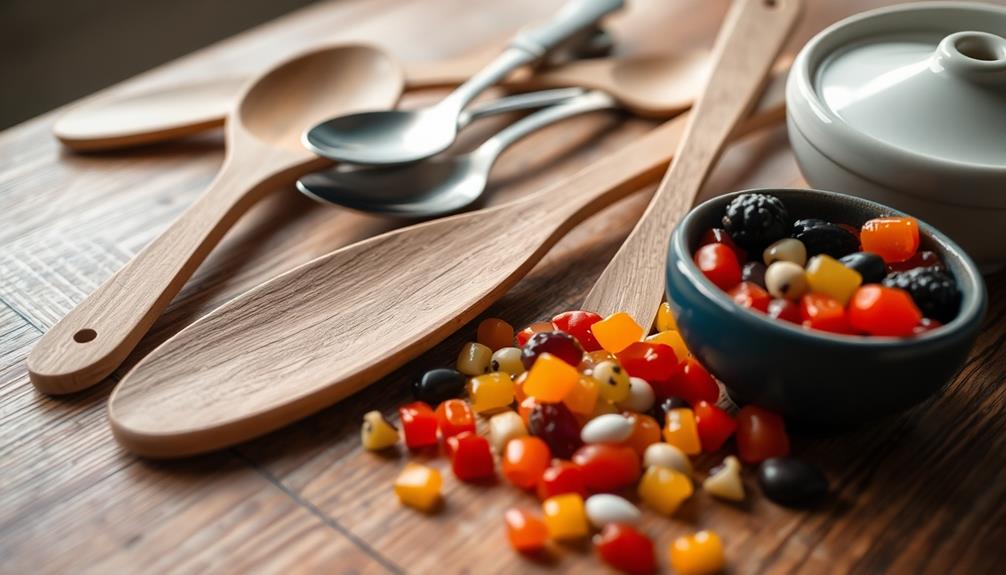
  2. Utensil Texture: Metal spoons feel cool, impacting temperature perception and potentially altering taste. In contrast, wooden spoons offer a warmer, more comfortable feel.
  3. Glassware Rim: Smooth rims provide a pleasant drinking experience, while rough rims can heighten tactile sensations, affecting your enjoyment.

These textural differences in cutlery and dishware aren't just about aesthetics; they shape your expectations about flavor and quality.

The interplay of texture in dining not only enhances your enjoyment of the food but also plays an important role in flavor perception, guiding you through a multi-sensory experience. It's a subtle yet powerful factor that can change how you experience a meal.

Advertisement

Enhancing Flavor Through Texture

Although you mightn't realize it, the textures of the utensils and dishware you use can greatly enhance your flavor experience during a meal. For instance, the rough texture of a clay bowl creates friction that heightens your perception of flavors, making each bite more engaging.

In Indonesian cuisine, the use of natural materials like bamboo for serving dishes can add a unique element to the meal, as seen with Kue Putu, which is steamed in bamboo tubes. On the other hand, smooth utensils, like metal spoons, provide a cooler sensation, which can positively influence your enjoyment of the food.

When drinking, the texture of a glass rim also matters. A smooth rim offers a pleasant drinking experience, while a rough rim can intensify tactile sensations, sometimes overshadowing the drink's flavor.

Research shows that the texture of your utensils can change how you perceive flavors; for example, wooden spoons provide a warm, natural feel that may enhance certain foods' tastes.

In essence, the tactile experience of different textures in your tableware plays a significant role in your overall dining enjoyment. By selecting the right utensils and dishware, you can elevate your meal and savor the flavors in a whole new way.

Advertisement

Embrace the impact of texture—your taste buds will thank you!

Tactile Experience and Taste

How does the texture of your utensils influence your perception of taste? The tactile experience you get from your cutlery can dramatically impact how you perceive flavors.

For instance, a metal spoon's coolness might enhance the crispness of a chilled dessert, while a wooden spoon's warmth could make a hearty soup feel more comforting. The experience of enjoying a dish like Agnolotti can be heightened with the right utensils, as the texture of the pasta complements the flavors of the sauce.

Here are three key ways texture plays a role:

  1. Weight and Texture: Heavier cutlery often suggests better quality, raising your expectations for flavor intensity.
  2. Material Sensation: Rough clay bowls create friction, heightening flavor perception, whereas smooth porcelain might feel less engaging, dulling the sensory experience.
  3. Rim Texture: The edge of your glassware matters too; a smooth rim offers a sleek drinking experience, while a rough rim intensifies tactile sensations, making each sip feel more vibrant.

Ultimately, the interplay between texture and flavor perception shapes your overall dining experience. Different textures not only provide sensory engagement but can also alter the enjoyment of specific foods, making every meal a unique adventure.

Cutlery Properties Explored

exploring cutlery characteristics thoroughly

The interplay between cutlery properties and flavor perception reveals intriguing dimensions of our dining experiences. You mightn't realize it, but the shape of your cutlery can greatly influence how you perceive flavors.

For instance, deeper spoons hold more liquid, affecting the overall flavor experience, while wider bowls help distribute flavors evenly, leading to a different taste sensation. In Indian cuisine, the way you enjoy dishes like Mushroom Masala or Chicken Chettinad can significantly be affected by the type of utensils used.

Advertisement

On the other hand, narrower shapes can concentrate flavors, altering your perception even more. Studies show that when participants used different utensils, they rated the same food differently based on the cutlery's shape. Certain designs can enhance or diminish specific taste qualities, making a dish seem richer or more bland.

Additionally, the curvature of forks and spoons impacts the ease of food intake, which may change your sensory experience during meals.

Moreover, the visual appearance and shape of cutlery can shape your expectations about flavor, ultimately affecting your actual taste perception. These subtle cues, often overlooked, play a vital role in how you enjoy your meals, proving that cutlery isn't just functional; it's an integral part of our dining experience.

Experimental Findings Overview

research results summary report

Experimental findings reveal that the shape of utensils plays an essential role in how you perceive flavor during meals. Studies highlight that different utensils can profoundly alter your dining experience, impacting everything from saltiness to sweetness.

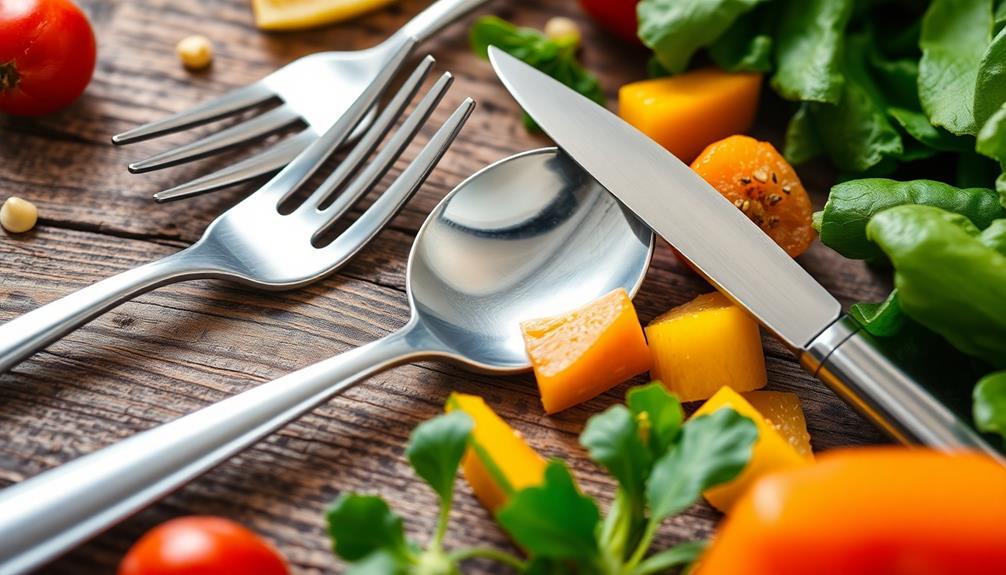
  1. Utensil Shape Impact: Food tasted saltier when you used a knife compared to a fork, demonstrating how utensil shape can skew flavor perception.
  2. Spoon Size Matters: Smaller spoons enhance the perception of sweetness in desserts like yogurt, proving that even small changes can affect your taste experience.
  3. Bowl and Plate Dynamics: The shape of bowls and plates also influences flavor distribution. Wider bowls distribute flavors evenly, while deeper ones concentrate them, affecting how you enjoy your meal.

These findings suggest that the right utensil not only complements your meal but also enhances your overall enjoyment.

When you use utensils tailored for specific foods, you may find that your perception of flavor improves, adding a layer of satisfaction to your dining experience.

The relationship between utensil shape and flavor perception is an intriguing area of research that could change how you approach your next meal.

Advertisement

Sensation Transference Explained

understanding sensation transference dynamics

Sensation transference reveals a fascinating interplay between utensils and flavor perception. This phenomenon shows how the physical properties of cutlery—like weight and material—can greatly impact your enjoyment of food. For instance, you might find that heavier utensils evoke a sense of richness, leading to higher enjoyment ratings. Conversely, using lighter plastic spoons may lower your expectations of taste, making the food seem less appealing.

Interestingly, color also plays a role. Research indicates that yogurt can taste sweeter when sampled with white spoons, highlighting how visual associations influence your perception. The type of cutlery you use doesn't just affect how the food feels; it can alter the very essence of what you're tasting.

Before you even take a bite, the appearance and heft of your utensils shape your initial judgments. When you use lightweight cutlery, the food may feel less substantial, diminishing your overall experience.

Understanding sensation transference helps you appreciate how much your choice of cutlery influences flavor perception, turning an everyday meal into an extraordinary tasting experience.

Environmental Influences on Dining

dining environment impact assessment

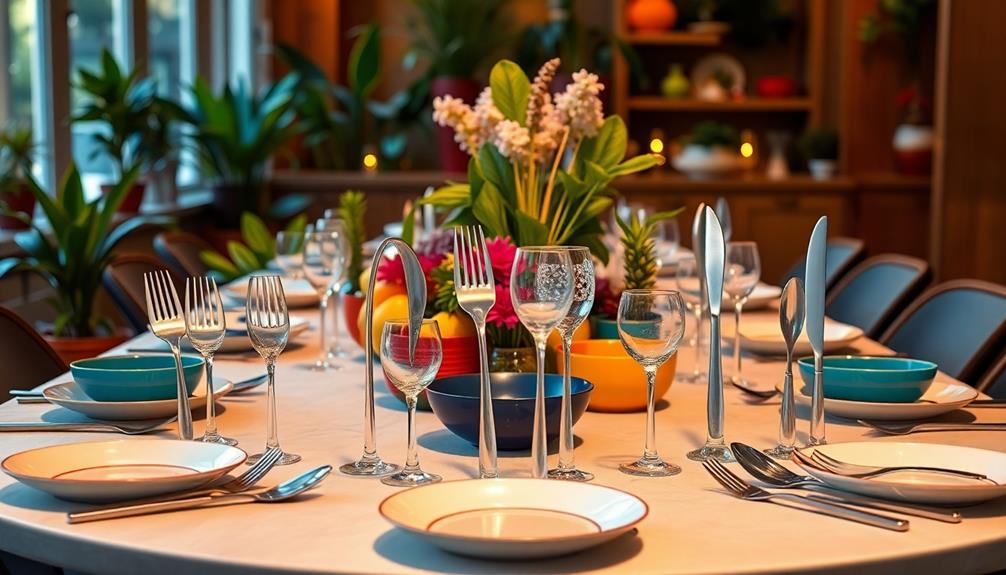
Many factors in your dining environment can dramatically shape your flavor perception and overall experience. Environmental factors such as lighting, ambiance, and social context play crucial roles in how you perceive flavors. It's not just about the food; it's about how everything around you influences your senses.

Here are three key elements to reflect upon:

  1. Lighting: Dim lighting can soften the appearance of food, making flavors seem richer, while harsh lighting may highlight imperfections, detracting from enjoyment.
  2. Tableware Aesthetics: The design and color of your utensils and plates can create expectations. For instance, contrasting colors can enhance flavor perception, making the meal seem more appealing.
  3. Social Context: Dining alone versus with others alters your sensory experience. Sharing a meal often enhances flavor, as good company can elevate your overall enjoyment.

Understanding these environmental factors helps you appreciate how context influences flavor perception.

Next time you sit down to eat, take a moment to reflect upon how your surroundings, from tableware aesthetics to ambiance, impact your culinary experience.

Advertisement

Frequently Asked Questions

How Do Utensils Affect Taste?

You'd think taste relies solely on ingredients, but surprise! Your spoon's depth might trick your brain into savoring flavors differently. Who knew that a tiny fork could turn your salad into a gourmet experience?

What Influences Our Perception of Flavor?

Your perception of flavor's influenced by various factors, including aroma, texture, temperature, and personal experiences. Each element interacts uniquely, shaping how you taste and enjoy food and beverages in everyday situations.

How Does the Shape of Food Affect Taste?

When you consider how shape affects taste, you'll notice that wider dishes enhance flavor distribution, unique designs elevate freshness perceptions, and textured foods engage your senses, all contributing to a more enjoyable eating experience.

What Are the Factors Affecting Taste Perception?

Taste perception's influenced by several factors, including aroma, texture, temperature, and even visual presentation. Your mood and past experiences also play a role, shaping how you enjoy and interpret flavors during each meal.

Conclusion

To sum up, you've discovered how the subtle shapes and surfaces of your utensils can greatly shape your dining experience. By embracing the artful alignment of material and design, you can elevate every bite. So, next time you sit down for a meal, remember the powerful interplay between your cutlery and flavor perception. This hidden harmony of utensils and tastes could turn an ordinary dinner into a delightful dining discovery. Savor not just the food, but the full experience!

Advertisement
Continue Reading
Advertisement

Cooking

Haunted Haystack Cookies

Overcome your sweet tooth with the hauntingly delicious Haunted Haystack Cookies, a spooky Halloween treat that combines buttery crumbs, toasted coconut, and melted chocolate.

Published

on

spooky themed cookie recipe

Haunted Haystack Cookies emerged during colonial America, inspired by mysterious "haunted haystacks" inhabited by mischievous spirits. This Halloween-themed treat combines a buttery, crumbly base with toasted coconut and chocolate candies, creating a striking dessert with crisp cookie, chewy coconut, and sweet chocolate. It's an ideal party treat, pairing well with beverages to enhance the overall experience. Bake these cookies to 350°F, cool them thoroughly, and decorate with melted chocolate for a festive presentation. Haunted Haystacks are sure to delight guests and add to the spooky Halloween spirit – there's more to discover about these bewitching cookies.

Key Takeaways

  • Haunted Haystack Cookies are a Halloween-themed treat popular in America, inspired by the mysterious "haunted haystacks" of the colonial era.
  • The cookies feature a buttery, crumbly base topped with toasted coconut and chocolate candies, combining crisp, chewy, and sweet flavors.
  • The recipe involves simple baking techniques, with key ingredients including butter, sugar, flour, and shredded coconut.
  • Proper baking and cooling techniques are essential for achieving the desired texture and shape of the haystack-like cookies.
  • The cookies can be further decorated with melted chocolate for a spooky, festive presentation, making them a perfect addition to Halloween gatherings and celebrations.

History

According to legend, the haunted haystack cookies first emerged during the early colonial period in America. As settlers ventured into the wilderness, they often encountered strange phenomena, including the mysterious "haunted haystacks" that dotted the landscape.

These peculiar piles of hay were rumored to be inhabited by mischievous spirits, which inspired the creation of the haunted haystack cookie. This whimsical treat can be likened to the enduring love of a mother, as it brings warmth and comfort to those who enjoy it, reminiscent of the heartfelt tributes we create to honor our loved ones a mother's enduring love.

The recipe for these whimsical treats evolved over time, blending traditional colonial baking techniques with the supernatural element of the haunted haystacks. Bakers would shape the dough into clusters, mimicking the lofty, irregular form of the haystacks, then bake them until they developed a golden, crispy exterior.

The result was a delightfully crunchy cookie that captured the essence of the legendary haunted haystacks.

Today, the haunted haystack cookie remains a beloved part of American culinary heritage, a delicious reminder of the country's rich folklore and the ingenuity of its early settlers.

Advertisement

Recipe

Haunted Haystack Cookies are a Halloween-themed treat that will delight both children and adults alike.

These spooky cookies are made with a buttery, crumbly base topped with a mound of toasted coconut "haystack" and a handful of chocolate "spiders" or other festive candies. The combination of the crisp cookie, the chewy coconut, and the sweet chocolate creates a delightful and visually striking dessert that's sure to be a hit at any Halloween party or gathering.

For those who enjoy pairing their treats with a beverage, understanding the different brewing methods can enhance the overall experience.

Ingredients:

  • 1 cup (2 sticks) unsalted butter, softened
  • 1 cup granulated sugar
  • 1 egg
  • 2 teaspoons vanilla extract
  • 2 1/4 cups all-purpose flour
  • 1 teaspoon baking powder
  • 1/4 teaspoon salt
  • 2 cups shredded sweetened coconut
  • Chocolate spiders or other Halloween candies

Instructions:

In a large bowl, cream the butter and sugar together until light and fluffy. Beat in the egg and vanilla.

Advertisement

In a separate bowl, whisk together the flour, baking powder, and salt. Gradually add the dry ingredients to the wet ingredients, mixing until just combined. Chill the dough for at least 30 minutes.

Preheat the oven to 350°F (177°C) and line two baking sheets with parchment paper. Scoop tablespoon-sized balls of dough and place them about 2 inches apart on the prepared baking sheets.

Bake for 10-12 minutes, or until the edges are lightly golden. Remove from the oven and immediately top each cookie with a mound of toasted coconut, pressing it down gently to adhere. Allow the cookies to cool on the baking sheets for 5 minutes before transferring them to a wire rack to cool completely.

Once the cookies are cool, top each coconut "haystack" with a chocolate spider or other Halloween candy. Serve and enjoy your Haunted Haystack Cookies!

Cooking Steps

Preheat your oven to 350°F, then grab a bowl and combine the ingredients for the Haunted Haystack Cookies.

Advertisement

For a delightful morning treat, consider whipping up Cinnamon Sugar French Toast Bites as well.

Spoon the cookie dough onto a baking sheet and pop it in the oven for 10-12 minutes until the cookies are golden brown.

Once they've cooled completely, you're ready to enjoy these delightfully spooky treats.

Step 1. Preheat Oven to 350°F

preheat oven 350 f

Preheating the oven to 350°F is the first crucial step in baking these Haunted Haystack Cookies. This temperature strikes the perfect balance, ensuring the cookies bake evenly and develop that irresistible crunch. Regularly checking your oven's calibration can help maintain this balance, just like optimal usage timing is essential for air purifiers to function effectively.

Begin by locating your oven and giving the door a gentle tug to make sure it opens smoothly. Consult your oven's manual if you're unsure about the controls. Most modern ovens have digital displays that make temperature selection a breeze. Simply press the "Bake" button and use the up and down arrows to set the temperature to 350°F.

Once the oven is preheated, you'll hear a chime or see a light indicating it's reached the desired temperature. This is your cue to begin preparing the cookie dough.

Advertisement

Keep in mind that oven temperatures can fluctuate, so it's a good idea to use an oven thermometer to double-check the heat level. With the oven set and ready, you're one step closer to baking up a batch of spooky-good Haunted Haystack Cookies.

Step 2. In a Bowl, Combine Ingredients

combine ingredients in bowl

Now that your oven is preheated, let's move on to the next step. In a large bowl, combine the dry ingredients – flour, baking soda, and salt. Whisk them together until evenly mixed.

In a separate bowl, cream the butter and sugar until light and fluffy. It's important to be aware that many popular candies, for example, can contain high sugar levels, impacting health when consumed excessively (sugar overload risks).

Beat in the egg and vanilla extract, incorporating them fully. Gradually add the dry ingredients to the wet ingredients, mixing until just combined. Don't overmix, or your cookies will become tough.

Fold in the chocolate chips and crushed cookies, distributing them evenly throughout the dough. The cookie dough should have a nice, thick consistency, perfect for shaping into the iconic haystack design.

Using a spoon or cookie scoop, portion the dough into rounds and place them onto the prepared baking sheets, spacing them a few inches apart. This will allow the cookies to spread and develop their unique, rustic shape during baking.

Advertisement

Now you're ready to pop them in the oven and let the magic happen!

Step 3. Spoon Cookie Dough Onto Baking Sheet

spoon dough onto sheet

With the dry ingredients thoroughly combined, it's time to portion the cookie dough onto the prepared baking sheets.

Grab a spoon or small scoop and start scooping the dough, placing mounds about 2 inches apart on the sheets.

Don't worry if the dough doesn't look perfectly round – the cookies will spread and take shape as they bake.

Once you've filled the sheets, gently press down on the dough mounds to flatten them slightly.

This will help them bake evenly and achieve that classic haunted haystack look.

Advertisement

Be sure to work quickly, as you don't want the dough to dry out.

If it starts to get too firm, try scooping with a warm spoon or re-kneading the dough lightly before portioning.

With the cookies ready for the oven, you're one step closer to enjoying the spooky, delicious results of your labors.

Just pop the sheets in and get ready for the haunting aroma to fill your kitchen!

Step 4. Bake 10-12 Minutes Until Golden Brown

bake until golden brown

Slip the prepared baking sheets into the preheated oven and let the cookies bake for 10 to 12 minutes, or until they're golden brown around the edges.

The aroma of the cookies will start to fill your kitchen, tempting you with their delightful scent. Keep a close eye on them, as the baking time can vary depending on your oven. You'll know they're ready when the tops are lightly golden, and the edges have a slightly crisp texture.

Advertisement

Once the cookies are done, carefully remove the baking sheets from the oven. Allow the cookies to cool on the sheets for a few minutes before transferring them to a wire rack.

This will help them retain their shape and prevent them from becoming too soft. Remember, the cookies will continue to firm up as they cool, so don't be tempted to move them too soon.

With a little patience, you'll have a batch of perfectly baked Haunted Haystack Cookies, ready to be enjoyed by all.

Step 5. Let Cookies Cool Completely

cool cookies completely first

After removing the cookies from the oven, let them cool completely on the baking sheets for at least 10 minutes. This resting period is crucial for the cookies to firm up and maintain their shape.

As they cool, the butter and other ingredients will set, preventing the cookies from crumbling when you try to transfer them. Be patient – resist the temptation to start munching right away. The extra time allows the flavors to meld and the texture to reach its optimal state.

Once the cookies have cooled, you can carefully transfer them to a wire rack or serving platter. This will ensure even cooling and prevent the bottoms from getting soggy.

Advertisement

Final Thoughts

As you put the finishing touches on your Haunted Haystack Cookies, you can't help but feel a sense of accomplishment. These spooky, whimsical treats are the perfect addition to your Halloween festivities.

You've carefully crafted each cookie, ensuring they're baked to perfection and cooled completely before decorating.

Now, it's time to unleash your creativity. Drizzle the melted chocolate over the cookies, creating intricate web patterns or ghostly designs. Sprinkle the crushed cookies or candies over the tops, transforming your cookies into haunted haystacks.

The visual contrast of the dark chocolate and the light, fluffy cookie base is truly captivating.

As you step back and admire your handiwork, you can't help but feel a sense of pride. These Haunted Haystack Cookies aren't just delicious, but they also showcase your baking skills and attention to detail.

Advertisement

Savor the moment, for these delightful cookies are sure to delight your guests and bring a touch of spooky magic to your Halloween celebrations.

Frequently Asked Questions

Are Haunted Haystack Cookies Gluten-Free?

Haunted haystack cookies are a popular Halloween treat, but are they gluten-free?

Unfortunately, there's no simple answer, as the ingredients can vary widely from recipe to recipe. Some versions may use gluten-free ingredients like rice cereal or gluten-free oats, while others could contain wheat flour or other gluten-containing components.

To know for sure, you'd need to check the specific recipe or ask the baker. If you have a gluten sensitivity, it's best to inquire about the ingredients before indulging.

What Is the Shelf Life of These Cookies?

The shelf life of these cookies can vary, but they generally last about 2-3 weeks when stored properly.

Advertisement

Keep them in an airtight container at room temperature, and they'll stay fresh and delicious.

Avoid storing them in the fridge, as that can cause them to dry out.

With proper storage, you can enjoy these tasty treats for up to a couple of weeks.

Just be sure to keep an eye on them and consume them before they start looking stale or lose their flavor.

Can I Substitute Ingredients in the Recipe?

Absolutely! Substituting ingredients in recipes can be a fun way to customize them to your tastes.

Advertisement

Just keep in mind that it may affect the final result, so it's best to make any changes gradually and test them out before committing to the full recipe.

Feel free to experiment with different types of flours, sweeteners, or even add-ins like nuts or dried fruit.

The key is to have fun and be willing to adjust as you go.

Do These Cookies Contain Any Artificial Preservatives?

The cookies don't contain any artificial preservatives.

Preservatives are often added to baked goods to extend their shelf life, but these homemade cookies rely on natural ingredients without any synthetic additives.

Advertisement

You can feel good about serving them, knowing you're providing a wholesome treat without any questionable chemicals.

The simple, straightforward recipe ensures these cookies are free from artificial preservatives, allowing you to enjoy their fresh, homemade flavor.

Are Haunted Haystack Cookies Suitable for Vegan Diets?

Unfortunately, haunted haystack cookies aren't suitable for vegan diets. These traditional holiday treats typically contain butter, milk, and sometimes even eggs – all ingredients that vegans avoid.

If you're looking for a vegan-friendly alternative, you could try making "spooky haystack" cookies using plant-based butter, dairy-free milk, and egg substitutes. This would allow you to enjoy the classic flavors and textures, just without the animal-derived ingredients.

Ultimately, haunted haystack cookies aren't the best choice for those following a vegan lifestyle.

Advertisement
Continue Reading

Cooking

Midnight Black Bean Dip

Kick-start your party with the rich, earthy flavors of Midnight Black Bean Dip, a crowd-pleasing appetizer with ancient Mesoamerican roots and regional variations.

Published

on

midnight black bean delight

Midnight Black Bean Dip traces its roots back to ancient Mesoamerican civilizations, where black beans were a dietary staple often transformed into a creamy dip. Over time, this appetizer evolved through cultural exchanges, leading to unique regional variations. The classic Mexican version features spices like cumin and chili peppers, while Caribbean renditions may include herbs and coconut milk. Today, this versatile dip remains a beloved crowd-pleaser, appreciated for its rich, earthy flavor and creamy texture. Serve it with tortilla chips, pita bread, or fresh veggies for a delightful snacking experience. And if you're intrigued to learn more, keep reading to uncover the full recipe and cooking steps.

Key Takeaways

  • Midnight Black Bean Dip is a versatile appetizer with origins in ancient Mesoamerican civilizations, featuring a creamy texture and bold, earthy flavors.
  • The dip's key ingredient, black beans, provides a hearty base, while spices like cumin, chili powder, and jalapeño add depth and subtle heat.
  • Blending the beans with garlic, lime juice, and a touch of olive oil creates a smooth, creamy consistency that is enhanced by refrigeration.
  • This dip can be served with tortilla chips, pita bread, or fresh vegetables, and can also be used as a topping for tacos or burgers.
  • The infusion of flavors during refrigeration results in a rich, balanced taste that appeals to a wide range of palates, making it a crowd-pleasing appetizer.

History

Black bean dip has a rich history that dates back to ancient Mesoamerican civilizations. These cultures, such as the Maya and Aztec, were among the first to cultivate and consume black beans, which were a staple in their diets. They often prepared the beans in various ways, including mashing them into a creamy dip that was enjoyed as part of their traditional cuisine.

Similar to the way Cacciucco represents coastal culinary heritage, black bean dip has evolved through cultural exchanges and adaptations.

Over time, the popularity of black bean dip spread throughout the Americas, with each region developing its own unique recipes and flavor profiles. In Mexico, for instance, the dip may be seasoned with aromatic spices like cumin and chili peppers, while in the Caribbean, it might incorporate fragrant herbs and coconut milk.

As black beans and their dip became more widely known, the dish evolved to reflect the diverse culinary traditions of the Americas.

Today, black bean dip remains a beloved appetizer and snack, appreciated for its rich, satisfying taste and versatility in various cultural contexts.

Advertisement

Recipe

Midnight Black Bean Dip is a delicious and versatile appetizer that can be enjoyed at any time of the day. This dip is perfect for parties, game nights, or a casual snack. The deep, rich color and bold flavors make it a stand-out dish that your guests are sure to love.

Incorporating healthy snacks into your diet is essential for maintaining overall well-being, especially when considering nutritional adjustments that can enhance your snacking experience.

The key to this dip is the use of black beans, which provide a hearty texture and a unique, earthy taste. Combined with a blend of spices and a touch of heat, this dip is sure to elevate your snacking experience.

Ingredients:

  • 2 (15 oz) cans black beans, drained and rinsed
  • 1 jalapeño, seeded and finely chopped
  • 1 clove garlic, minced
  • 1 teaspoon ground cumin
  • 1 teaspoon chili powder
  • 1/2 teaspoon smoked paprika
  • 1/4 cup fresh cilantro, chopped
  • 2 tablespoons lime juice
  • Salt and pepper to taste

To prepare, simply combine all the ingredients in a food processor or high-powered blender and blend until smooth and creamy. Adjust seasoning to taste.

For best results, let the dip sit for 30 minutes to allow the flavors to meld.

Advertisement

When serving, consider pairing the Midnight Black Bean Dip with tortilla chips, pita bread, or fresh veggies. The dip can also be used as a topping for tacos, burgers, or even as a spread for sandwiches.

For a creamier texture, you can stir in a tablespoon or two of sour cream or Greek yogurt. Enjoy!

Cooking Steps

First, rinse and drain the black beans thoroughly. It's important to ensure that the beans are well-drained to prevent any excess moisture that could affect the dip's texture.

While preparing the dip, consider that black beans are rich in fiber and nutrients, which can contribute to overall health nutritional benefits include high fiber.

Next, puree the beans with the spices until smooth.

Advertisement

Then, transfer the bean dip to a serving bowl and garnish it with chopped cilantro.

Step 1. Rinse and Drain Black Beans

rinse and drain beans

To begin, rinse the canned black beans under cool running water in a colander or mesh strainer. This step helps remove any excess sodium or impurities that may be present, which is particularly beneficial for those monitoring their sodium intake.

Gently swish the beans around with your hand to ensure they're thoroughly rinsed, just as regular maintenance is essential for appliances like air purifiers to keep them functioning optimally filter replacement recommendations.

Once rinsed, transfer the beans to a clean paper towel-lined plate or baking sheet to drain. Let them sit for a few minutes, allowing the excess water to drip off. This simple step helps prevent the dip from becoming watery or overly thin in consistency.

By rinsing and draining the black beans, you'll start with a clean, fresh base that allows the other flavors in the dip to shine. Plus, it's an easy way to control the sodium content and texture of your midnight black bean dip.

Once drained, you're ready to move on to the next step in the recipe.

Advertisement

Step 2. Puree Beans With Spices

puree beans with spices

With the black beans rinsed and drained, you can now move on to pureeing them with the flavorful spices.

Grab your food processor or blender and add the beans, cumin, smoked paprika, garlic powder, and a pinch of salt. To elevate your dip, consider pairing it with a side of easy tomato focaccia, which adds a delightful texture contrast.

Pulse the mixture until it reaches a smooth, creamy consistency, scraping down the sides as needed. The spices will infuse the beans with a warm, earthy flavor that's simply irresistible.

For an extra silky texture, you can add a tablespoon or two of olive oil while blending. Taste the dip and adjust the seasonings to your liking, adding more salt or spices as desired. The key is to find the perfect balance of bold flavors that will make your taste buds dance.

Once you've achieved the ideal taste and texture, your midnight black bean dip is ready to serve. Scoop it into a bowl and get ready to enjoy this delightful, nutrient-packed treat.

Step 3. Transfer to Serving Bowl

transfer to serving bowl

Transferring the silky smooth black bean dip to a serving bowl is the final step.

First, select a bowl that's the right size to accommodate all the dip. You want a bowl that's large enough to allow for easy dipping, but not so big that the dip gets lost in it.

Advertisement

Gently pour the dip from the food processor into the serving bowl, using a spatula to scrape down the sides and ensure you get every last delicious drop.

Once the dip is in the bowl, use the spatula to smooth the top and create an even surface. This not only looks more appetizing, but it also allows the flavors to mingle together evenly.

Finally, add any garnishes you desire, such as a sprinkle of chopped cilantro or a drizzle of olive oil.

Your midnight black bean dip is now ready to serve and enjoy with your favorite crunchy dippers.

Step 4. Garnish With Chopped Cilantro

garnish with chopped cilantro

Once the black bean dip is nestled in the serving bowl, it's time to add the finishing touch – a sprinkle of freshly chopped cilantro. This verdant garnish not only enhances the dip's visual appeal but also infuses it with a vibrant, herbal aroma.

Using a sharp knife, finely chop a handful of cilantro leaves, ensuring they're evenly distributed across the surface of the dip. The fresh, fragrant cilantro provides a delightful contrast to the rich, creamy texture of the black beans, creating a sensory experience that will delight your guests.

Advertisement

As they dip their tortilla chips into the midnight-hued dip, the cilantro will release its aromatic oils, tantalizing their taste buds. This simple finishing touch takes the dip from great to exceptional, elevating the overall dish and leaving your guests craving more.

With the cilantro garnish in place, your Midnight Black Bean Dip is now ready to be served and savored.

Step 5. Refrigerate for One Hour Before Serving

chill for one hour

After assembling the Midnight Black Bean Dip, you'll want to refrigerate it for one hour before serving. This chilling period allows the flavors to meld and intensify, creating a truly delectable dip. The coolness also enhances the creamy texture, making it an irresistible addition to your appetizer spread.

During the refrigeration time, the spices and seasonings will have a chance to infuse the beans, developing a rich, balanced taste. The garlic, cumin, and chili powder will marry beautifully, while the lime juice and zest provide a bright, tangy counterpoint. Refrigerating the dip ensures these flavors have time to fully incorporate, resulting in a harmonious blend that will delight your guests.

Once the hour is up, give the dip a gentle stir and transfer it to your serving bowl. The cooled, thickened consistency will make it perfect for scooping with crisp tortilla chips or fresh vegetable crudités. Enjoy this Midnight Black Bean Dip at its flavor-packed best!

Final Thoughts

With a simple yet delicious recipe under your belt, the Midnight Black Bean Dip is a true crowd-pleaser.

Advertisement

The key to its success lies in the fusion of bold flavors and the smooth, creamy texture that sets it apart. As you serve this dip, you'll find that it pairs exceptionally well with a variety of dippers, from crunchy tortilla chips to fresh vegetable sticks.

The richness of the black beans is perfectly balanced by the tangy notes of lime juice and the subtle heat from the jalapeño, creating a flavor profile that will have your guests coming back for more.

Whether you're hosting a casual gathering or looking to impress at a potluck, this Midnight Black Bean Dip is sure to be a hit.

Embrace its versatility and let it shine as the star of your next snacking spread.

Frequently Asked Questions

How Long Does the Dip Last After Being Refrigerated?

The refrigerated dip should last about 3-5 days when stored properly.

Advertisement

Just make sure to keep it in an airtight container in the fridge.

Give it a good stir before serving, and you'll enjoy that creamy, flavorful dip for several days.

Keep an eye on it, though – if you notice any changes in color, smell, or texture, it's best to play it safe and toss it.

With a little care, you can savor that dip for a while!

Can I Use Canned Black Beans Instead of Dried?

Absolutely! Using canned black beans is a great alternative to dried beans for your recipe.

Advertisement

Canned beans are already cooked, so they'll save you the time and effort of soaking and simmering dried beans. Just be sure to rinse and drain the canned beans before using them in your dip.

This will help prevent the dip from becoming too watery. The flavor and texture will be just as delicious using canned beans.

Give it a try – it's a convenient shortcut!

Is the Dip Suitable for Vegans or Vegetarians?

The dip is definitely suitable for vegans and vegetarians! Since it's made with just black beans, spices, and other plant-based ingredients, there's no animal products involved.

That means vegans and vegetarians can enjoy this tasty dip without any worries.

Advertisement

And you can easily use canned black beans instead of dried for a quick and convenient option. Just be sure to drain and rinse them first before adding to the recipe.

What Are Some Alternative Toppings for the Dip?

When it comes to topping your dip, the possibilities are endless! You could try diced tomatoes, sliced olives, chopped scallions, or even crumbled feta cheese.

For a plant-based twist, consider roasted red peppers, sautéed mushrooms, or a sprinkle of toasted pumpkin seeds.

Get creative and have fun experimenting with different flavors and textures to find your perfect dip topping combo. The key is to choose toppings that complement the dip's flavor profile and add a delightful contrast.

Can I Make the Dip Ahead of Time?

Yes, you can definitely make this dip ahead of time!

Advertisement

In fact, it's a great option for preparing in advance. The flavors will meld together and intensify if you make it a day or two before serving.

Just store it in an airtight container in the fridge, and when you're ready to serve, give it a good stir.

This makes it super convenient to have on hand for parties or casual gatherings.

Enjoy your delicious homemade dip!

Advertisement
Continue Reading

Cooking

Cobweb Cotton Candy

Transporting you back in time, cobweb cotton candy is a magical confection that captivates with its ethereal web-like structure and delicate flavors.

Published

on

sweet spun sugar delight

Cobweb cotton candy is a magical confection that'll transport you back in time. It emerged in the late 1800s when pioneering confectioners began experimenting with spun sugar techniques. This delicate treat soon captivated audiences at world fairs and carnivals, evoking nostalgia and joy. Over decades, the production process has been refined for consistent, large-scale manufacturing. Today, cobweb cotton candy remains a beloved specialty, enchanting all who experience its ethereal web-like structure, fluffy texture, and delicate flavors. Serve it immediately for optimal freshness and texture, then get ready to be amazed by the creative possibilities.

Key Takeaways

  • Cobweb cotton candy is a delicate and ethereal treat that emerged in the late 19th century, captivating audiences at world fairs and carnivals.
  • The intricate production process involves heating sugar and corn syrup, then carefully spinning the hot syrup into airy, whimsical strands using a cotton candy machine.
  • Cobweb cotton candy is known for its translucent web-like structure, fluffy texture, and delicate flavors, which create a unique sensory experience.
  • Proper presentation and immediate serving are crucial to maintain the ephemeral nature and cloud-like texture of the cobweb cotton candy.
  • Experimentation with different flavors, colors, and techniques is encouraged to create unique and personalized variations of this magical culinary delight.

History

When did cobweb cotton candy first emerge? The origins of this unique confection can be traced back to the late 19th century. In the 1880s, candy makers began experimenting with new techniques to create intricate, web-like structures out of spun sugar.

This delicate art form was initially showcased at world's fairs and carnivals, captivating audiences with its ethereal beauty and delicate texture. Interestingly, similar to how coffee's health benefits can enhance mood and cognitive function, the delightful experience of enjoying cobweb cotton candy can evoke feelings of nostalgia and joy.

Over the decades, the production process has been refined, allowing for more consistent and larger-scale manufacturing. Today, cobweb cotton candy is a cherished treat found at various events and specialty shops.

Its mesmerizing appearance, combined with its light and airy flavor, has made it a beloved favorite among children and adults alike. Whether enjoyed as a whimsical dessert or a decorative element, cobweb cotton candy continues to enchant and delight those who encounter its delicate, web-like strands.

Recipe

Cobweb Cotton Candy is a delightful and whimsical treat that captures the essence of a spooky Halloween night. Imagine a fluffy, ethereal confection that mimics the delicate strands of a spider's web, with a delicate sweetness that melts on the tongue.

Advertisement

The process of creating this enchanting dessert involves a bit of culinary magic, as the sugar is spun and stretched to create the intricate, web-like patterns, similar to how businesses must navigate essential services for startup guidance. The result is a delightful visual spectacle that's sure to delight both children and adults alike.

Ingredients:

  • 1 cup granulated sugar
  • 1/4 cup light corn syrup
  • 1/4 cup water
  • Food coloring (optional)

Cooking Instructions:

In a medium saucepan, combine the sugar, corn syrup, and water. Heat the mixture over medium-high heat, stirring occasionally, until it reaches 300°F on a candy thermometer.

Remove the pan from the heat and let the mixture cool for 30 seconds. Dip the tines of a fork or a candy spider web maker into the hot sugar mixture and quickly wave it back and forth to create the delicate web-like strands.

Transfer the cobweb cotton candy to a parchment-lined baking sheet and allow it to cool completely before serving.

Advertisement

Tips:

It's important to work quickly when spinning the sugar, as it will harden quickly. If the sugar becomes too thick, you can reheat it briefly to make it more pliable.

Additionally, you can experiment with different food colorings to create unique and visually stunning cobweb cotton candy.

Cooking Steps

First, you'll need to heat the sugar until it's molten and ready to spin into thin, delicate strands.

This process requires careful temperature control, similar to budgeting essentials for managing your finances.

Advertisement

Then, gather those cobweb-like cotton candy threads and shape them into whimsical forms.

Step 1. Heat Sugar

heat sugar to melt

Grab a heavy-bottomed saucepan and place it over medium heat. Add the sugar and a splash of water, then stir until the sugar is fully dissolved.

As the mixture heats up, it'll start to bubble and caramelize. Keep a close eye on it, gently swirling the pan occasionally, to ensure the sugar doesn't burn. For an added health benefit, consider pairing your cotton candy with a refreshing drink like Cranberry Juice that offers antioxidants.

Once the syrup reaches 300°F on a candy thermometer, it's ready. Carefully pour the hot sugar into the center of your cotton candy machine, allowing it to spin and create those delightful wispy strands.

Work quickly, as the sugar will begin to harden as it cools. Adjust the speed and motion of the machine to control the thickness and texture of the cotton candy.

Step 2. Spin Sugar Into Thin Strands

spin sugar thin strands

Once your sugar syrup has reached the ideal temperature, it's time to transform it into the airy, wispy strands that define cotton candy.

Grab your cotton candy spinner and position it on a secure surface. Switch it on, allowing the inner bowl to heat up and reach the optimal spinning speed. Dip your ladle into the hot syrup, carefully scooping up a small amount. Gently pour the syrup into the spinning bowl, watching as it's immediately transformed into delicate, gossamer-like threads.

Advertisement

Dreams, much like this process, can evoke strong emotions and memories, providing a sense of comfort and connection to the past, especially in times of grief such as dreams of deceased loved ones.

As the sugar strands accumulate, use your hands to gently pull and shape the cotton candy, creating a fluffy, cloud-like confection. Work quickly, as the sugar will harden and lose its airy texture if left in the spinner for too long.

Continue this process, adding more syrup as needed, until you've created the perfect, ethereal cotton candy. With a little practice, you'll be spinning sugar into heavenly strands in no time.

Step 3. Gather Cobweb-like Cotton Strands

collect cotton strands carefully

With the sugar syrup at the ideal temperature, it's now time to transform it into the signature wispy strands of cotton candy.

Grab your trusty cotton candy machine and let the magic begin. Slowly pour the hot syrup into the spinning head, letting it melt and spread into delicate threads.

Watch in awe as the sugar spins and stretches, creating a mesmerizing display of cobweb-like cotton strands. Gently guide the forming cotton candy with your hands, gathering it into a soft, fluffy ball.

Advertisement

Be careful not to handle it too much, as the gentle strands can easily tear. Gradually build up the size of your cotton candy creation, layer by layer, until you have a beautifully wispy and ethereal confection.

With a few simple motions, you've captured the essence of the classic carnival treat, ready to delight and enchant all who behold it.

Step 4. Shape Into Whimsical Forms

whimsical shape transformation process

After gathering the delicate cotton strands, you can shape them into whimsical forms. Start by lightly pinching a small portion of the wispy fibers and gently pulling them apart. As you stretch the cotton, it will begin to take on a delicate, web-like appearance.

Experiment with different techniques, such as twisting, curling, or folding the strands, to create intricate patterns and shapes. You can even try draping the cotton over various objects, like a wire frame or the edge of a bowl, to form unique structures.

The key is to handle the cotton with a light touch, as it's incredibly fragile. Work quickly, as the fibers tend to stick together and lose their airy, cloud-like texture if left unattended.

With a little practice, you'll be able to craft mesmerizing cotton candy sculptures that resemble enchanting cobwebs. Display your creations on a platter or tray for a truly whimsical presentation that's sure to delight your guests.

Advertisement

Step 5. Serve Immediately

serve the dish promptly

Now that you've skillfully crafted your cotton candy into whimsical shapes, it's time to serve them immediately. Cotton candy is best enjoyed fresh, as its delicate, airy texture quickly begins to deteriorate once exposed to air.

As soon as you've finished shaping your creations, carefully transfer them to serving plates or trays.

Be gentle when handling the cotton candy, as it's incredibly fragile. Use your fingertips to gently lift and place each piece, taking care not to crush or distort the shapes.

Arrange the cotton candy in a visually appealing manner, allowing the intricate designs to be fully showcased.

Serve the cotton candy immediately, as it will begin to lose its lofty, cloud-like consistency within minutes. Encourage your guests to enjoy the treats right away, savoring the delicate sweetness and ethereal textures.

The true magic of cobweb cotton candy lies in its ephemeral nature, so seize the moment and indulge in these whimsical confections without delay.

Advertisement

Final Thoughts

Ultimately, the Cobweb Cotton Candy is a delightful and whimsical treat that captures the essence of a magical, ethereal experience. When executed properly, this fluffy confection transforms into a stunning, translucent web that mesmerizes the senses.

The key to success lies in serving it immediately, as the cobweb structure is fleeting and requires prompt attention.

While the process may seem daunting, the reward of presenting this edible artwork is well worth the effort. Embrace the playful nature of this dessert and have fun experimenting with different techniques and flavors.

Don't be afraid to get creative and put your own unique spin on the classic cotton candy. Ultimately, the Cobweb Cotton Candy is a delightful way to bring a touch of magic to any occasion, leaving your guests in awe of its ethereal beauty and delightful taste.

Frequently Asked Questions

Can Cobweb Cotton Candy Be Made in Different Flavors?

Yes, you can absolutely create cobweb cotton candy in a variety of flavors!

Advertisement

The airy, delicate texture of cotton candy lends itself perfectly to experimenting with different taste profiles. From classic options like strawberry and vanilla to more unique flavors like chai or lavender, the possibilities are endless.

All you'll need is your basic cotton candy equipment and some creative flavor extracts or infusions.

How Long Does Cobweb Cotton Candy Last Before It Loses Its Texture?

Cobweb cotton candy typically lasts for around 2-3 days before it starts to lose its delicate, web-like texture.

To preserve the quality, store it in an airtight container at room temperature and away from moisture.

Avoid refrigerating it, as the cool, humid environment can cause the candy to become sticky and lose its signature lightness.

Advertisement

Enjoy your cobweb cotton candy as soon as possible for the best texture and flavor experience!

Is Cobweb Cotton Candy Safe for Children to Consume?

Consuming cotton candy can be perfectly safe for children, as long as it's made with high-quality ingredients and proper food safety practices.

However, the delicate texture of cobweb cotton candy may pose a choking hazard for younger kids.

It's best to supervise children closely and avoid giving them cobweb cotton candy until they're old enough to handle it safely.

When in doubt, it's always better to err on the side of caution when it comes to children's health and wellbeing.

Advertisement

Can Cobweb Cotton Candy Be Made Gluten-Free or Nut-Free?

Yes, cobweb cotton candy can be made gluten-free or nut-free!

The key is to use alternative ingredients that don't contain gluten or nuts. For a gluten-free version, you'd replace the wheat-based sugar with a gluten-free sugar substitute.

And for a nut-free version, you'd avoid any nut-based ingredients.

With a few simple tweaks, you can enjoy this fun treat without worrying about dietary restrictions.

Just be sure to check the ingredients carefully and follow any specific allergy-friendly recipes.

Advertisement

Does Cobweb Cotton Candy Have Any Nutritional Value or Benefits?

Cobweb cotton candy doesn't have much in the way of nutritional value or health benefits.

It's essentially just spun sugar, so you won't find any significant vitamins, minerals, or other nutrients.

The main appeal of this type of cotton candy is its unique, delicate texture and elaborate appearance.

While it may make for a fun and visually striking treat, it's best enjoyed in moderation as part of a balanced diet.

The real nutritional value comes from the joy and celebration it brings!

Advertisement
Continue Reading
Advertisement

Affiliate Disclaimer
As an affiliate, we may earn a commission from qualifying purchases. We get commissions for purchases made through links on this website from Amazon and other third parties.

Advertisement
Advertisement

Vetted

Vetted2 months ago

Book Review: “The Creative Spark: Unleashing Your Inner Artist”

Rekindling Creativity in the Digital Era In a world increasingly dominated by digital distractions, “The Creative Spark: Unleashing Your Inner...

Vetted4 months ago

Review: “Sleep Solutions for New Parents”

Overview “Sleep Solutions for New Parents: How to Establish Healthy Sleep Habits from Day One” by Margaret Blake, Esther Harper,...

Vetted4 months ago

“Survival Guide for New Dads”: A Paradigm Shift in Paternal Literature

In the burgeoning field of parenting literature, “Survival Guide for New Dads: The Ultimate Baby Book for New Dads” emerges...

versatile ladders for home versatile ladders for home
Vetted4 months ago

15 Best Multi-Position Ladders for Versatile Home Improvement Projects

Discover the top 15 multi-position ladders for versatile home improvement projects, including innovative features and safety-focused designs - essential for...

effortless lawn care top picks effortless lawn care top picks
Vetted4 months ago

15 Best Zero Turn Mowers for 3 Acres – Top Picks for Effortless Lawn Care

Looking for the ultimate zero-turn mower for 3 acres? Discover top picks with cutting-edge features for effortless lawn care and...

top robot vacuums list top robot vacuums list
Vetted4 months ago

15 Best Robot Vacuum Cleaners to Keep Your Floors Spotless

Seeking the best robot vacuum cleaners for spotless floors? Discover top picks from Eufy, iRobot, Shark, and more for effortless...

budget friendly furniture transformation guide budget friendly furniture transformation guide
Vetted4 months ago

15 Best Affordable Furniture Pieces to Transform Your Home on a Budget

Jazz up your home with budget-friendly furniture finds that promise style and savings - discover the top picks for a...

luxurious bathtubs for transformation luxurious bathtubs for transformation
Vetted4 months ago

15 Best Bathtubs for a Luxurious Soak – Transform Your Bathroom Today

Dive into luxury with the 15 best bathtubs for a transformative bathing experience - discover your ultimate relaxation spot.

spotless ride with cordless vacuums spotless ride with cordless vacuums
Vetted4 months ago

15 Best Cordless Car Vacuums for a Spotless Ride – Reviews & Rankings

Cruise through our top 15 cordless car vacuums with powerful suction and convenient features for a sparkling clean interior.

stylish file cabinets for organization stylish file cabinets for organization
Vetted4 months ago

15 Best File Cabinets for Organizing Your Home Office in Style

Find the perfect file cabinet to elevate your home office organization and style with these top picks starting with the...

luxury egyptian cotton sheets luxury egyptian cotton sheets
Vetted4 months ago

15 Best Egyptian Cotton Sheets for the Ultimate Luxury Sleep Experience

Indulge in the epitome of luxury with the 15 best Egyptian cotton sheets that promise the ultimate sleep experience.

top canister vacuums reviewed top canister vacuums reviewed
Vetted4 months ago

15 Best Canister Vacuum Cleaners That Will Keep Your Home Spotless

Get ready for a game-changer in home cleaning with the 15 best canister vacuum cleaners that promise spotless floors and...

Trending

Copyright © 2024 ID Times or In-Depth Times Affiliate disclaimer As an affiliate, we may earn a commission from qualifying purchases. We get commissions for purchases made through links on this website from Amazon and other third parties.