Black cat cookies are a spellbinding treat that capture the enchanting essence of their feline namesakes, blending rich chocolate flavors with a touch of whimsy perfect for Halloween and other spooky celebrations. Their origins are linked to superstitions and folklore, as black cats have long been associated with magic and bad luck in society. The recipe is easy to prepare, yielding crunchy and flavorful cookies that can be decorated with white frosting, chocolate chips, and other creative touches to achieve a perfectly haunting appearance. With a step-by-step guide and tips for baking and decorating, you'll be conjuring up a batch of these bewitching treats in no time – and there's more to discover about their captivating history. In fact, the black cat cookie recipe has been passed down through generations, with each baker adding their own unique flair to the treat. Some have even compared the cookies to a fudgy chocolate brownie recipe, with their rich and decadent taste. Whether you’re baking them for a Halloween party or just as a fun treat for the family, these cookies are sure to delight and mystify all who try them. So roll up your sleeves, gather your ingredients, and get ready to cast a spell with these bewitching black cat cookies!
Key Takeaways
- Black Cat Cookies are inspired by the enchanting nature and cultural significance of black cats, often associated with magic and folklore.
- The recipe provides a whimsical and easy-to-make cookie perfect for Halloween or other spooky occasions, with simple ingredients and a step-by-step guide.
- The cookies can be decorated with various techniques, such as using cookie cutters, white frosting, and chocolate chips, to achieve a unique and visually appealing design.
- Baking and decorating the cookies offers a satisfying creative outlet, as the transformation from raw ingredients to finished products can become a beloved tradition.
- The cookies can be served as delightful spooky treats, packaged as gifts, or enjoyed at Halloween parties, catering to different occasions and preferences.

Brother HL-L2480DW Wireless Compact Monochrome Multi-Function Laser Printer with Copy and Scan, Duplex, Mobile, Black & White | Includes Refresh Subscription Trial(1), Works with Alexa
BEST FOR SMALL OFFICES & WORK FROM HOME – Engineered for efficiency, the Brother HL-L2480DW Monochrome (Black &...
As an affiliate, we earn on qualifying purchases.
History
Black cat cookies have a rich history, tracing their origins back to the superstitions and folklore surrounding these mysterious felines. For centuries, black cats have been both revered and feared, their presence often associated with magic, bad luck, or supernatural power.
It's interesting to note that just as heat pumps utilize the refrigeration cycle to efficiently transfer heat, the cultural significance of black cats has also been shaped by their dual nature in society. It's no surprise then that these intriguing creatures have inspired countless culinary creations, with black cat cookies being a perennial favorite.
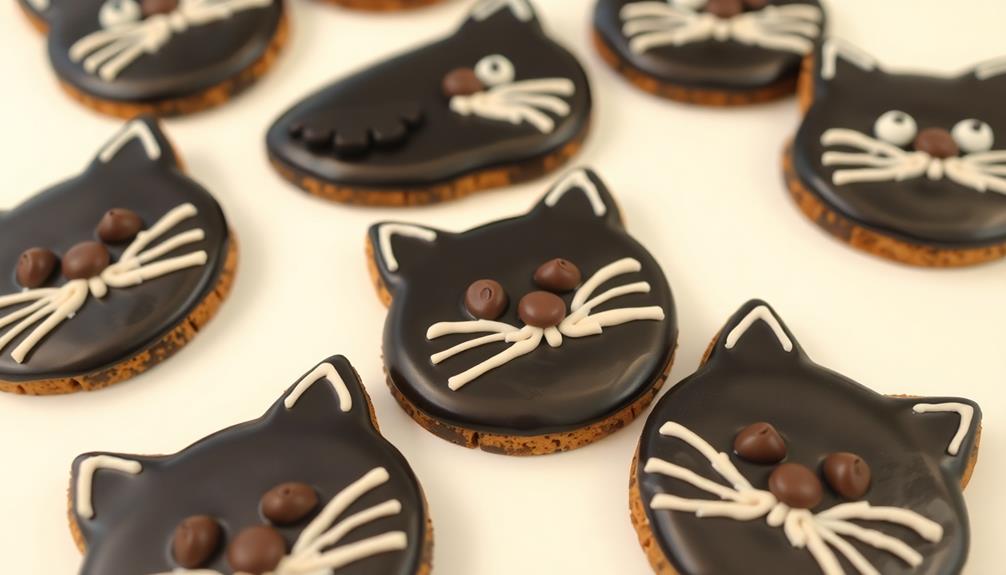
These delightful treats typically feature a simple sugar cookie base, often shaped like the iconic black cat silhouette. The cookies may be decorated with features like white chocolate chips for eyes, licorice whiskers, and even a tiny icing bow tie to complete the feline look.
Baking these cookies has become a beloved tradition, especially around Halloween when the spooky black cat motif is particularly fitting.
Whether you're a fan of the superstitions or simply enjoy the whimsical design, black cat cookies offer a delicious way to celebrate the enchanting and enigmatic nature of these beloved felines.

Brother HL-L2460DW Wireless Compact Monochrome Laser Printer with Duplex, Mobile Printing, Black & White Output | Includes Refresh Subscription Trial(1), Works with Alexa
BEST FOR HOME OFFICES & SMALL TEAMS – Engineered for consistent, premium print quality, the Brother HL-L2460DW Monochrome...
As an affiliate, we earn on qualifying purchases.
Recipe
Black Cat Cookies
Recipe
These whimsical black cat cookies are perfect for Halloween or any spooky occasion. With their shiny black coats and playful shapes, they'll delight both kids and adults alike. The recipe is easy to follow and yields a batch of delightfully crunchy and flavorful treats. For a delightful dessert pairing, consider serving them with sugar-free ice cream for a healthier treat that everyone can enjoy.
To create these adorable feline-inspired cookies, you'll need just a few simple ingredients and a bit of creativity. The key is to capture the essence of a black cat through the shape and decoration of the cookie. This recipe will guide you step-by-step to achieve the perfect black cat cookies that are sure to be the star of your Halloween party or holiday gathering.
Ingredients:
- 2 cups all-purpose flour
- 1/2 cup unsweetened cocoa powder
- 1/2 teaspoon baking soda
- 1/4 teaspoon salt
- 1 cup unsalted butter, softened
- 1 cup granulated sugar
- 1 egg
- 1 teaspoon vanilla extract
- Black food coloring (optional)
- White frosting or royal icing
- Chocolate chips or Mini chocolate chips
Instructions:
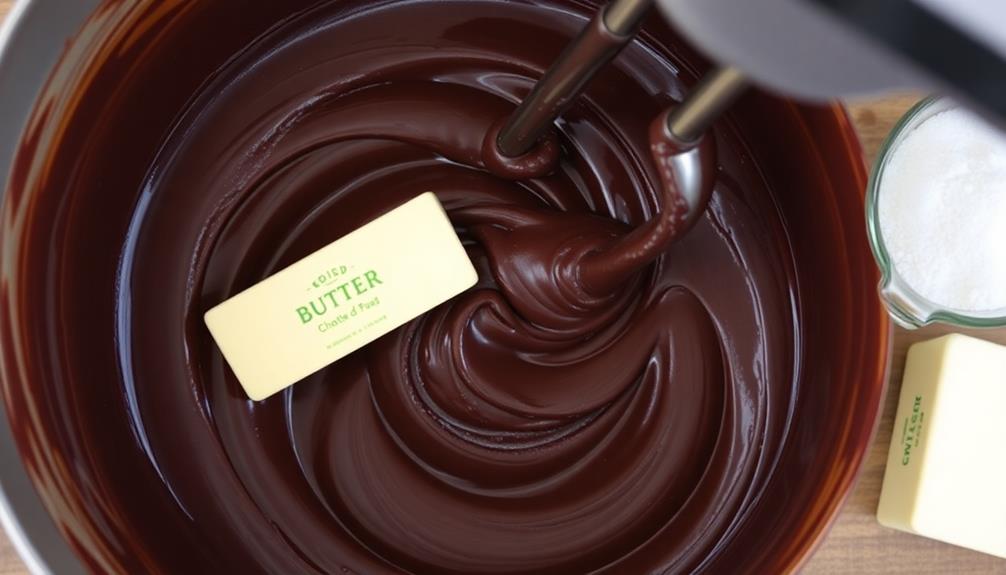
Preheat your oven to 350°F (175°C). In a medium bowl, whisk together the flour, cocoa powder, baking soda, and salt. In a large bowl, cream the softened butter and sugar until light and fluffy. Beat in the egg and vanilla extract until well combined. Gradually add the dry ingredients to the wet ingredients, mixing until a dough forms. If desired, add a few drops of black food coloring to achieve a deeper black color. Chill the dough for at least 30 minutes.
Once chilled, roll the dough out to about 1/4-inch thickness on a lightly floured surface. Use cat-shaped cookie cutters to cut out the cookie shapes, arranging them on parchment-lined baking sheets. Bake for 8-10 minutes, or until the cookies are set and slightly crisp. Allow the cookies to cool on the baking sheets for a few minutes before transferring them to a wire rack to cool completely.
Once cooled, decorate the cookies with white frosting or royal icing to create the cats' features, such as eyes, noses, and whiskers. Use chocolate chips or mini chocolate chips to create the cats' eyes and other details. Let the decorations set before serving.
Tips:
For best results, chill the dough for at least 30 minutes before rolling and cutting. This helps the cookies hold their shape better during baking. You can also experiment with different cookie cutter shapes, such as paw prints or silhouettes, to create unique black cat designs. Have fun with the decorations and let your creativity shine!

Brother DCP-L2640DW Wireless Compact Monochrome Multi-Function Laser Printer with Copy and Scan, Duplex, Mobile, Black & White | Includes Refresh Subscription Trial(1), Works with Alexa
BEST FOR SMALL BUSINESSES – Engineered for extraordinary productivity, the Brother DCP-L2640DW Monochrome (Black & White) 3-in-1 combines...
As an affiliate, we earn on qualifying purchases.
Cooking Steps
Preheat your oven to 350°F to get started on these delightful Black Cat Cookies.
While the oven is heating, you might consider pairing these cookies with a quick breakfast option like the Egg Rollup and Dumpling Sauce for a protein-rich start to your day.
Next, mix all the ingredients together until you have a smooth dough. Roll the dough into small, uniform balls and arrange them on a baking sheet.
Step 1. Preheat Oven to 350°F
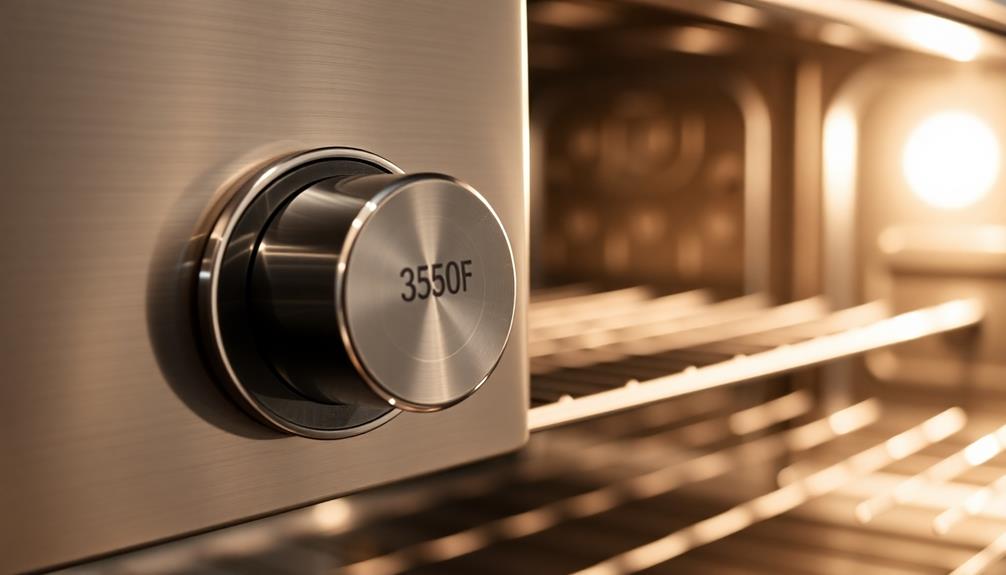
Preheating the oven to 350°F is a crucial first step in baking these delightful Black Cat Cookies. This temperature ensures the cookies bake evenly and develop a perfect golden-brown hue.
Many fun and creative desserts, like Dirt Cups, also rely on proper temperature management for the best results.
First, locate your oven and check that it's clean and ready to use. Then, simply turn the temperature dial or press the corresponding buttons to set the oven to 350°F.
It's important to give the oven a few minutes to fully preheat, as this helps the cookies bake properly. While you're waiting, you can prepare the other ingredients and mix the dough.
Once the oven is ready, you'll be all set to pop the cookie dough onto the baking sheet and slide it into the hot oven.
This initial step lays the foundation for baking success, so take the time to preheat your oven carefully. Soon, the aroma of freshly baked Black Cat Cookies will fill your kitchen!
Step 2. Mix Ingredients
Once the oven is preheated, you can begin mixing the ingredients for your delightful Black Cat Cookies. In a large bowl, whisk together the all-purpose flour, cocoa powder, baking soda, and salt.
Create a well in the center of the dry ingredients. Maintaining a clean environment is crucial, as it ensures no contaminants affect your baking, similar to how air purifiers maintain optimal air quality by reducing allergens and pollutants air purifier maintenance dos and don'ts.
In a separate bowl, cream the unsalted butter and granulated sugar until light and fluffy. Beat in the large egg and pure vanilla extract until well combined.
Gradually add the dry ingredients to the wet ingredients, mixing until just incorporated, being careful not to overmix.
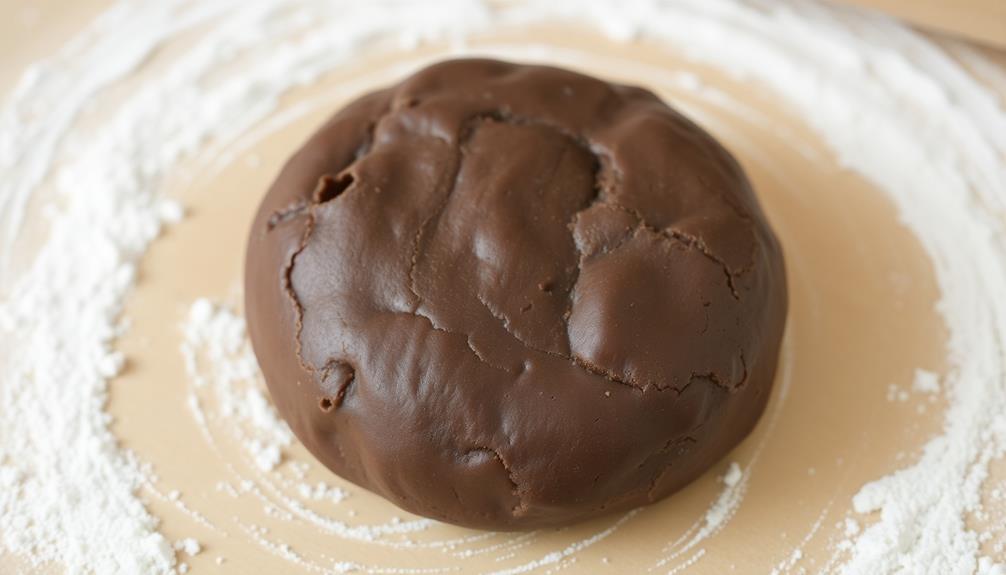
Divide the dough into two equal portions. Roll each portion into a ball, then flatten into a disk. Wrap the disks in plastic wrap and refrigerate for at least 30 minutes. This chilling step helps the cookies maintain their shape during baking.
Once the dough has chilled, you're ready to shape your Black Cat Cookies and bake them to perfection.
Step 3. Roll Dough Into Balls
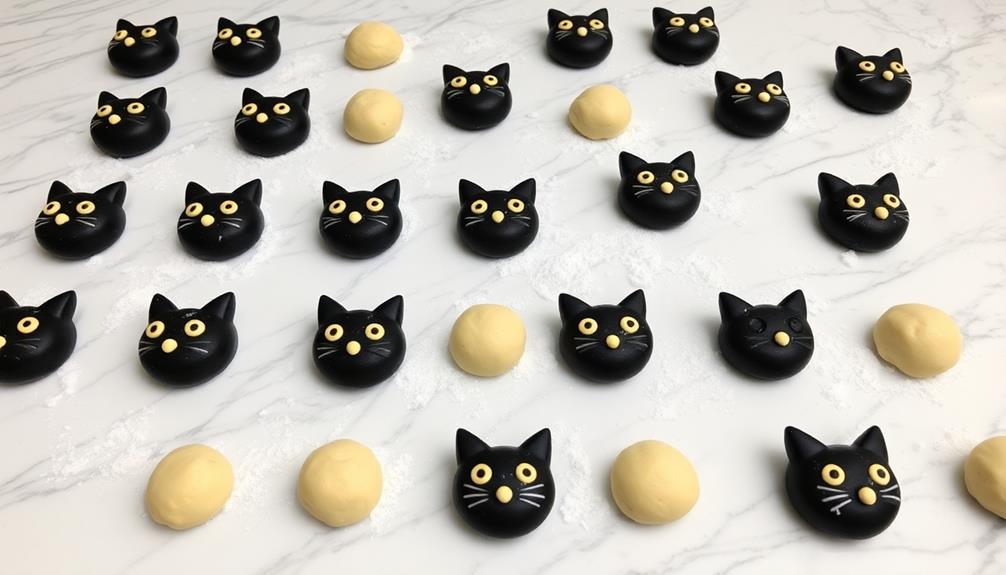
After chilling the dough, you're ready to start shaping your Black Cat Cookies. Grab a small portion of the dough and roll it between your palms to create a smooth, round ball. The dough should be about 1-inch in diameter. As you roll, apply gentle pressure to ensure the shape is consistent.
Arrange the dough balls on a parchment-lined baking sheet, spacing them about 2 inches apart. This will give the cookies room to spread slightly during baking.
Once you've rolled all the dough into balls, it's time to add the finishing touches. Using a toothpick or the tip of a small knife, gently press two indents near the top of each ball to create the cat's eyes.
Finish by pressing a small piece of chocolate or a mini chocolate chip into the center of each ball to form the cat's nose. Now your Black Cat Cookies are ready for the oven!
Step 4. Place Balls on Baking Sheet
Place the dough balls on the prepared baking sheet, spacing them about 2 inches apart. This allows the cookies to spread and develop their signature shape without touching each other. If the balls are too close together, they may bake into one large cookie, losing their individual definition.
Once the dough balls are evenly spaced, give the baking sheet a gentle shake to help the balls settle and slightly flatten on the bottom. This promotes even baking and helps the cookies achieve their signature round, slightly domed appearance.
Be sure not to overcrowd the baking sheet – work in batches if necessary to ensure ample room for the cookies to spread. This prevents them from steaming or baking unevenly.
After placing the dough balls, take a moment to admire your handiwork. Soon, these adorable black cat cookies will be ready for the oven!
Step 5. Bake 12-15 Minutes Until Golden
Preheat your oven to 375°F (190°C) and line a baking sheet with parchment paper.
Now it's time to bake those adorable black cat cookies. Once your dough balls are carefully placed on the prepared sheet, pop them in the oven for 12 to 15 minutes.
Keep a close eye as they bake, watching for them to turn a lovely golden brown. The cookies should be firm to the touch yet still slightly soft in the center when they're ready.
Remember, oven temperatures can vary, so start checking them at 12 minutes and adjust the baking time as needed.
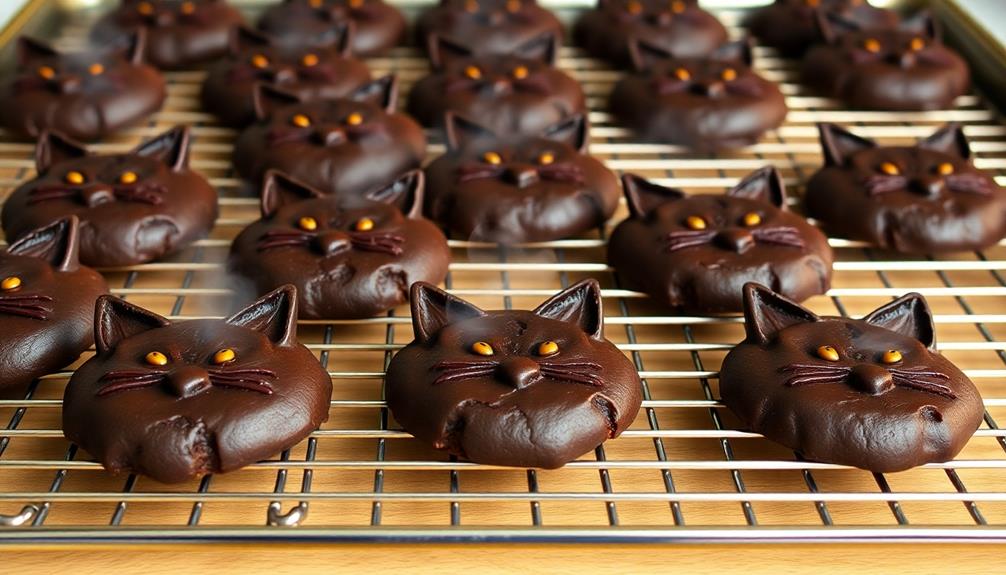
When the cookies have reached that perfect baked state, carefully remove the sheet from the oven.
Let the black cat cookies cool on the baking sheet for a few minutes before transferring them to a wire rack to cool completely.
Soon, you'll have a batch of delightfully spooky treats ready to enjoy or share with friends and family.

Brother Professional Laser Printer with High-Speed 50 ppm Output, Advanced Security Features, and Wireless Networking for Business, Monochrome Printing with Duplex Capability (HL-6210DW)
Professional Performance: Dominate your office printing tasks with this Brother Genuine laser printer delivering an impressive 50 ppm...
As an affiliate, we earn on qualifying purchases.
Final Thoughts
As you've whipped up a delightful batch of black cat cookies, it's time to reflect on the experience. These spooky yet charming treats have surely brought a smile to your face, both in the making and the eating.
The process of shaping the dough, piping the eyes, and carefully arranging the cookies on the baking sheet has likely been a satisfying creative outlet. Seeing the transformation from raw ingredients to adorable feline-inspired confections is undoubtedly rewarding.
Now, as you admire your handiwork, consider how these black cat cookies could become a beloved tradition. Serve them at Halloween parties, package them as thoughtful gifts, or enjoy them as a personal treat.
The recipe is versatile, allowing you to experiment with different shapes, sizes, or decorative touches. Savor the moment, and don't forget to snap a few photos to commemorate your baking accomplishment.
These black cat cookies are sure to delight for years to come.
Frequently Asked Questions
Can I Use a Regular Cookie Cutter Instead of a Cat-Shaped One?
Yes, you can definitely use a regular cookie cutter instead of a cat-shaped one.
The shape doesn't really matter – the important thing is that the cutter is the right size for the cookies you want to make.
Just make sure to adjust the baking time if the shape is different.
With a regular cutter, you'll still end up with delicious cookies, just in a different fun shape.
Have fun experimenting!
Do I Need to Add Food Coloring to Achieve the Black Color?
To achieve the deep black color, you'll need to use food coloring.
Simply add a few drops of black food coloring to your cookie dough and mix until the desired shade is reached.
Keep in mind that the intensity of the color may fade slightly during baking, so you may want to start with a slightly darker hue.
With the right food coloring, you can easily create stunning black cookies without the need for a specialty cookie cutter.
How Long Do the Cookies Stay Fresh After Baking?
The freshness of your homemade cookies will depend on a few factors, but generally they'll stay fresh for 3-5 days after baking.
Store them in an airtight container at room temperature to maintain their texture and flavor.
If you notice the cookies starting to dry out or get stale, you can try reviving them by popping them in the oven for a few minutes.
With proper storage, you can enjoy your freshly baked treats for several days.
Can I Freeze the Dough for Later Use?
Absolutely! You can definitely freeze the cookie dough for later use.
Just scoop the dough into portions, wrap them tightly in plastic or foil, and pop them in the freezer.
When you're ready to bake, simply thaw the dough in the fridge overnight, then bake as usual.
This is a great way to have freshly baked cookies on hand anytime, without all the prep work.
Enjoy your homemade treats whenever the craving strikes!
Is It Possible to Make These Cookies Vegan or Gluten-Free?
Yes, it's definitely possible to make these cookies vegan or gluten-free!
For a vegan version, simply swap out the butter and eggs for plant-based alternatives like coconut oil and flax or chia "eggs."
To make them gluten-free, use a reliable all-purpose gluten-free flour blend in place of the regular flour.
With a few simple substitutions, you can enjoy these festive cookies while accommodating dietary needs.
Just be sure to do a bit of testing to nail the perfect texture and flavor.