Ghostly meringue cookies are a hauntingly delightful Halloween treat with roots dating back to 17th-century Switzerland. You'll whip up a glossy, stiff meringue from egg whites and sugar, then pipe it into spooky ghost shapes. Bake these ethereal treats until they're crisp on the outside yet delicate within. You can even get creative with food coloring for ghostly hues or add decorative touches like black gel. These light, airy cookies are the perfect complement to your Halloween festivities. If you're looking to add a touch of whimsy and elegance to your holiday spread, these ghostly meringues are sure to enchant.
Key Takeaways
- Ghostly meringue cookies originated in Switzerland during the 17th century as a whipped egg white and sugar mixture, often enjoyed at Halloween parties.
- Baking meringues requires precision and creativity, with achieving a light and crisp texture essential for success using simple ingredients like egg whites, sugar, and vanilla.
- Piping meringue into ghost shapes creates an ethereal dessert, with optional use of black decorating gel for added ghostly features.
- The baking process involves precisely piping the meringue, baking at 200°F for 1 hour, and cooling completely before serving.
- Ghostly meringue cookies feature a light, airy texture with a delicate flavor that complements a variety of desserts, adding charm and whimsy to Halloween celebrations.
History
How did the ghostly meringue cookie come to be? These delicate, airy treats have a storied history rooted in ancient culinary traditions. Meringue, a whipped egg white and sugar mixture, was first documented in Switzerland during the 17th century.
Over time, creative bakers began experimenting with the versatile base, shaping it into spooky silhouettes to celebrate All Hallows' Eve. The art of baking meringues can be likened to the principles of music therapy integration, where precision and creativity blend to enhance the overall experience.
The key to mastering ghostly meringues lies in achieving the perfect light and crisp texture. Carefully controlling the baking temperature and duration is crucial, as is properly whipping the egg whites to stiff peaks.
With a dusting of powdered sugar, these hauntingly beautiful cookies evoke the ethereal essence of their namesakes.
Whether served at Halloween parties or enjoyed year-round, ghostly meringue cookies offer a delightful balance of sweetness and suspense. Their delicate appearance and melt-in-your-mouth consistency make them a beloved treat for bakers and cookie enthusiasts alike.
Recipe
Ghostly Meringue Cookies are a delightful and whimsical treat perfect for Halloween or any time of year. These delicate, cloud-like cookies are made from just a few simple ingredients, creating a dessert that's both visually striking and deliciously light. High-quality ingredients and careful preparation enhance the overall experience, making these cookies not only a treat for the eyes but also a testament to the importance of content quality in creating memorable culinary delights.
The key to achieving the ghostly appearance is in the meringue. By carefully piping the meringue mixture into ghostly shapes and baking them until crisp, you'll end up with an assortment of ethereal, floating cookies that are sure to delight both children and adults alike.
Ingredients:
- 3 large egg whites, at room temperature
- 3/4 cup granulated sugar
- 1/4 teaspoon cream of tartar
- 1/4 teaspoon vanilla extract
- Black decorating gel or food coloring (optional)
Instructions:
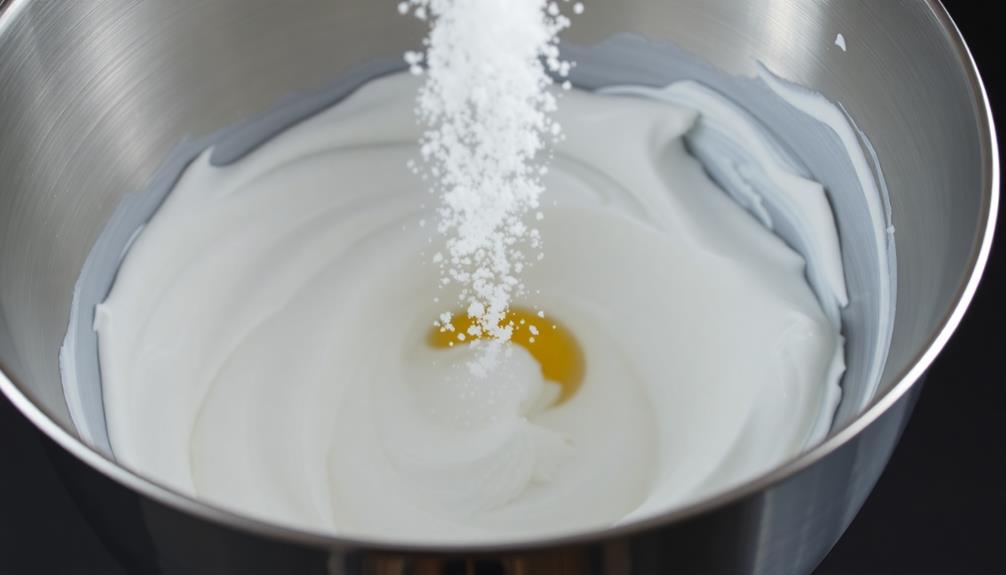
Preheat your oven to 200°F (95°C) and line two baking sheets with parchment paper. In a large, clean, and dry bowl, beat the egg whites with a hand mixer or stand mixer fitted with the whisk attachment until they begin to foam. Gradually add the sugar, a tablespoon at a time, while continuing to beat the mixture until it forms stiff, glossy peaks. Gently fold in the cream of tartar and vanilla extract.
Transfer the meringue to a piping bag fitted with a large round tip. Pipe the meringue into ghost shapes, making them as tall and narrow as desired. Bake for 1 hour and 15 minutes, or until the meringues are crisp and dry to the touch. Turn off the oven and leave the meringues inside for an additional 30 minutes to an hour, allowing them to cool completely and dry out further.
Tips:
- For extra ghostly flair, you can use a black decorating gel or food coloring to add facial features to the meringues once they've cooled.
- Be sure to use fresh, room-temperature egg whites for the best results. Chilled or older egg whites may not whip up as well.
- Avoid opening the oven door during the baking process, as this can cause the meringues to collapse.
Cooking Steps
First, separate the egg whites from the yolks.
For a fun twist, you can serve these ghostly meringue cookies alongside a scoop of Birthday Cake Ice Cream for an enjoyable dessert experience.
Then, whip the egg whites until they form stiff peaks. Gradually fold in the sugar, and pipe the meringue mixture onto a baking sheet before baking it at 200°F for an hour.
Step 1. Separate Egg Whites From Yolks

To separate the egg whites from the yolks, you'll need to carefully crack each egg and gently let the white slide into a clean bowl, leaving the yolk behind in the shell. This process requires a steady hand and a bit of practice, but it's an essential step in making meringue cookies.
The precision involved in separating the eggs can also be likened to the emotional regulation needed in managing BPD symptoms.
Make sure to use a clean, dry bowl, as any traces of oil or grease can prevent the egg whites from whipping up properly. Gently tap the egg against the edge of the bowl, then slowly pull the two halves of the shell apart, allowing the white to drip down while the yolk stays in one half of the shell.
You can then transfer the yolk back and forth between the shell halves to ensure all the white has been separated.
Once you've separated all the eggs, you can proceed to the next step of whipping the egg whites until they form stiff, glossy peaks – the foundation for your ghostly meringue cookies.
Step 2. Whip Egg Whites Until Stiff Peaks Form
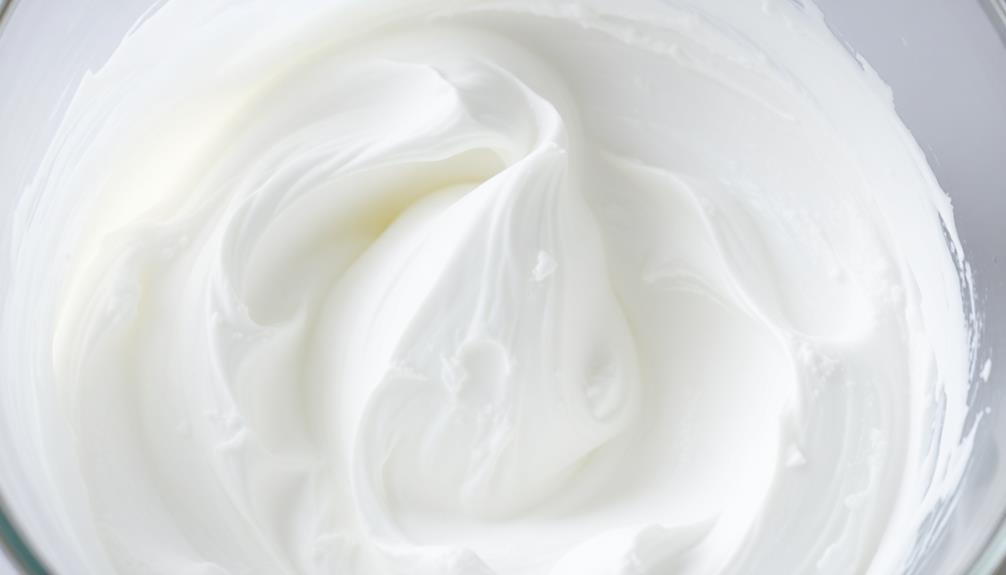
With the egg whites separated, you can now begin whipping them into a lofty, stiff meringue. Using a clean, dry bowl and beaters, start beating the egg whites on medium speed. As they start to foam, gradually increase the speed to high.
This process is crucial, as achieving the right texture can make a significant difference in your final product, much like how color accuracy impacts overall image quality in projectors. Continue beating, stopping occasionally to scrape down the sides of the bowl, until the egg whites form stiff, glossy peaks. This usually takes around 5-7 minutes.
You'll know the egg whites are ready when you can lift the beaters straight up, and the peaks stand upright without collapsing. Overbeating can cause the meringue to become dry and crumbly, so keep a close eye on the texture.
The ideal meringue should be smooth, shiny, and able to hold its shape. With this stiff meringue base, you're ready to fold in the remaining ingredients and shape your ghostly meringue cookies.
Step 3. Fold in Sugar Gradually
How do you fold in the sugar gradually? It's all about technique!
First, you'll want to have your egg whites whipped to stiff, glossy peaks. Then, start adding the sugar a little at a time, gently folding it in with a rubber spatula.
Don't just dump it all in at once – that'll deflate your beautiful meringue. Take your time, folding the sugar in a few tablespoons at a time, until it's all incorporated.
The key is to maintain the light, airy texture of the whipped egg whites. Fold the sugar in with a gentle, lifting motion, cutting through the center and bringing the mixture up and over.
Avoid stirring or beating, which can knock the air out. Keep going until the sugar is completely dissolved and the meringue is smooth and glossy.
With a little practice, you'll be folding like a pro and creating those ghostly, sweet meringue cookies in no time!
Step 4. Pipe Meringue Mixture Onto Baking Sheet
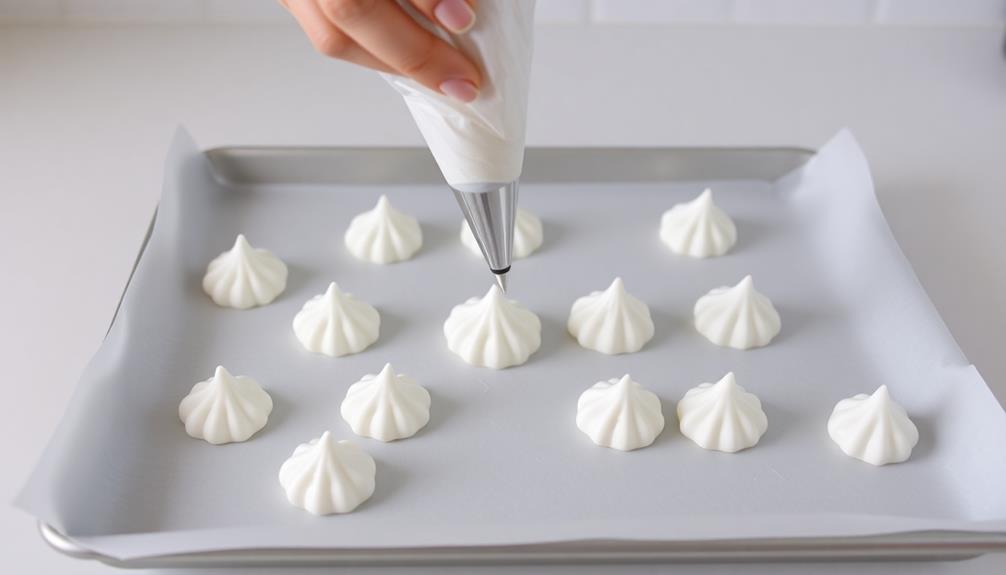
Now that you've successfully folded the sugar into the whipped egg whites, it's time to pipe the meringue mixture onto a baking sheet.
Prepare a piping bag with a large star-shaped tip. Gently spoon the meringue into the piping bag, being careful not to deflate the airy mixture.
Position the piping bag perpendicular to the baking sheet, and pipe the meringue into ghost-like shapes, using the star tip to create textured details. Space the piped meringues about an inch apart, as they'll expand during baking.
Once you've piped the entire batch, gently tap the baking sheet on the counter to release any air bubbles. This will help the meringues bake up smooth and even.
With your ghostly meringues piped and ready, you're one step closer to creating those hauntingly delicious cookies. Just pop them in the oven, and get ready for a spooktacular treat.
Step 5. Bake at 200°F for 1 Hour
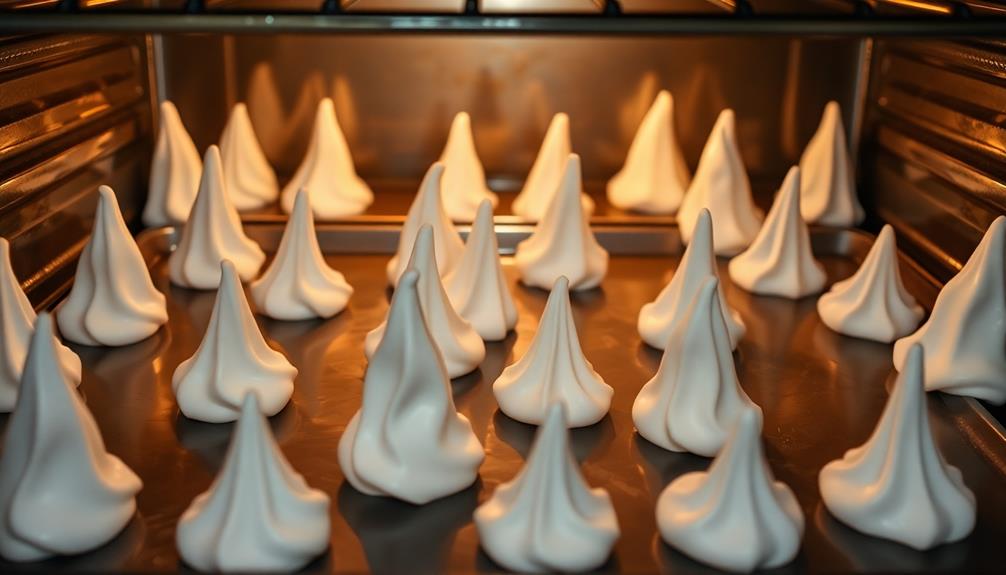
Preheat your oven to 200°F. This low temperature is crucial for slowly drying out the meringue cookies, allowing them to develop their signature ghostly texture.
Once your oven is preheated, carefully transfer the piped meringue dollops from the baking sheet onto the oven racks. Space them out evenly, ensuring they don't touch each other. This will enable the heat to circulate freely around each cookie, drying them out evenly.
Set a timer for 1 hour and let the meringues bake undisturbed. Resist the urge to open the oven door, as this can disrupt the delicate drying process.
After 1 hour, the meringues should have a crisp, ghostly appearance, with a delicate, airy interior. Remove them from the oven and let them cool completely on the baking sheet before gently transferring to a serving platter.
These ethereal treats are now ready to delight your guests with their spooky yet delicious presence.
Final Thoughts
With a little creativity and the right technique, these ghostly meringue cookies can be a whimsical and delightful addition to your Halloween celebrations. You can shape the meringue into ghostly figures with a piping bag, then add small chocolate chips for eyes to give them a spooky touch. For an extra fun twist, serve these ghostly meringue cookies alongside a spooky haystack cookie recipe for a complete Halloween treat spread. The light and airy texture of the meringue pairs perfectly with the crunchy and sweet haystack cookies, creating a delightful contrast that will impress all your Halloween party guests.
The final step is to let your imagination run wild. Piping the meringue into fun, spooky shapes is half the fun. Get creative with pointed peaks for ghost-like silhouettes or swirls for a more abstract, haunting effect.
You can also experiment with food coloring to achieve the perfect ghostly hue, from subtle grays to vibrant purples and blues. Once baked, these ethereal treats will bring an air of mystery and enchantment to your Halloween spread.
Serve them alongside your favorite seasonal drinks or alongside other festive desserts for a truly magical experience.
With their light, airy texture and delicate flavor, these ghostly meringue cookies are sure to delight guests of all ages.
Frequently Asked Questions
How Long Do Ghostly Meringue Cookies Last?
Ghostly meringue cookies have a relatively short shelf life, usually lasting 3-5 days when stored properly.
They're delicate and can become soggy or lose their signature crispness over time. To maximize their lifespan, store them in an airtight container at room temperature, away from moisture.
If you'd like to enjoy their spooky charm for longer, consider freezing them for up to 2 months. Just be sure to thaw them at room temperature before serving for the full meringue experience.
Can Ghostly Meringue Cookies Be Frozen?
Yes, you can definitely freeze ghostly meringue cookies!
They'll maintain their delicate, airy texture and spooky appearance for up to 3 months in the freezer. Just be sure to store them in an airtight container or freezer-safe bag.
When you're ready to enjoy them, simply thaw the cookies at room temperature for about an hour.
This makes them a fantastic make-ahead treat for Halloween or any ghostly gathering.
Are Ghostly Meringue Cookies Gluten-Free?
Yes, ghostly meringue cookies are typically gluten-free!
These airy, delicate treats are made from just egg whites, sugar, and sometimes a bit of vanilla or other flavoring. Since there's no flour involved, they're a great option for those following a gluten-free diet.
Just be sure to check the ingredients list on any store-bought meringues to ensure they don't contain any gluten-containing additives.
With their light and crunchy texture, gluten-free meringues make a delightful and guilt-free snack.
Can I Substitute Egg Whites With Something Else?
You can absolutely substitute egg whites with other vegan options!
Some great choices include aquafaba (the liquid from a can of chickpeas), silken tofu, or commercial egg replacers.
Just keep in mind that the texture and rise of your meringues may vary depending on the substitute you use.
Experiment and have fun finding the best vegan swap for your recipe.
With a little creativity, you can make delicious meringues without eggs.
How Do I Make Ghostly Meringue Cookies Extra Spooky?
To make your ghostly meringue cookies extra spooky, try adding a few drops of black food coloring to the meringue mixture. This will give your cookies a haunting, otherworldly appearance.
You can also use a piping bag to create intricate web-like designs on the cookies, adding to the eerie, ethereal look.
Finish them off by dusting with a light coating of powdered sugar for a ghostly, ethereal effect.
Get creative and have fun making these delightfully spooky treats!