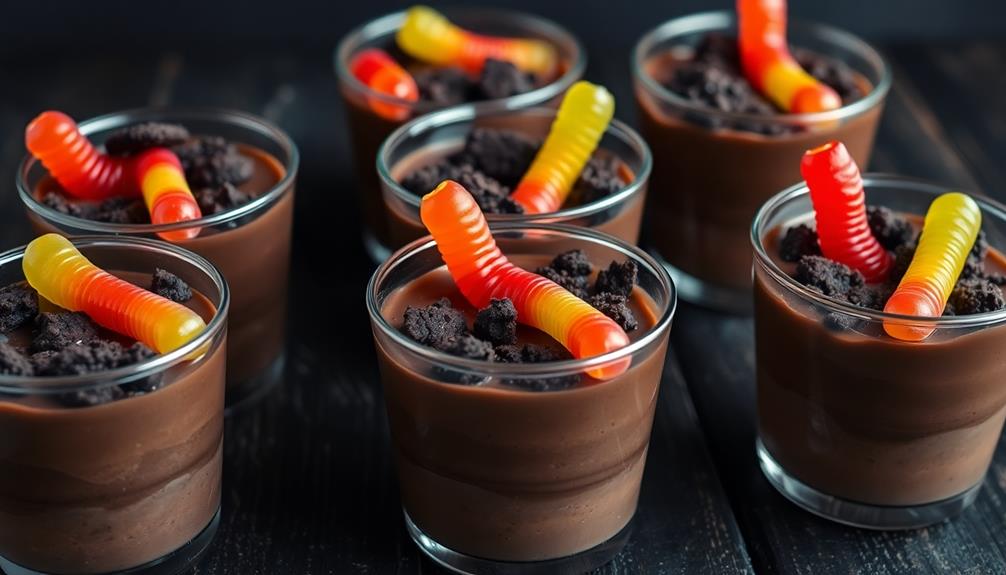

Graveyard pudding cups are a delightfully spooky twist on classic Halloween treats. You'll love layering creamy chocolate pudding, crunchy Oreo "dirt," and chewy gummy worms to create a dessert that's sure to delight. Start by whisking together pudding mix and milk, then divide it into serving cups. Top with crushed Oreos and gummy worms for a graveyard-inspired look. Chill for 2 hours to allow the flavors to meld. Get creative with extra decorations like cookie crumbs or graham cracker "headstones" to make your graveyard pudding cups even more impressive. With their irresistible combination of textures and flavors, these festive treats are sure to become a Halloween hit. For a more decadent twist on these graveyard pudding cups, consider swapping out the chocolate pudding for a delicious chocolate mousse recipe. The rich and velvety texture of the mousse will add even more depth to the dessert, making it an indulgent Halloween treat. You can also experiment with different types of cookie crumbs or candy decorations to customize the graveyard pudding cups to your liking. No matter how you choose to make them, these spooky sweet treats are sure to be a hit at any Halloween gathering.
Key Takeaways
- Graveyard Pudding Cups are a beloved Halloween dessert featuring layers of chocolate pudding, crushed Oreo "dirt," and gummy worms.
- The dish originated in the late 19th century as a creative, economical treat made by resourceful homemakers during Halloween celebrations.
- The contrast of textures, including crunchy Oreo, chewy gummy worms, and rich pudding, creates a delightful experience.
- Graveyard Pudding Cups are versatile, allowing for customization with additional decorations to enhance the spooky, festive appearance.
- The dessert appeals to both children and adults, capturing the spirit of Halloween and evoking nostalgia through its classic flavors and presentation.
Top picks for "graveyard pudd cups"
Open Amazon search results for this keyword.
As an affiliate, we earn on qualifying purchases.
History
The origins of graveyard pudding cups can be traced back to the late 19th century, when resourceful homemakers sought creative ways to celebrate the spookier aspects of the Halloween season.
As the holiday gained popularity, these clever cooks began to experiment with dark, rich puddings and whimsical presentations to capture the eerie atmosphere. Many of these early culinary creations paralleled the importance of budgeting during festive seasons, as families looked for economical yet delightful treats that could be made at home creating a personal budget.
The earliest versions often featured crushed chocolate cookies or crumbs to mimic the appearance of dirt, topped with gummy worms or other candies to represent creepy crawlies emerging from the ground.
Over time, the recipe evolved, incorporating layers of chocolate and vanilla pudding, crushed Oreo cookies, and an array of spooky decorations.
Today, graveyard pudding cups remain a beloved Halloween treat, blending nostalgic flavors with a playful, imagination-stirring presentation that delights both children and adults alike.
Recipe
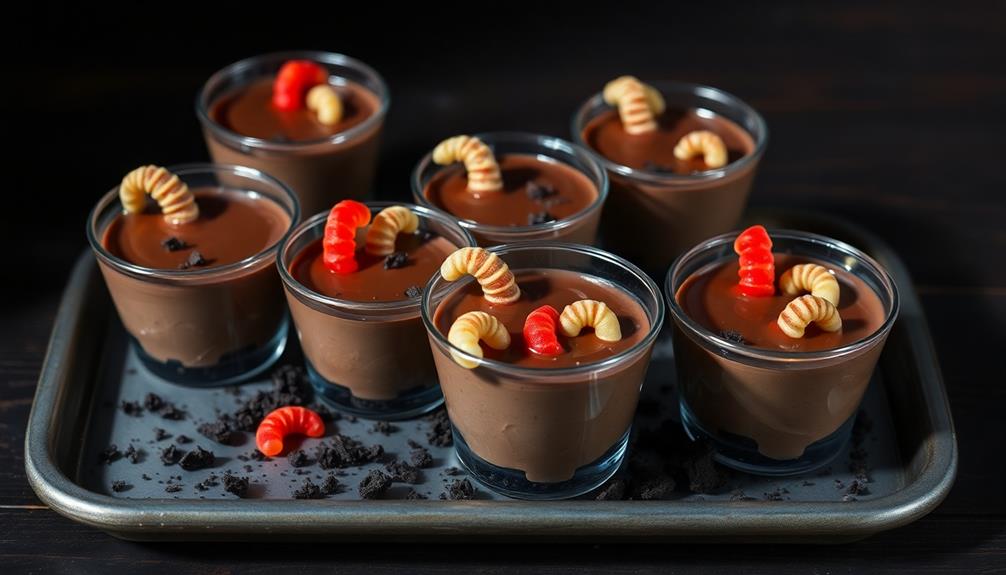
Graveyard Pudding Cups are a spooky and delicious treat perfect for Halloween celebrations. These individual pudding cups are layered with crushed Oreo "dirt," gummy worms, and a creamy chocolate pudding, creating a whimsical graveyard scene.
The key to these Graveyard Pudding Cups is the contrast of textures and flavors. The crunchy Oreo "dirt" provides a satisfying base, while the chewy gummy worms and rich chocolate pudding offer a delightful contrast in both taste and mouthfeel. This delightful recipe can evoke feelings of joy and nostalgia, similar to the uplifting vibes found in songs like Blue Skies and Lemonade.
Ingredients:
- 1 (3.9 oz) package instant chocolate pudding mix
- 2 cups cold milk
- 1 (14.3 oz) package Oreo cookies, crushed
- 12 gummy worms
Instructions:
Prepare the chocolate pudding according to the package instructions, using the 2 cups of cold milk. Once the pudding has set, spoon it into 12 individual serving cups or glasses.
Top each pudding cup with a layer of crushed Oreo cookies, creating the "dirt" effect. Finally, add 1-2 gummy worms to each cup, nestling them into the "dirt."
Tips:
For a more authentic graveyard look, consider adding small chocolate cookie crumb "gravestones" or decorating the tops with edible Halloween-themed sprinkles or decorations.
You can also experiment with different pudding flavors, such as vanilla or butterscotch, to create unique variations of the Graveyard Pudding Cups. Chill the completed cups in the refrigerator for at least 30 minutes before serving to allow the flavors to meld and the pudding to set fully.
Cooking Steps
Mix up some creamy chocolate pudding, then start layering the pudding and chocolate cookie crumbs in your cups.
For an additional flavor boost, consider adding a touch of vanilla extract or a sprinkle of sea salt to elevate the taste, similar to how Milk Bar Cinnamon Roll Bread enhances brunch gatherings with its sweet layers.
Top it all off with a handful of spooky gummy worms, and you're ready to chill these graveyard pudding cups in the fridge until it's time to serve them up.
Step 1. Mix Chocolate Pudding
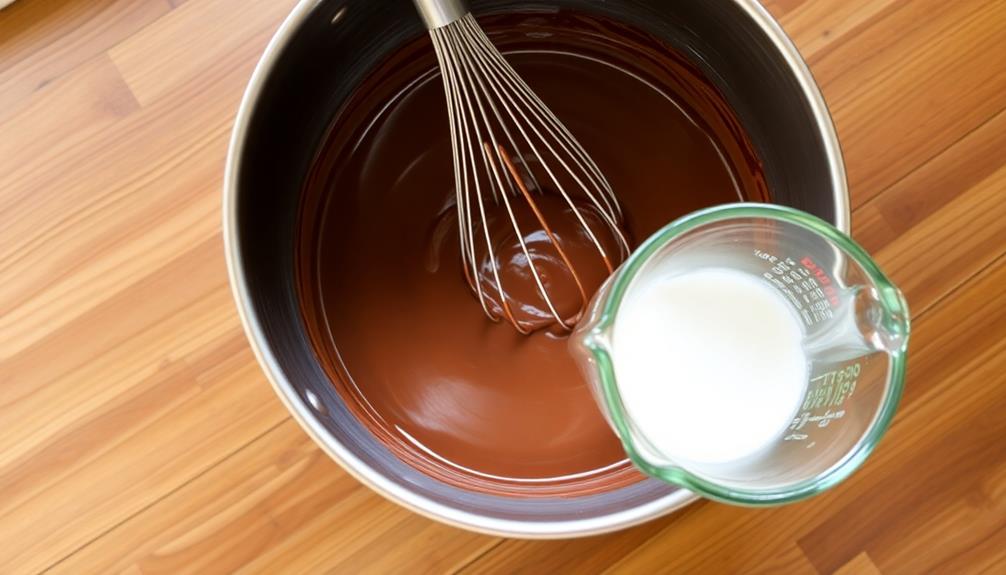
First, grab a medium-sized bowl and whisk together the milk and chocolate pudding mix until it's well combined. This creates a rich, creamy base for your graveyard pudding cups. Be sure to whisk thoroughly to prevent any lumps from forming. For an extra touch of fun, consider adding some colorful sprinkles to the pudding mix, reminiscent of the festive elements found in Birthday Cake Blondies.
Next, divide the chocolate pudding evenly into your prepared individual serving cups or bowls. This recipe typically yields 4-6 servings, depending on the size of your cups. Smooth the top of the pudding with a spoon or rubber spatula.
Now, it's time to add the "graveyard" elements. Crumble some crushed Oreo cookies or chocolate graham crackers on top of the pudding to create a "dirt" effect. Then, arrange some gummy worms, crushed cookies, or other spooky toppings on the "dirt" to complete the graveyard scene. Get creative with your presentation to make each cup visually intriguing.
Once your graveyard pudding cups are assembled, refrigerate them for at least 30 minutes to allow the pudding to set before serving. Enjoy this delightfully creepy and delicious dessert!
Step 2. Layer Pudding and Crumbs
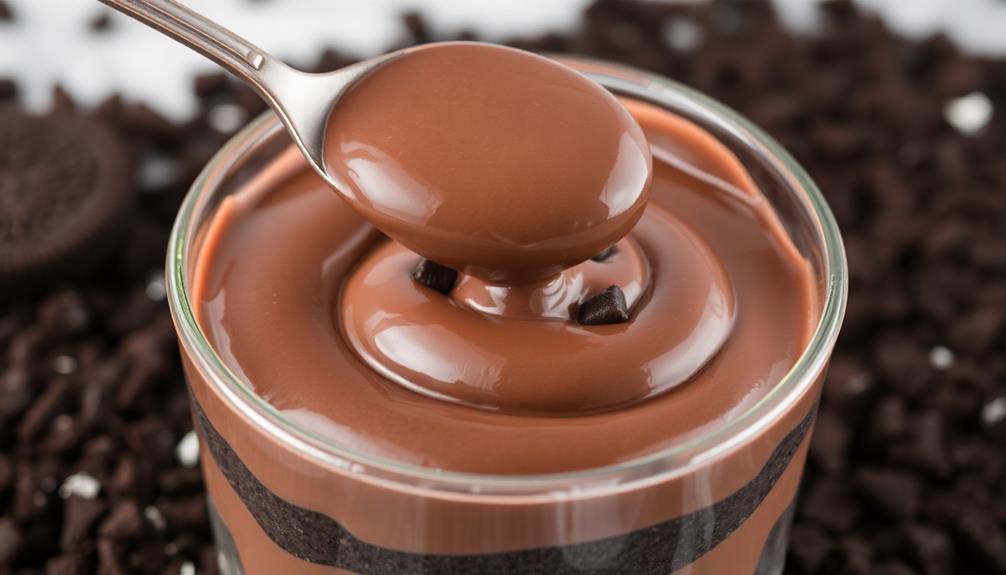
Next, divide the chocolate pudding evenly into your prepared individual serving cups or bowls. Smoothen the surface of the pudding, ensuring it's level.
To enhance your dessert presentation, consider using some seasonal decor like the GEEORY Fall Pillow Covers to create a festive atmosphere around your serving area.
Now it's time to add the crumbly goodness! Grab your crushed cookie or graham cracker crumbs and sprinkle them generously over the top of the pudding. Aim to create a thick, textured layer that resembles dirt or gravel in a graveyard.
Gently press down on the crumbs to help them adhere to the pudding. This will create a solid foundation for the next layer. For an extra spooky touch, you can add a few crushed Oreo cookies or chocolate wafer crumbs to mimic small rocks or tombstones.
Once you're satisfied with the crumb layer, it's time to chill your graveyard pudding cups. Refrigerate them for at least 2 hours, or until the pudding is set and the crumbs have softened slightly. This will allow the flavors to meld and create the perfect graveyard-inspired dessert.
Step 3. Sprinkle Chocolate Cookie Crumbs
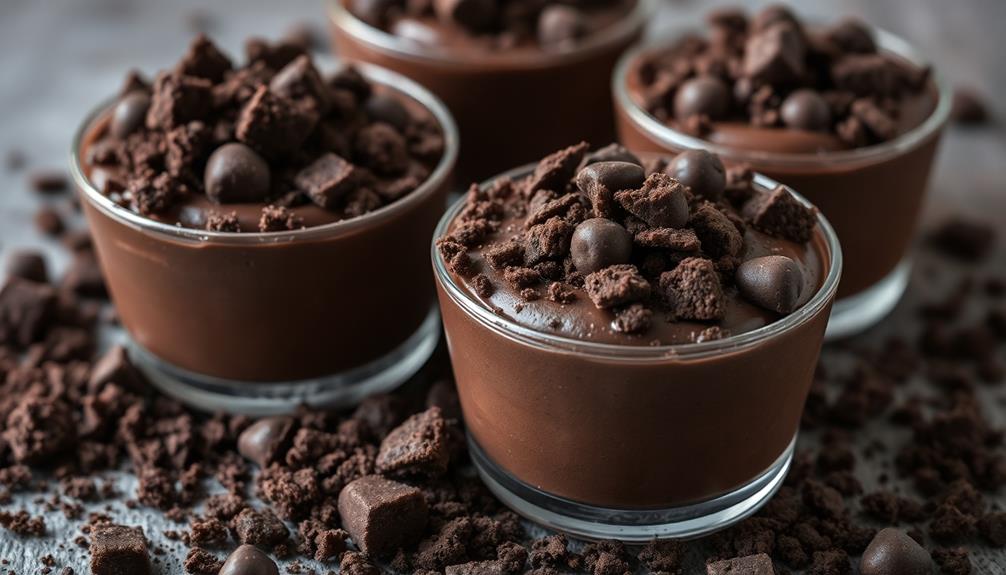
With the pudding layer firmly in place, it's time to add the final touch – the chocolate cookie crumbs. This step not only adds a delightful textural contrast to the smooth pudding, but it also brings in a rich, chocolatey flavor that will have your guests craving more.
Simply take your favorite chocolate cookies, such as Oreos or chocolate graham crackers, and gently crush them into small, bite-sized pieces. Sprinkle these crumbs generously over the top of the pudding, making sure to cover the entire surface.
The contrast of the dark chocolate crumbs against the light pudding will create a visually stunning "graveyard" effect, perfect for your spooky theme.
Don't be afraid to get creative and experiment with different cookie varieties or even add a touch of cinnamon or nutmeg to the crumbs for an extra flavor boost. The key is to have fun and let your imagination run wild as you bring this delightful dessert to life.
Step 4. Add Gummy Worms on Top
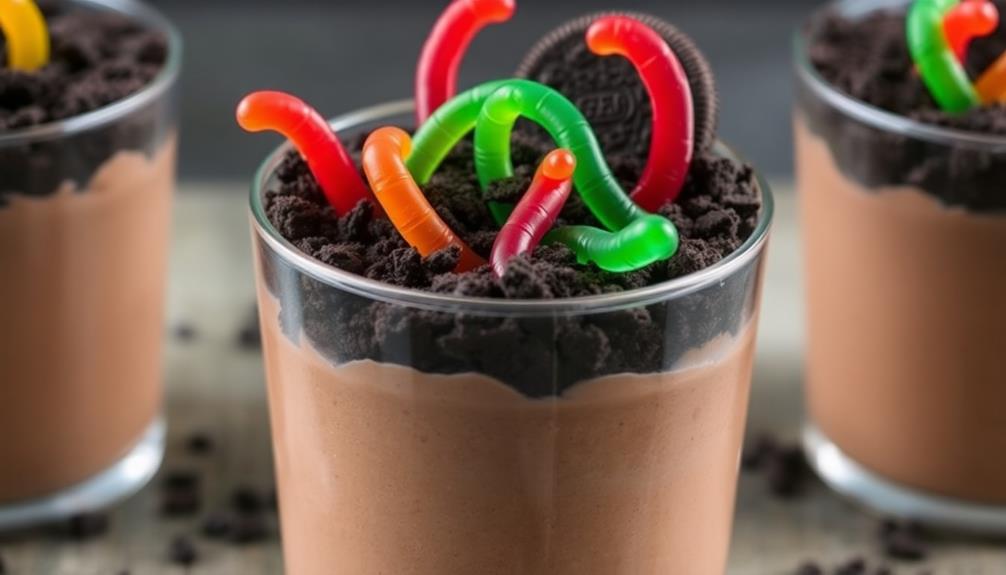
To complete the graveyard theme, adding gummy worms on top of the chocolate cookie crumbs is the perfect finishing touch. Gummy worms, with their wiggly shape and spooky appearance, instantly transform your pudding cups into a haunting delight.
Gently press the gummy worms into the chocolate cookie crumbs, arranging them as if they're slithering out of the "dirt." Be sure to evenly distribute the worms across the surface, creating a realistic graveyard look.
The juxtaposition of the creamy pudding, crunchy cookie crumbs, and chewy gummy worms offers a delightful contrast in texture and flavor. Not only do the gummy worms enhance the visual appeal of your dessert, but they also add a delightful burst of fruity sweetness that complements the rich chocolate notes.
With this simple yet effective addition, your Graveyard Pudding Cups will be the talk of any Halloween gathering.
Step 5. Refrigerate Until Ready to Serve
Once you've added the gummy worms, it's important to refrigerate your Graveyard Pudding Cups until you're ready to serve them. The chilled pudding and creamy texture will be the perfect contrast to the chewy gummy worms on top.
Refrigerating the cups ensures the flavors meld together and the pudding sets up nicely. Be sure to cover the cups with plastic wrap or a lid to prevent the pudding from developing a skin on top.
Refrigerate for at least 2 hours, but you can keep them chilled for up to 3 days before serving. When you're ready to wow your guests, simply remove the cups from the fridge and top them with a few more gummy worms, if desired.
The cold, rich pudding and tart gummy worms create a delightfully spooky and delicious graveyard-themed dessert. Your friends and family will love digging into these fun and festive Graveyard Pudding Cups.
Just make sure to keep them nicely chilled until it's time to enjoy.
Final Thoughts
Ultimately, these Graveyard Pudding Cups make for a delightfully spooky and delicious dessert.
You'll find that the classic chocolate pudding base, paired with the crushed Oreo "dirt" and gummy worm "worms," creates a whimsical and visually striking treat. The best part? It's incredibly easy to assemble, making it a fantastic option for Halloween parties or family gatherings.
Simply layer the pudding and toppings in individual cups, then chill until ready to serve. Your guests will be impressed by the creative presentation and pleasantly surprised by the tasty flavors.
Don't be afraid to get creative with the decorations, too – add some crumbled cookies as headstones or even a sprinkling of crushed graham crackers for an extra touch of spookiness.
These Graveyard Pudding Cups are sure to become a new Halloween tradition in your household.
Frequently Asked Questions
Where Can I Buy the Necessary Ingredients for Graveyard Pudding Cups?
You can find the ingredients for this recipe at your local grocery store.
Head to the baking aisle for pudding mix, Oreo cookies, and food coloring. The dairy section will have whipped cream or cool whip.
You might also need plastic cups or jars to assemble the pudding cups.
Check the produce section for gummy worms or other spooky garnishes.
With a quick trip to the store, you'll have everything you need to make these fun and festive treats.
How Long Do Graveyard Pudding Cups Typically Last?
Graveyard pudding cups typically last 3-5 days when stored in the refrigerator.
The creamy pudding and crunchy cookie crumbs maintain their texture and flavor best during this time.
After that, the dessert may start to dry out or the ingredients could separate.
For optimal freshness, it's best to enjoy your graveyard pudding cups within a few days of making them.
With proper storage, you can savor the spooky and delicious treat at its peak.
Are Graveyard Pudding Cups Suitable for Vegetarians or Vegans?
Typically, graveyard pudding cups aren't suitable for vegetarians or vegans. They often contain dairy ingredients like milk and whipped cream, which are off-limits for those following plant-based diets.
However, you can find vegetarian or vegan-friendly alternatives that swap in non-dairy milk and whipped topping. Just check the ingredient list carefully to ensure it aligns with your dietary needs.
With a little creativity, you can enjoy a spooky treat that works for your lifestyle.
Can I Freeze Graveyard Pudding Cups for Later Use?
You can definitely freeze graveyard pudding cups for later use!
Just be sure to store them in an airtight container or freezer-safe bag.
When you're ready to enjoy them, simply thaw in the refrigerator overnight.
The texture may change slightly, but the flavors will still be delicious.
Freezing is a great way to extend the shelf life of these tasty treats and enjoy them whenever the mood strikes.
Are There Any Health Benefits Associated With Graveyard Pudding Cups?
When it comes to graveyard pudding cups, there aren't really any significant health benefits to speak of.
These treats are primarily made up of sugary pudding, crushed cookies, and candy toppings – not exactly a nutritional powerhouse.
While they may be fun and festive, graveyard pudding cups are best enjoyed in moderation as an occasional indulgence.
Instead, focus on incorporating more whole, nutrient-dense foods into your diet for better overall health.
Enjoy the pudding cups, but don't expect them to provide any real health advantages.