
Unleash your inner Halloween spirit by crafting a spooky haunted house gingerbread! This beloved holiday treat has ancient roots, with the Middle Ages seeing the incorporation of distinctive ginger flavor. Today, you'll knead rich, molasses-infused dough, roll out shapes, and bake sturdy gingerbread pieces. Decorate with royal icing and candies to create a visually striking dessert that captivates attention. Let your imagination soar as you experiment with unique designs and personalize your haunted creation. Display your masterpiece with pride, then slice into the delicious flavors – but be warned, you may not want to destroy this edible work of art! There's more to uncover about the history and craft of haunted house gingerbread.
Key Takeaways
- Gingerbread can be crafted into haunted house designs, incorporating spooky elements and unique shapes to create visually striking holiday desserts.
- Decorating gingerbread houses with royal icing and candies allows for personalization and the incorporation of a haunted aesthetic.
- Baking gingerbread components and assembling the haunted house can become a family-bonding experience, fostering creativity and lasting memories.
- Displaying the completed haunted gingerbread house as a centerpiece during holiday gatherings creates a captivating focal point.
- Enjoying the delicious flavors of the gingerbread house, despite hesitation to destroy the intricate design, is a rewarding part of the experience.
Top picks for "haunt house gingerbread"
Open Amazon search results for this keyword.
As an affiliate, we earn on qualifying purchases.
History
Gingerbread's origins can be traced back to ancient Egypt, where honey-sweetened breads were baked in intricate shapes. Over time, this delectable tradition spread throughout Europe, evolving into the beloved gingerbread we know and love today.
In the Middle Ages, European bakers experimented with spices, eventually incorporating the distinctive ginger flavor that became a hallmark of gingerbread. As gingerbread grew in popularity, it took on various forms, from simple cookies to elaborate house-shaped creations.
The tradition of shaping gingerbread into whimsical structures gained particular traction in Germany, where families would craft detailed gingerbread houses during the holiday season. These enchanting edible structures inspired the iconic gingerbread houses that have become a staple of modern Christmas celebrations.
Additionally, much like how regional water parks contribute to local economies, gingerbread houses bring communities together through festive baking events and competitions.
Today, gingerbread's timeless charm continues to captivate bakers and enthusiasts alike, with endless opportunities to create unique and festive designs, from haunted houses to charming cottages. The history of this beloved treat is a testament to the enduring power of culinary innovation and the joy of sharing homemade delights.
Recipe
Gingerbread has long been a beloved holiday treat, evoking the warmth and spice of the season. This haunted house version takes the traditional recipe and transforms it into a whimsical and spooky centerpiece for your Halloween celebrations.
The rich, molasses-infused dough and intricate decorations create a delightfully eerie confection that's sure to delight both young and old. To make your Halloween even more enjoyable, consider pairing your gingerbread creation with activities like setting up a portable camping toilet for added convenience during outdoor festivities.
Preparing this haunted house gingerbread requires a bit of patience and attention to detail, but the end result is well worth the effort. The process of constructing the house and adorning it with ghoulish details is a fun activity the whole family can enjoy, making memories that will last long after the last crumb has been devoured.
Cooking Steps
First, knead the dough on a floured surface until it's smooth and pliable.
To add some festive flair, consider using colorful sprinkles to mimic the look of Cotton Candy Ice Cream.
Next, roll out the dough to a 1/4-inch thickness, then use cookie cutters to cut out your haunted house shapes.
Step 1. Knead Dough on Floured Surface
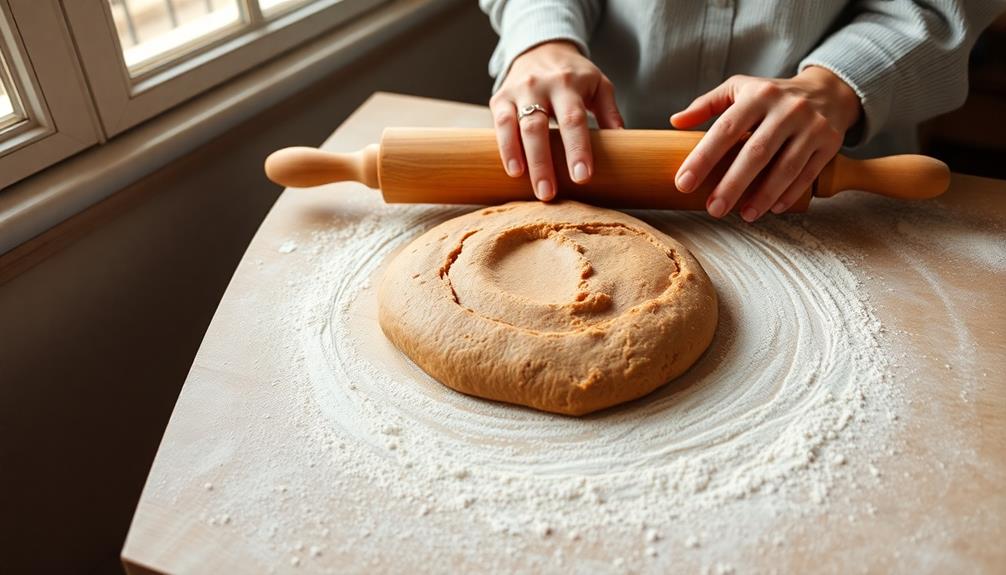
To begin, knead the dough on a lightly floured surface. Use the heel of your hand to push the dough away from you, then fold it back toward you. Rotate the dough and repeat this process for 2-3 minutes until the dough becomes smooth and elastic.
Don't be afraid to add more flour if the dough starts to stick to the surface. The texture of the dough should be soft yet firm, similar to the comfort of modern farmhouse textiles that add warmth to a space.
Once the dough is nicely kneaded, it's time to roll it out. Lightly flour the surface again and use a rolling pin to gently roll the dough out to your desired thickness, about 1/4 inch.
Be careful not to overwork the dough, as this can make it tough. Use cookie cutters to cut out your haunted house shapes, transferring them to a parchment-lined baking sheet as you go.
Gather any scraps, re-roll, and cut out more shapes until you've used all the dough. Now you're ready to bake your haunted gingerbread houses!
Step 2. Roll Out Dough to 1/4-Inch Thickness
Once you've kneaded the dough to the desired texture, it's time to roll it out. Dust your work surface generously with flour to prevent the dough from sticking. Gently press the dough into a rough rectangle shape with your hands.
Using a rolling pin, start rolling the dough from the center outward, applying even pressure. Rolling out dough to 1/4-inch thickness is essential for achieving the right texture in your numerous varieties of gingerbread cookies. Roll the dough until it's approximately 1/4-inch thick, turning it occasionally to ensure an even thickness.
Be mindful of the edges, rolling them just as much as the center to maintain a level surface. If the dough starts to stick, simply dust the surface and your rolling pin with a bit more flour.
Once you've achieved the desired thickness, use a bench scraper or sharp knife to trim the edges, creating clean, straight sides. This step ensures your gingerbread house pieces will fit together neatly.
With the dough rolled out, you're now ready to begin cutting out the various shapes needed for your haunted house design.
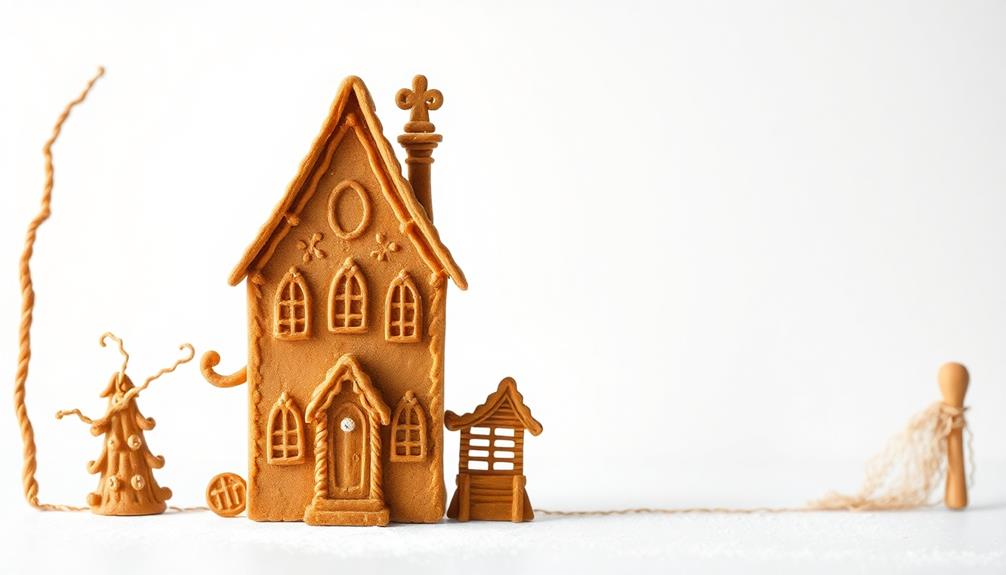
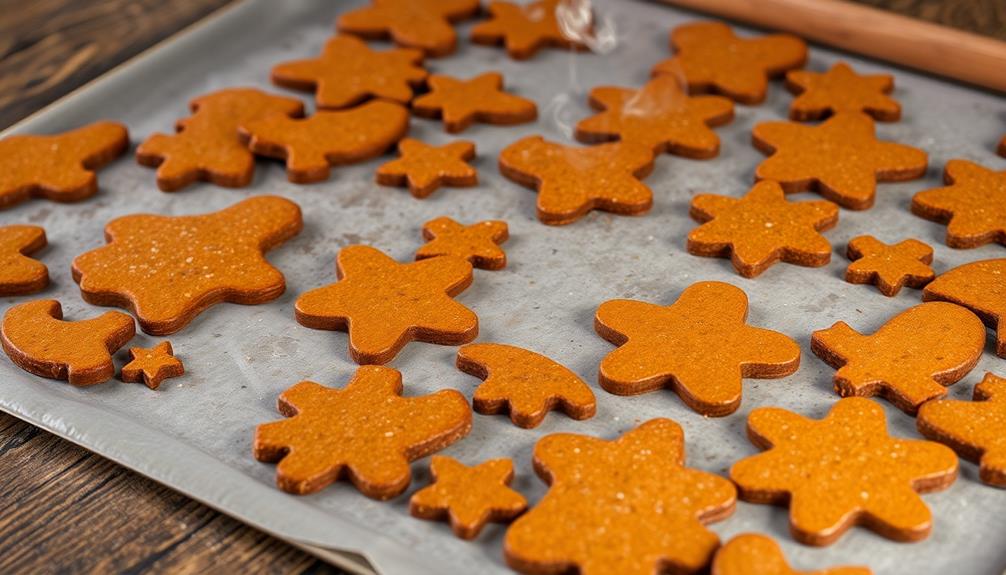
Step 3. Cut Out House Shapes
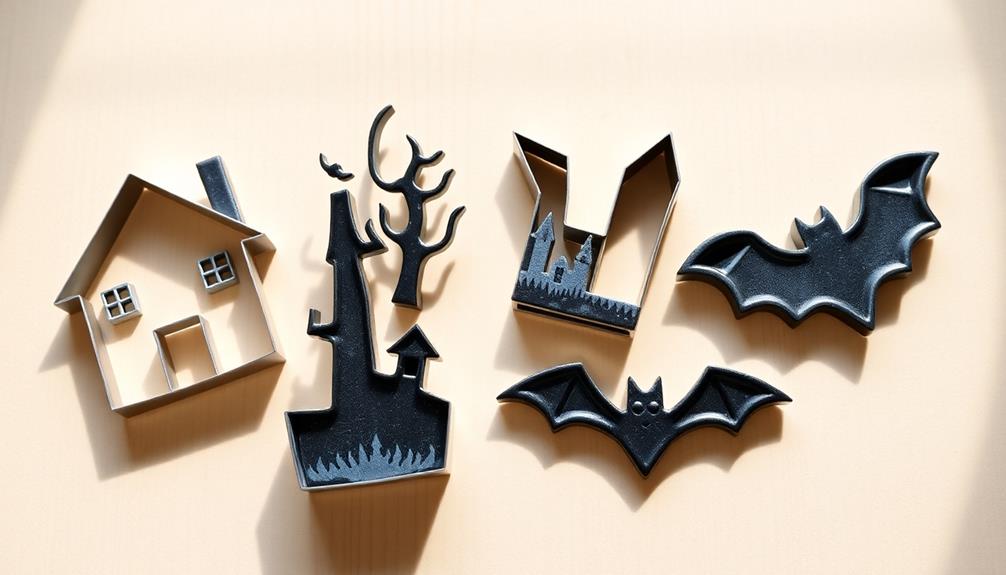
With the dough rolled out to the perfect 1/4-inch thickness, you can now start cutting out the various house shapes for your haunted gingerbread creation.
Grab your favorite cookie cutters and let your imagination run wild. You can create a traditional gingerbread house, complete with walls, a roof, and a chimney, or get creative with spookier shapes like haunted mansions, creepy cottages, or even a gingerbread graveyard.
Don't be afraid to experiment – the more unique your shapes, the more character your haunted house will have.
Carefully transfer each cut-out shape onto a parchment-lined baking sheet, ensuring they're evenly spaced. This will make the assembly process much easier later on.
Remember to re-roll any dough scraps and continue cutting out shapes until you've used up all the dough.
With your house pieces ready, you're one step closer to bringing your haunted gingerbread vision to life.
Step 4. Bake Gingerbread House Pieces
Preheat your oven to 350°F (175°C). Time to bake the gingerbread pieces for your haunted house!
First, roll out your dough to about 1/4-inch thickness on a lightly floured surface. Use your pre-made house templates to carefully cut out the walls, roof, and any other shapes you'll need. Transfer the pieces to a parchment-lined baking sheet, making sure they're spaced apart.
Bake the pieces for 12-15 minutes, or until they're golden brown and firm to the touch. Keep a close eye to prevent over-baking, which can make the gingerbread brittle.
Once done, let the pieces cool completely on the baking sheet before handling. Trim any rough edges or imperfections with a sharp knife.
Now you've got the sturdy, flavorful foundations for your haunted gingerbread house. Time to start assembling!
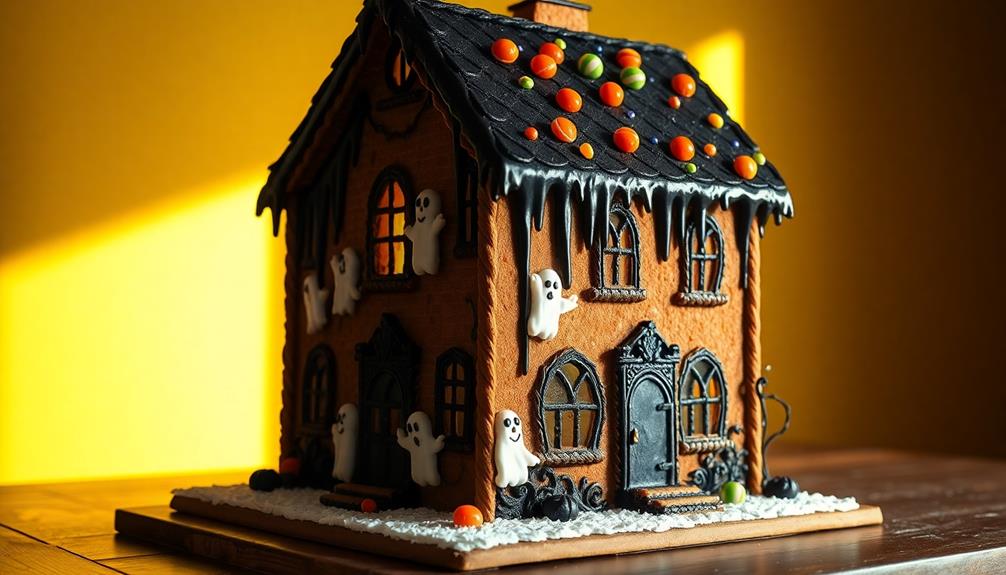
Step 5. Decorate With Royal Icing and Candies

Now that you have your sturdy gingerbread pieces, it's time to bring your haunted house to life with royal icing and candies.
Start by preparing your royal icing. Mix the powdered sugar, egg whites, and a splash of vanilla extract until you have a smooth, spreadable consistency. This will act as the "glue" to hold your gingerbread pieces together and decorate the house.
Next, it's time to get creative with your candy decorations. Licorice strips can make eerie window frames, while gumdrops and jellybeans can become colorful shingles or spooky accents.
Crushed cookies or graham crackers can be scattered around the base to create a "spooky" graveyard. Be sure to use your royal icing to "glue" the candies in place, creating a haunting masterpiece. For an added touch, consider using candy eyes or other ghoulish decorations to bring your haunted snack to life. If you really want to go all out, try incorporating some edible food coloring to give your graveyard a touch of “blood” or other eerie hues. This spooky breakfast recipe is sure to be a hit at any Halloween gathering and is a fun activity to do with kids.
Don't be afraid to experiment and have fun with your design. The more unique and imaginative your touches, the more your haunted gingerbread house will stand out.
Let your creativity shine through and enjoy the process of bringing your haunted creation to life.
Final Thoughts
As you put the final touches on your haunted house gingerbread creation, take a moment to step back and admire your handiwork.
You've transformed a simple gingerbread structure into a spooky masterpiece, complete with intricate details and a haunting atmosphere. The combination of royal icing and candies has brought your vision to life, creating a truly impressive and visually striking dessert.
Now that your haunted house is complete, consider displaying it as a centerpiece for your holiday gatherings. Its eye-catching design is sure to impress family and friends, and they'll be amazed by the time and effort you've put into crafting this edible work of art.
Don't be surprised if they're hesitant to take a bite, as it may be too beautiful to destroy! When you're ready, carefully slice into the gingerbread and enjoy the delicious flavors that have been infused into every element of your haunted creation.
Frequently Asked Questions
How Long Will the Gingerbread House Last Before Going Stale?
Your homemade gingerbread creation can stay fresh for quite a while with proper storage.
Typically, a gingerbread house will last 2-4 weeks before going stale, depending on the ingredients and how it's kept.
Store it in an airtight container at room temperature, away from direct sunlight or heat.
With a little care, you can enjoy your festive gingerbread for several weeks and impress your guests with your baking skills.
Can the Gingerbread House Be Used as a Decoration Year-Round?
A gingerbread house can absolutely be used as year-round decor!
While it may not stay fresh indefinitely, you can display it proudly for several months before it starts to go stale.
Just keep it in a cool, dry place and avoid handling it too much.
With a little creativity, you can even transform your gingerbread house into a unique piece of art that adds charm to your home all year long.
What Type of Ghosts or Spirits Might Haunt the Gingerbread House?
The gingerbread house could be haunted by a variety of ghostly inhabitants.
Perhaps a mischievous poltergeist who enjoys rearranging the candy décor or a mysterious spirit who leaves behind ectoplasmic crumbs.
You might even spot a friendly ghoul munching on a gingerbread man!
These paranormal guests could add an extra touch of whimsy and wonder to your home, though they might also require some creative problem-solving to keep them from disrupting your holiday cheer.
Can the Gingerbread House Be Displayed Outdoors in Warm Weather?
Displaying your gingerbread house outdoors in warm weather isn't recommended. The heat and humidity can quickly soften the dough, causing it to warp and collapse.
Even if you coat it with a protective sealant, the sun's rays will eventually disintegrate the intricate details.
For best results, keep your gingerbread creation indoors in a cool, dry environment.
With proper storage, you can enjoy its spooky charm for weeks to come!
How Do I Prevent the Gingerbread House From Collapsing?
To prevent your gingerbread house from collapsing, start by using a sturdy base, like a thick cardboard or plywood.
Reinforce the structure with internal supports, like dowels or skewers, to provide stability.
Apply a generous amount of royal icing between the panels to create a strong bond.
Let the icing dry completely before adding any decorations.
Finally, handle the house carefully and avoid placing too much weight on top.
With these tips, your gingerbread creation will stand tall and proud.