
Bring the festive spirit of Halloween into your kitchen with jack-o'-lantern stuffed peppers! These vibrant orange peppers, carved with spooky faces, are filled with a savory mixture of ground turkey, rice, and aromatic veggies. Not only do they look impressive, but the hearty filling also makes them a healthy and delightful meal. Pair them with a scoop of creamy birthday cake ice cream for an extra celebratory touch. These peppers aren't just for Halloween – you can enjoy them year-round as a unique twist on a classic dish. Now that you know the history and recipe, let's dive into the step-by-step instructions to make these enchanting jack-o'-lanterns come to life in your own kitchen!
Key Takeaways
- Stuffed bell peppers carved with jack-o'-lantern designs offer a festive and creative way to enjoy seasonal produce during the autumn and Halloween season.
- The savory filling made with ground turkey, rice, and aromatic vegetables provides a healthy and hearty meal option.
- Topping the baked stuffed peppers with toasted pumpkin seeds adds texture and flavor, complementing the visual appeal.
- Garnishing the stuffed peppers with spooky elements, such as black olive shapes or edible glitter, enhances the Halloween theme.
- The recipe is suitable for year-round enjoyment, not just limited to the Halloween period, making it a versatile dish.
History
Carving jack-o'-lanterns has long been a beloved Halloween tradition, dating back centuries to the Celtic festivals of Samhain. The practice of hollowing out and carving gourds, particularly turnips and potatoes, originated in Ireland, where they were believed to ward off the spirits of the dead.
These spooky lanterns were named after Stingy Jack, a clever trickster who trapped the devil and was condemned to roam the earth with only a hollowed-out turnip containing a coal to light his way.
When Irish immigrants brought the tradition to America, they discovered that pumpkins, abundant in the New World, made the perfect canvas for their carved lanterns.
Over time, the humble jack-o'-lantern evolved from a simple folk custom to a quintessential symbol of Halloween, with intricate designs and glowing faces adorning homes and neighborhoods each autumn. In addition to being a festive decoration, the pumpkin has also become a popular ingredient in seasonal recipes. From pumpkin soups and pies to pumpkin quesadilla recipes, this versatile gourd is now embraced as a staple of autumn cuisine. Its transformation from a mere piece of decor to a cherished ingredient highlights the enduring popularity and significance of the jack-o’-lantern in modern Halloween celebrations.
Recipe
Fall is the perfect time to get creative with seasonal produce, and these Jack-o'-Lantern Stuffed Peppers are a fun and delicious way to celebrate the spooky season. The vibrant orange peppers, filled with a savory and satisfying stuffing, make for a visually striking and flavorful dish that's sure to impress your guests.
For dessert, consider pairing this festive meal with a scoop of Birthday Cake Ice Cream to keep the celebration going. These stuffed peppers aren't only a festive addition to your Halloween spread, but they're also a healthy and hearty meal option that can be enjoyed year-round. The combination of ground turkey, rice, and a variety of aromatic vegetables creates a well-balanced and satisfying filling that's sure to satisfy your cravings.
- 4 medium-sized orange bell peppers
- 1 lb ground turkey
- 1 cup cooked rice
- 1 onion, diced
- 2 cloves garlic, minced
- 1 cup diced tomatoes
- 1 tsp dried oregano
- 1 tsp dried basil
- 1/2 tsp salt
- 1/4 tsp black pepper
- 1 cup shredded mozzarella cheese
Preheat your oven to 375°F (190°C). Cut the tops off the bell peppers and remove the seeds and membranes. In a large skillet, cook the ground turkey over medium heat until browned and crumbled.
Add the onion and garlic, and sauté until fragrant and the onion is translucent. Stir in the cooked rice, diced tomatoes, oregano, basil, salt, and pepper. Fill each bell pepper cavity with the turkey and rice mixture, and top with shredded mozzarella cheese.
Place the stuffed peppers in a baking dish and cover with foil. Bake for 30-35 minutes, or until the peppers are tender and the cheese is melted and bubbly. For a fun and festive touch, use a knife to carve jack-o'-lantern faces on the tops of the peppers before baking.
Serve these delightful Jack-o'-Lantern Stuffed Peppers hot and enjoy the perfect blend of seasonal flavors.
Cooking Steps
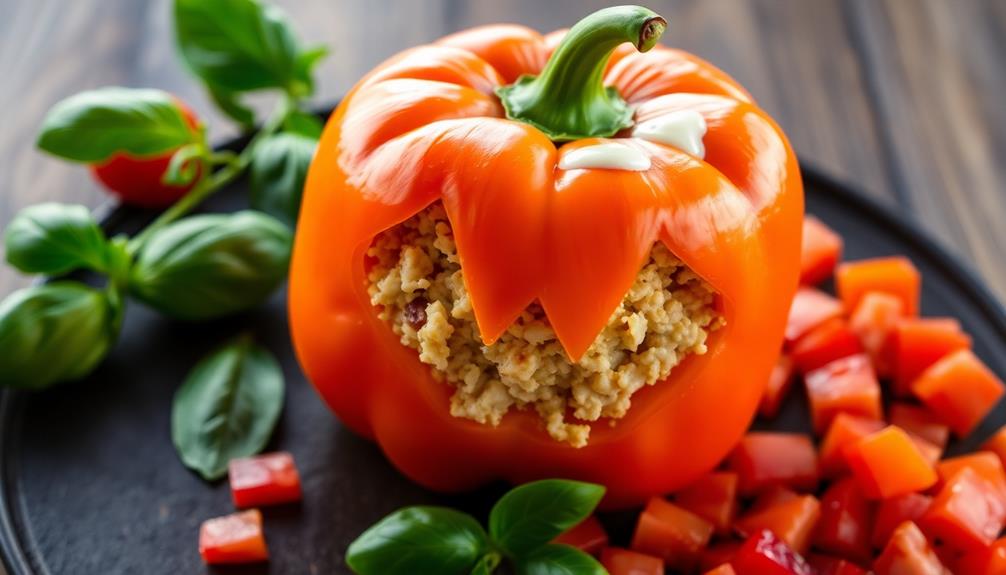
Start by carving your bell peppers into fun jack-o'-lantern shapes, making sure to include unique facial features for added charm.
Next, fill the peppers with a savory rice mixture, perhaps incorporating some of your favorite seasonal produce for an extra burst of flavor diverse flavors in fermentation.
Step 1. Carve Jack-O'-Lantern-Shaped Bell Peppers

With a steady hand and a sharp knife, you'll transform ordinary bell peppers into whimsical Jack-o'-lanterns. Begin by selecting firm, medium-sized bell peppers in a variety of colors. Using a sharp paring knife, carefully slice off the tops, creating a "lid" for your pumpkin-shaped peppers. Scoop out the seeds and membranes, ensuring a clean, hollow interior.
For an added sensory experience, consider incorporating essential oils like mood enhancement into your cooking area while you prepare your festive treats.
Next, let your creativity shine as you carve the peppers. Sketch a simple jack-o'-lantern face on the peppers, then use the knife to carefully cut out the features. Avoid cutting all the way through the pepper walls, as you want to maintain their sturdy structure. Embrace any imperfections – the unique, handmade look adds to the charm.
Once your jack-o'-lanterns are carved, replace the lids and place them on a baking sheet, ready to be stuffed and baked.
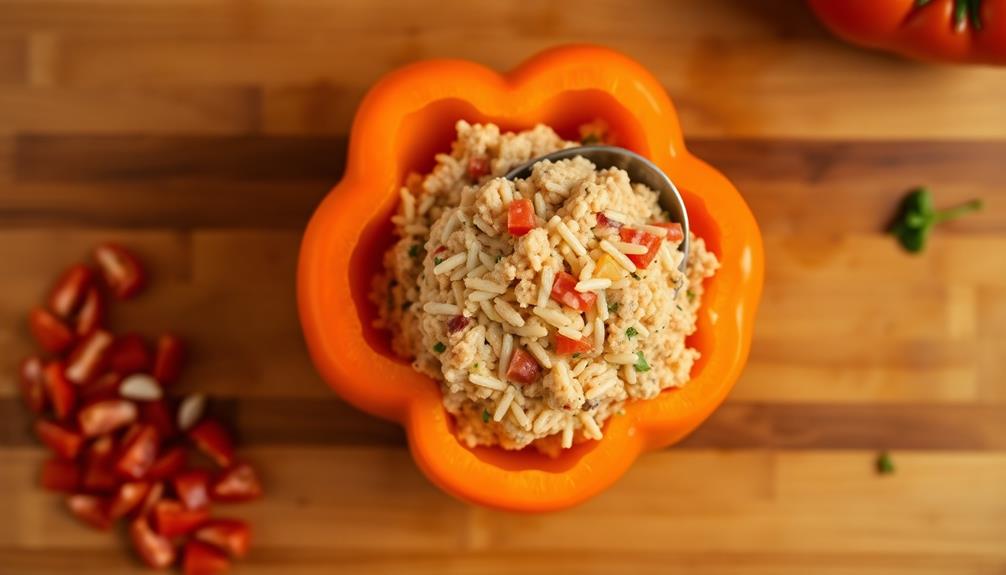
Step 2. Stuff Peppers With Rice Mixture
Preheat your oven to 350°F (175°C) and prepare a baking sheet.
Now, let's stuff those jack-o'-lantern-shaped bell peppers! In a large bowl, combine cooked rice, diced tomatoes, diced onion, minced garlic, and your desired seasonings like chili powder, cumin, and a pinch of salt and pepper.
For an added twist, consider incorporating some finely chopped vegetables or beans to enhance the nutritional value of the dish, similar to the way one might assess storage requirements in a bathroom renovation assessing storage requirements.
Stir the mixture until well blended.
Next, carefully slice the tops off the carved peppers and scoop out the seeds and membranes. Stuff each pepper cavity with the rice mixture, packing it in tightly.
Place the stuffed peppers on the prepared baking sheet. If you have any remaining rice mixture, you can spoon it around the base of the peppers.
Bake the stuffed peppers for 30-35 minutes, or until the peppers are tender and the filling is hot and bubbly.
Serve your spooky-yet-delicious jack-o'-lantern stuffed peppers warm. Enjoy this fun and festive fall dish!
Step 3. Bake Stuffed Peppers Until Tender
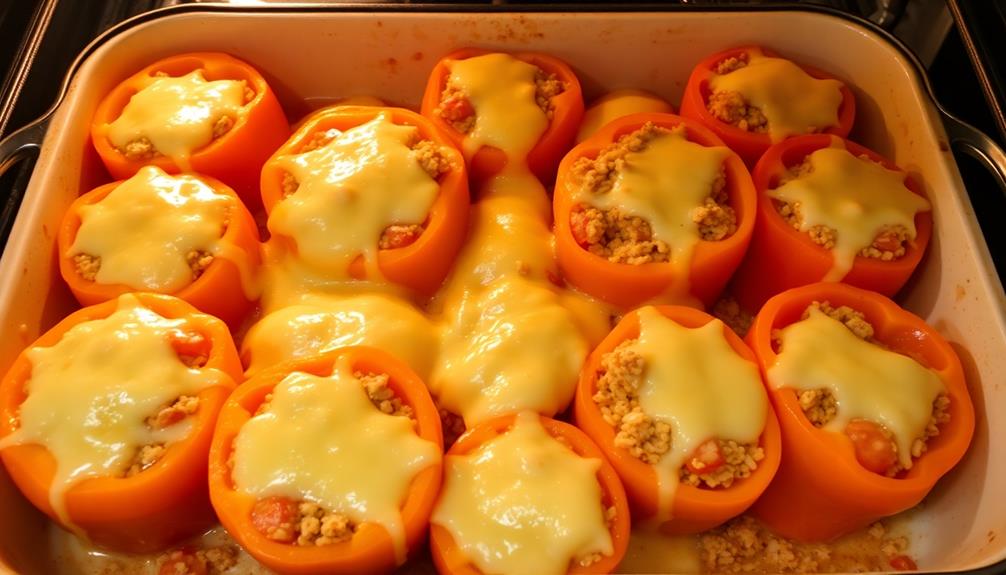
Bake the stuffed peppers for 30-35 minutes, or until the peppers are tender and the filling is hot and bubbly. This ensures the peppers are cooked through and the rice mixture is piping hot.
Halfway through the baking time, you may want to cover the peppers with foil to prevent the tops from browning too much. This helps the insides cook evenly without the exteriors getting too crispy.
Additionally, consider the impact of water usage in cooking, as more efficient methods can reduce overall consumption; if you're interested, check out eco-friendly toilets for innovative solutions.
Once the peppers are tender when poked with a fork, they're ready to serve. The rice should be fluffy and the cheese, if you added any, should be melted and gooey.
Let the stuffed peppers cool for a few minutes before serving – the filling will be quite hot straight from the oven. Garnish with fresh herbs like parsley or basil for a pop of color and extra flavor.
Enjoy your festive and delicious jack-o'-lantern stuffed peppers!
Step 4. Garnish With Toasted Pumpkin Seeds
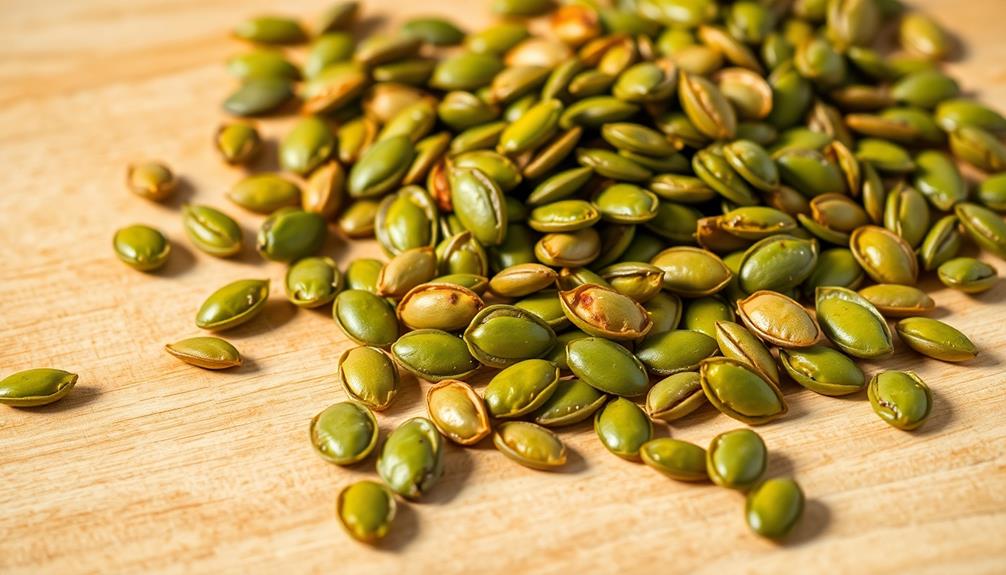
To add a final festive touch, top the baked stuffed peppers with toasted pumpkin seeds.
These crunchy little seeds not only look great but also provide a delightful textural contrast to the soft, savory filling. Simply toast the pumpkin seeds in a dry skillet over medium heat, stirring frequently, until they're lightly golden and fragrant, about 3-5 minutes. Be careful not to let them burn.
Once the seeds are toasted, sprinkle them generously over the top of the baked stuffed peppers. The nutty, toasted flavor of the pumpkin seeds complements the sweetness of the peppers and the bold seasonings in the filling.
Plus, the vibrant orange color of the seeds echoes the festive jack-o'-lantern theme, making your dish even more visually appealing. Serve the peppers warm, allowing your guests to enjoy the satisfying crunch of the pumpkin seed topping with each bite.
Step 5. Serve With Spooky Halloween Garnishes

To really make your jack-o'-lantern stuffed peppers extra spooky, consider adding a few ghoulish garnishes. One easy way to create a creepy effect is by cutting out shapes from black olives or bell peppers to resemble eyes, mouths, or other eerie features. Carefully place these on top of the stuffed peppers for a playful, Halloween-themed presentation.
You can also utilize orange and black food coloring to create spiderweb designs around the plates or drizzle "blood" (a mixture of ketchup and hot sauce) across the peppers for a gory touch.
Edible glitter in orange, purple, or black hues can add a shimmering, supernatural element to your dish. For a final flourish, sprinkle toasted pumpkin seeds around the plate to mimic the appearance of scattered bones or teeth.
These simple yet impactful garnishes will transform your stuffed peppers into a truly spine-tingling Halloween delight. Get creative and let your spooky spirit shine through!
Final Thoughts
With the jack-o'-lantern peppers now ready to serve, you can look forward to their vibrant presentation and delightful flavors.
These festive stuffed peppers are sure to be the highlight of your Halloween gathering, drawing oohs and aahs from your guests as they admire the carved pumpkin designs. The savory ground meat, rice, and melted cheese filling complements the sweet and crunchy pepper exteriors perfectly.
As you arrange the jack-o'-lantern peppers on your serving platter, don't forget to add the final spooky touches with your choice of Halloween garnishes. A sprinkle of pumpkin seeds, a drizzle of orange-tinted sour cream, or a scattering of edible eyeballs can elevate the ghoulish presentation.
Your guests will be delighted by the creativity and attention to detail you've put into this dish. With its impressive look and satisfying flavors, the jack-o'-lantern stuffed peppers are sure to become a new Halloween tradition in your household.
Frequently Asked Questions
Can I Use Different Types of Peppers?
Absolutely! You can use a variety of pepper types for stuffed peppers.
Bell peppers are a classic choice, but you could also try sweet Italian peppers, poblanos, or even spicy jalapeños or habaneros for a kick.
Just keep in mind that different peppers will have varying levels of sweetness, heat, and thickness, which may affect cooking times and stuffing amounts.
The key is to choose peppers that suit your personal taste preferences.
How Can I Adjust the Spice Level?
To adjust the spice level in your dish, you've got some great options!
If you prefer a milder flavor, opt for bell peppers or sweet Italian peppers.
For a bit more heat, try using poblano, anaheim, or banana peppers.
If you really want to kick things up, go for jalapeños or serrano peppers.
Just remember to adjust the amount to suit your taste buds.
Have fun experimenting with different pepper varieties and spice levels to find your perfect balance!
Can I Make This Dish in Advance?
Yes, you can absolutely make this dish in advance! The stuffed peppers will hold up well in the fridge for 2-3 days before you're ready to bake them.
Just prepare the filling, stuff the peppers, and store them in an airtight container.
When you're ready to serve, simply pop them in the oven and enjoy.
This make-ahead option is super convenient, especially if you're hosting a party or meal.
Give it a try – your future self will thank you!
What Is the Best Way to Carve the Peppers?
To carve the peppers, you'll want to start by cutting off the top and removing the seeds and membranes inside.
Then, use a small, sharp knife to carefully carve out a jack-o'-lantern face on the front of each pepper. Take your time and be precise, as the peppers can be delicate.
Remember to save the pepper tops – you'll need them to act as "lids" for your jack-o'-lanterns.
With a bit of practice, you'll be carving perfectly spooky peppers in no time!
Can I Freeze the Leftover Stuffed Peppers?
Yes, you can definitely freeze the leftover stuffed peppers!
Simply let them cool completely, then place them in an airtight container or freezer-safe bags.
When you're ready to enjoy them, just thaw them in the fridge overnight and reheat in the oven until hot.
Freezing is a great way to preserve those delicious flavors and enjoy them again later on.
Just be sure to label the container with the date so you know how long they've been in the freezer.