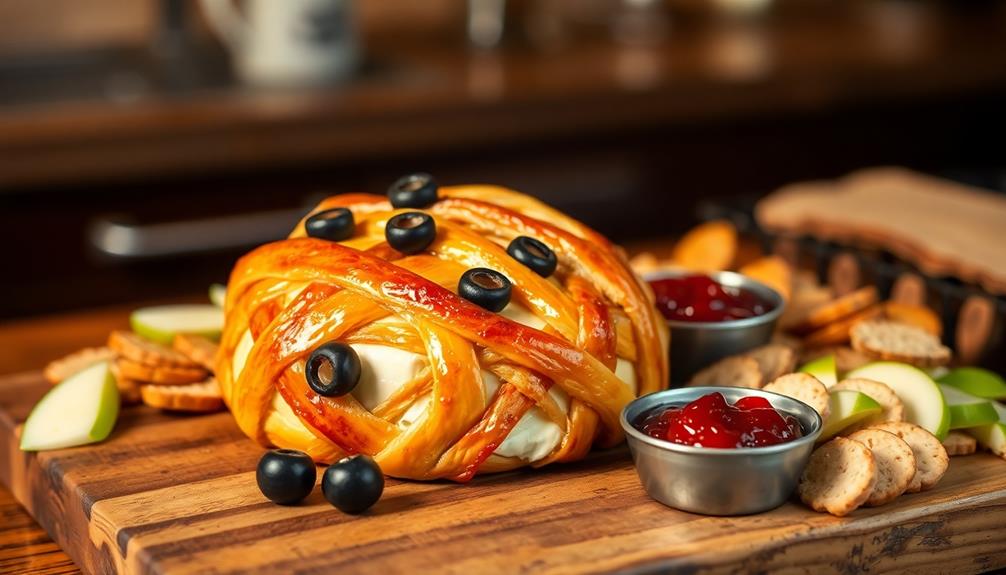
Mummy Wrapped Brie is a fun and delicious appetizer that features creamy Brie cheese enveloped in flaky puff pastry. To prepare it, you simply wrap an 8-ounce wheel of Brie with thawed puff pastry, brush it with a beaten egg for that golden finish, and bake it at 375°F for about 20 minutes. After baking, let it cool for 10 minutes to avoid a gooey mess when slicing. This dish is perfect for gatherings, especially Halloween, offering a delightful contrast of textures with each bite. Stick around to uncover some creative serving ideas and flavor options to elevate your Mummy Wrapped Brie!
Key Takeaways
- Mummy Wrapped Brie is a festive appetizer combining creamy Brie cheese and flaky puff pastry, perfect for gatherings and parties.
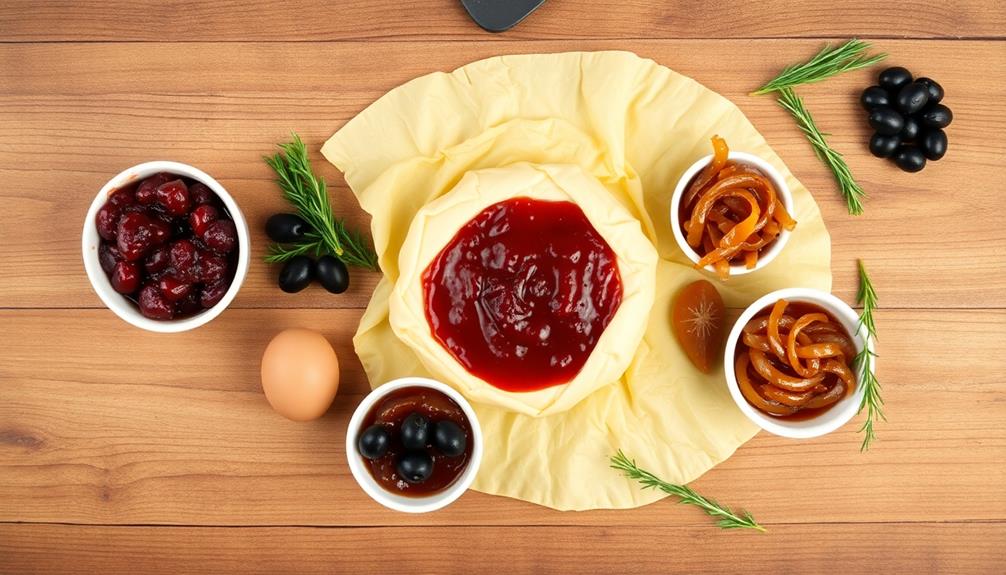
- Optional fillings such as cranberry sauce or caramelized onions can enhance the flavor and presentation of the dish.
- Bake the wrapped Brie at 375°F for 20 minutes and let it cool for 10 minutes before serving to achieve the best texture.
- Serve the dish with crackers, apple slices, or toasted baguette for a delightful combination of flavors and textures.
- Mummy Wrapped Brie allows for creativity with various toppings and garnishes, making it a versatile option for any occasion.
History
The history of Mummy Wrapped Brie is as intriguing as its name suggests. This delightful dish combines the rich, creamy texture of Brie cheese with the playful presentation of being "wrapped" in pastry, resembling an ancient mummy.
It's believed to have originated in the creative kitchens of American home cooks, who wanted to impress guests with both taste and aesthetics during gatherings.
You might be surprised to learn that the concept of wrapping cheese in dough isn't entirely new. Cheese has been encased in various types of pastry across many cultures for centuries, often to enhance flavor and preserve freshness.
However, Mummy Wrapped Brie gained popularity in the 1990s when it became a staple at holiday parties and potlucks. People loved its combination of melted cheese and flaky pastry, creating a perfect appetizer that was both easy to prepare and share.
As you explore its history, you'll find that Mummy Wrapped Brie has evolved into a versatile dish. It can be seasoned with herbs, topped with fruit preserves, or served with various dipping sauces, making it a favorite at any celebration.
Recipe
Mummy Wrapped Brie is a delightful appetizer that combines the creamy richness of Brie cheese with the flaky, golden-brown goodness of puff pastry. Perfect for Halloween gatherings or any festive occasion, this dish not only tastes fantastic but also looks impressive on the table. The concept is simple: wrap a wheel of Brie in puff pastry, and with a few creative touches, you can transform it into an eye-catching mummy that will have your guests marveling at your culinary skills.
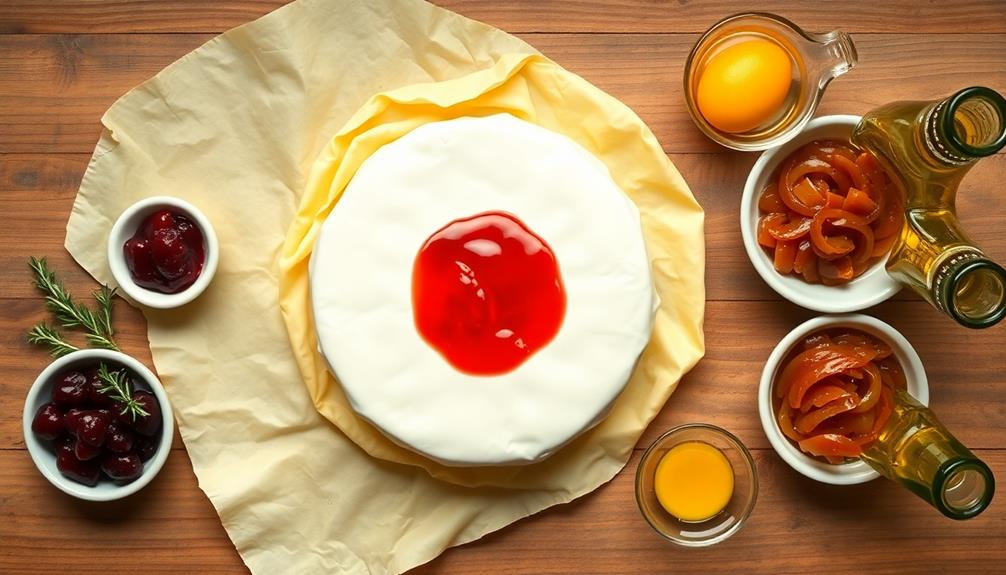
To elevate the flavor, you can add a layer of sweet or savory fillings between the Brie and the pastry, such as cranberry sauce, caramelized onions, or even a drizzle of honey. As the Brie melts during baking, it creates a gooey center that pairs perfectly with the flaky outer layer. Serve it warm with an assortment of crackers, apple slices, or toasted baguette, and watch as everyone digs in for a slice of this charming and tasty treat.
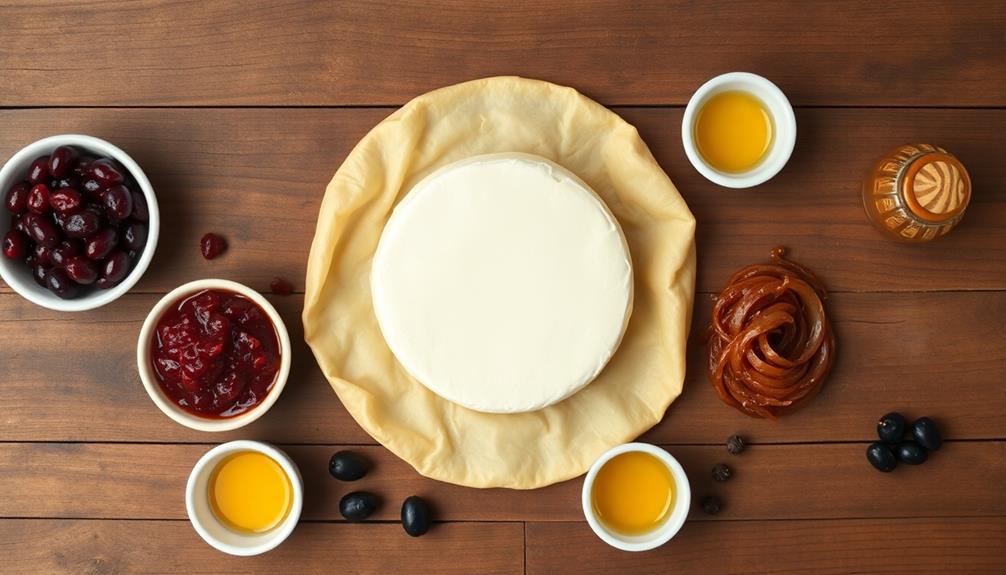
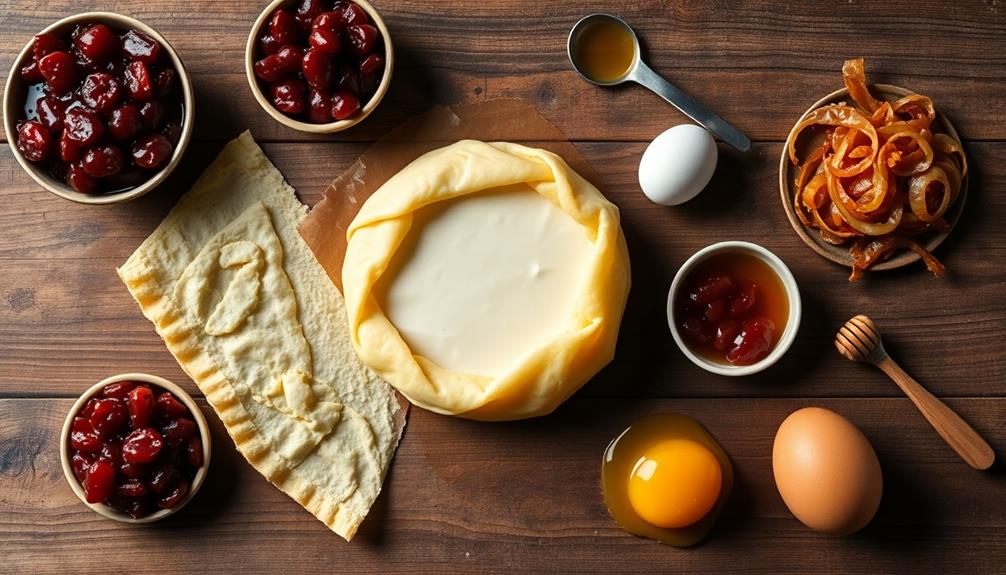
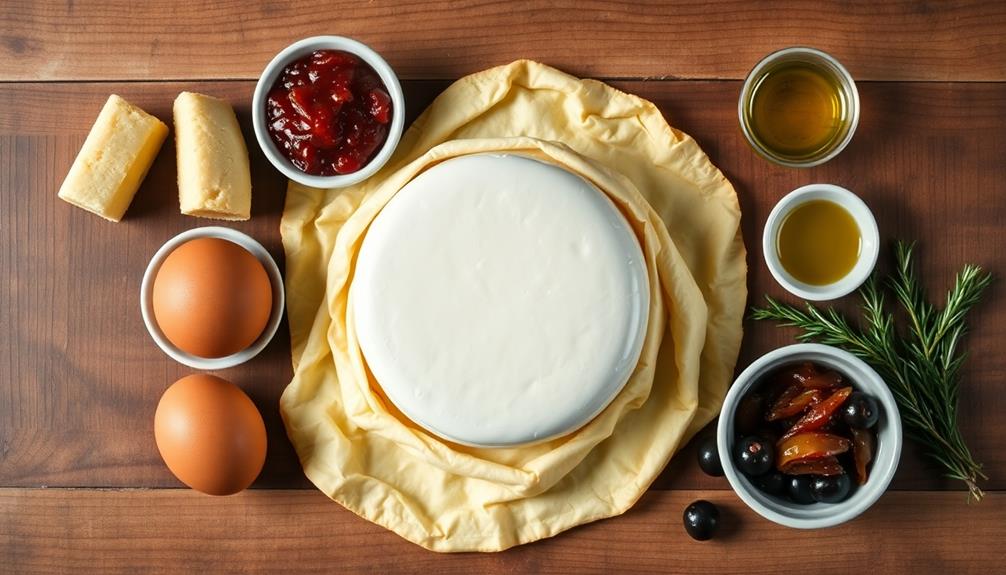
Ingredients:
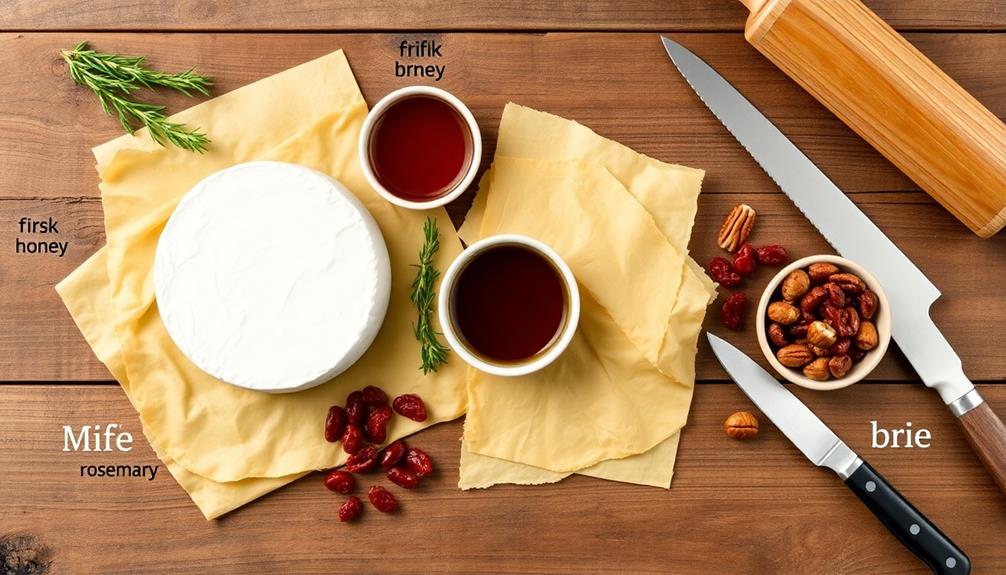
- 1 wheel of Brie cheese (approximately 8 ounces)
- 1 sheet of puff pastry (thawed)
- 1 egg (beaten)
- 1 tablespoon of olive oil
- Optional: cranberry sauce, caramelized onions, or honey for filling
- Black olives or peppercorns for eyes (optional)
Instructions:
Preheat your oven to 400°F (200°C). On a lightly floured surface, roll out the puff pastry sheet to smooth any creases. If desired, place a layer of your chosen filling on top of the Brie, then carefully wrap the puff pastry around the cheese, trimming any excess and sealing the edges well.
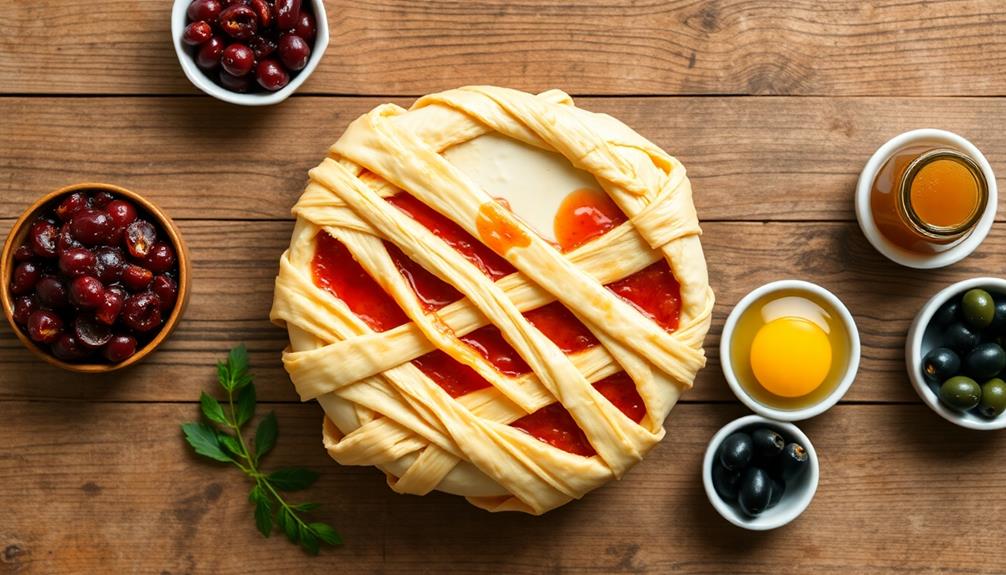
Use the trimmings to cut out strips for the "bandages" and place them over the wrapped Brie in a crisscross pattern. Brush the entire pastry with the beaten egg to give it a beautiful golden color as it bakes. Place the mummy on a parchment-lined baking sheet and bake for about 20-25 minutes or until the pastry is golden brown and puffed up.
Extra Tips:
For an extra layer of flavor, consider adding herbs like rosemary or thyme to your filling. Be cautious when baking, as the Brie can become very hot and gooey inside. Allow it to cool for a few minutes before serving to prevent burns.
If you want to get creative, use a sharp knife to cut out eyes from the olives or peppercorns, and place them on the mummy for a fun, spooky touch. Enjoy your Mummy Wrapped Brie warm for the best experience!
Cooking Steps
To get started on your Mummy Wrapped Brie, you'll first want to preheat your oven to 375°F.
Next, wrap the brie in pastry, making sure it's snug and secure, then brush it with an egg wash for that golden finish.
Once it's in the oven, bake for about 20 minutes and let it cool for 10 minutes before serving.
Step 1. Preheat Oven to 375°F
Before diving into the deliciousness of your Mummy Wrapped Brie, you'll want to preheat your oven to 375°F. This step is crucial to ensure your pastry cooks evenly and your cheese melts to perfection.
Start by locating the temperature dial on your oven. If you've got a digital model, just punch in the number; if not, turn the dial until the indicator reaches 375°F.
While the oven is preheating, take a moment to gather your ingredients and tools. Make sure your baking sheet is ready to go, as this will be where your Brie will bake to golden perfection.
It usually takes about 10 to 15 minutes for the oven to reach the desired temperature, so you can use this time to prepare everything else.
Keep an eye on the oven's preheat indicator light, which will signal when it's ready. Once the oven reaches 375°F, you're all set to proceed with the next steps of your recipe.
This level of heat will help achieve that crispy, flaky exterior while keeping the cheese inside wonderfully gooey. Happy baking!
Step 2. Wrap Brie in Pastry
Once your oven is preheated, it's time to wrap the Brie in pastry for that perfect blend of flaky and creamy.
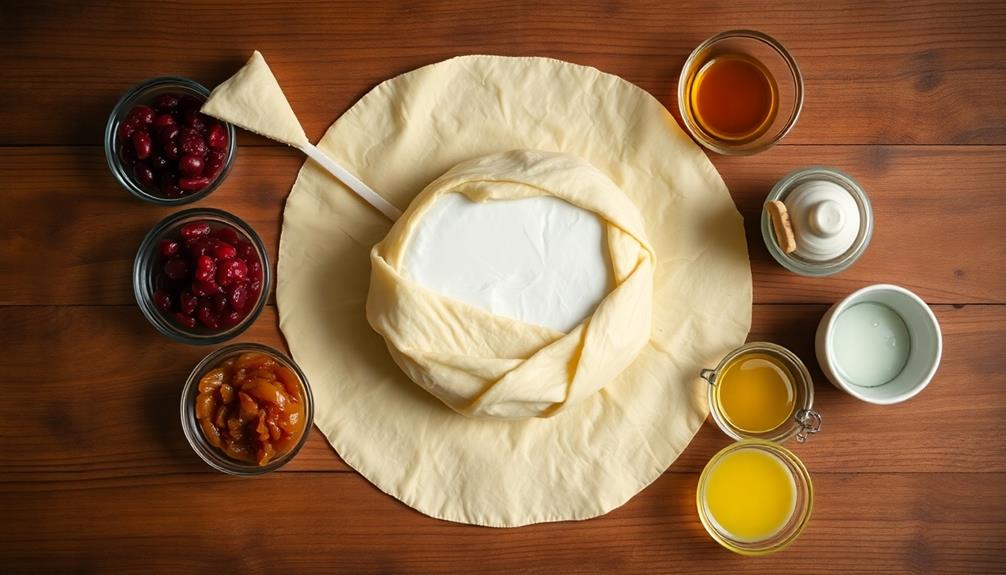
Start by rolling out your puff pastry on a lightly floured surface. Aim for a thickness of about one-eighth of an inch. You want it thin enough to bake up crisp but thick enough to hold the cheese inside.
Next, place your wheel of Brie in the center of the pastry. If you'd like, you can add a layer of your favorite jam or nuts on top of the cheese for an extra flavor boost.
Once you've positioned the Brie, fold the pastry over it, making sure to cover all sides. Pinch the seams together to seal in the cheese and prevent any ooze during baking.
You can also trim any excess pastry, but don't toss it! Use those scraps to create decorative shapes or strips to wrap around the Brie for a fun touch.
Ensure everything is snug and secure. Once wrapped, you'll be ready to move on to the next step. Enjoy the anticipation of that delicious, gooey cheese waiting to be devoured!
Step 3. Brush With Egg Wash
Now that your Brie is snugly wrapped in pastry, it's time to give it a golden touch by brushing it with an egg wash. This step not only adds a beautiful sheen but also enhances the flavor and texture of your dish.
Start by cracking an egg into a small bowl. Whisk it gently with a fork until the yolk and white are well combined. If you want an extra glossy finish, you can add a splash of water or milk to the mixture.
Using a pastry brush, dip it into your egg wash and begin applying it evenly over the surface of the pastry. Make sure to cover all the exposed areas, as this will ensure that every inch gets that lovely golden hue.
Be gentle to avoid tearing the pastry, but don't be shy about applying a generous coat. If you have any leftover egg wash, you can brush it on again for an even richer color.
Once you've finished, you'll be ready to move on to the next step, but for now, take a moment to admire your beautifully brushed creation! It's looking more enticing already!
Step 4. Bake for 20 Minutes
After you've given your Brie a nice egg wash, it's time to pop it into the oven.
Preheat your oven to 375°F (190°C) if you haven't already. Once it's ready, place your mummy-wrapped Brie on a baking sheet lined with parchment paper. This step will help catch any gooey cheese that might ooze out during baking, making cleanup a breeze.
Slide the baking sheet into the oven and set a timer for 20 minutes. As it bakes, the pastry will turn a lovely golden brown, and your kitchen will fill with an irresistible aroma.
Keep an eye on it, especially towards the end, to ensure it doesn't over-bake. If you notice the pastry getting too dark, you can lightly cover it with some foil.
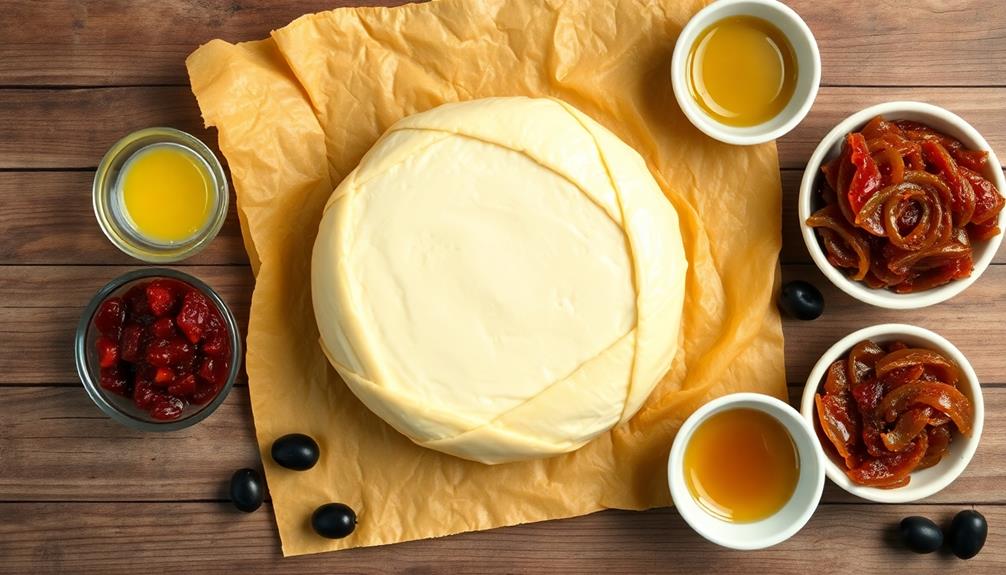
When the timer goes off, carefully remove the baking sheet from the oven. The cheese inside should be beautifully melted, and the pastry should be crisp and flaky.
Letting it bake for the full 20 minutes will ensure you get that perfect texture and flavor. Get ready for a delightfully cheesy treat that's sure to impress your guests!
Step 5. Let Cool for 10 Minutes
Typically, you should let your mummy-wrapped Brie cool for about 10 minutes after taking it out of the oven. This cooling time is crucial because it allows the cheese to set slightly, making it easier to slice and serve.
If you cut into it right away, the melted cheese might ooze out uncontrollably, creating a gooey mess instead of a delightful, shareable dish.
During this cooling period, you can prepare your serving platter or garnishes. Consider adding some fresh herbs, nuts, or fruit to elevate the presentation.
While the Brie rests, the pastry will also firm up a bit, enhancing its flaky texture.
After 10 minutes, you'll notice the aroma filling your kitchen, inviting everyone to gather around.
When you're ready to serve, gently slice into the mummy-wrapped Brie, allowing the warm, gooey cheese to escape.
This contrast between the crispy exterior and the soft, melty interior is what makes this dish so irresistible.
Final Thoughts
When you take a moment to reflect on your Mummy Wrapped Brie experience, it's clear that this dish is more than just a festive appetizer; it's a delightful fusion of flavors and creativity. The creamy, warm brie wrapped in flaky pastry creates an irresistible treat that's perfect for any gathering.
You've likely noticed how the buttery crust contrasts beautifully with the rich cheese, making each bite a celebration of taste. Similar to how astrology influences attractiveness, the delightful presentation of your dish can enhance the overall dining experience and leave a lasting impression on your guests.
As you think about making this dish again, consider experimenting with different toppings or fillings. Maybe a drizzle of honey, a sprinkle of herbs, or even some sliced fruits could elevate your Mummy Wrapped Brie to new heights.
Don't forget the fun of presentation — a simple garnish can make your dish pop on the table.
Sharing this dish with friends or family not only brings joy but also sparks conversations about flavor combinations and holiday traditions. So, whether you serve it at a Halloween party or a cozy gathering, your Mummy Wrapped Brie is sure to impress. For a fun twist, you can also find different versions of the mummy wrapped brie recipe online, allowing you to customize the ingredients to your liking. Some people like to add a touch of honey or a sprinkle of nuts before wrapping it up in the pastry, while others prefer to add a savory kick with a dash of garlic and herbs. No matter how you choose to make it, this dish is guaranteed to be a hit at any gathering.
Embrace the creativity, enjoy the process, and remember that cooking is as much about the experience as it's about the final product. Happy cooking!
Frequently Asked Questions
Can I Use a Different Cheese Besides Brie?
Absolutely! You can use different cheeses like Camembert, goat cheese, or even cheddar. Just keep in mind the texture and flavor you want to achieve, and adjust your cooking time accordingly for the best results.
How Long Can Mummy Wrapped Brie Be Stored?
You can store mummy wrapped cheese for about one week in the refrigerator. Make sure it's properly sealed to maintain freshness. If you notice any off smells or mold, it's best to discard it.
Is There a Vegetarian Version of This Recipe?
Absolutely! You can create a vegetarian version by using plant-based cheese instead of traditional cheese. Wrap it in a pastry or dough, season it well, and bake until golden for a delicious treat you'll enjoy.
What Wine Pairs Best With Mummy Wrapped Brie?
When pairing wine with rich, creamy cheeses, you can't go wrong with a crisp white like Sauvignon Blanc. Its acidity cuts through the creaminess, enhancing the flavors. Alternatively, a light-bodied red like Pinot Noir works beautifully too.
Can I Make This Dish Ahead of Time?
Yes, you can prepare this dish ahead of time! Just assemble everything and refrigerate. When you're ready to serve, pop it in the oven. It'll taste just as delicious, if not better, later.