The pumpkin patch cheese ball is a beloved autumnal classic, blending rich cream cheese, tangy cheddar, and the warm, earthy flavor of pumpkin puree into a festive appetizer that's perfect for sharing with loved ones during the harvest season. Originating in the 1950s, this creative recipe has evolved over decades, remaining a cherished seasonal delight. You'll love how easy it is to make, with simple steps that result in a visually striking centerpiece for any autumn-themed spread. Serve it up with an assortment of crackers, veggies, or crusty bread, and prepare to be delighted by its irresistible flavors and textures. Let's dive into the details…
Key Takeaways
- The Pumpkin Patch Cheese Ball is a classic autumn appetizer that combines cream cheese, cheddar, pumpkin puree, and warm spices for a festive flavor profile.
- Originating in the 1950s, this cheese ball has gained popularity as a cherished seasonal delight for autumn gatherings and celebrations.
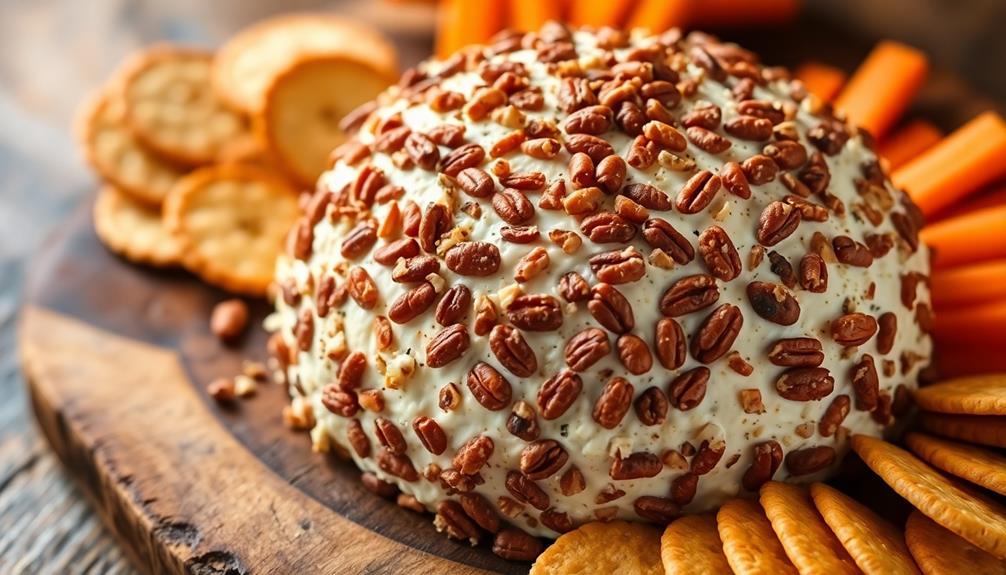
- The cheese ball can be easily prepared by home cooks and offers a creamy texture with a crunchy exterior when coated in chopped pecans.
- Serving the Pumpkin Patch Cheese Ball with crackers, vegetables, or crusty bread creates a visually striking and inviting autumn-themed spread.
- The vibrant color contrast and balanced flavors of the cheese ball make it a staple for cozy family dinners or lively autumn parties.
Top picks for "pumpkin patch cheese"
Open Amazon search results for this keyword.
As an affiliate, we earn on qualifying purchases.
History
The origins of the pumpkin patch cheese ball can be traced back to the 1950s, when resourceful homemakers sought creative ways to incorporate seasonal produce into their entertaining spreads.
During this time, many families were also focused on managing their household budgets, which often included strategies like creating a personal budget to ensure they could afford festive gatherings.
As autumnal festivities and harvest-themed gatherings gained popularity, these clever cooks recognized the opportunity to showcase the iconic pumpkin in a unique and delightful manner.
By blending cream cheese, spices, and the vibrant orange flesh of the pumpkin, they crafted a savory and visually striking appetizer that quickly became a staple on holiday tables across America. To accompany the pumpkin dip, they also developed a pumpkin patch veggie platter recipe that featured an assortment of colorful and crunchy vegetables arranged to resemble a harvest-inspired display. The combination of the vibrant orange dip and the rustic presentation of the vegetables made for a visually stunning and seasonally appropriate spread. This inventive use of pumpkin transformed the traditional holiday appetizer table, and quickly gained popularity as a playful and delicious way to celebrate the fall season.
The pumpkin patch cheese ball not only offered a delicious way to celebrate the bounty of the season but also captured the warm, cozy atmosphere of autumn gatherings.
Over the decades, this recipe has endured, evolving with personal touches and adaptations, yet always retaining its essence as a beloved autumnal classic.
Recipe
Pumpkin Patch Cheese Ball is a delightful and festive appetizer that perfectly captures the essence of autumn. This savory treat combines the rich, creamy texture of cheese with the warm, earthy flavors of pumpkin and spices, creating a delectable centerpiece for any gathering.
Additionally, understanding your astrological compatibility can enhance the joy of hosting, as certain zodiac signs may be more inclined to appreciate unique culinary creations like this one, especially when shared among friends with trust issues with boyfriends.
Preparing the Pumpkin Patch Cheese Ball is a simple process that can be enjoyed by home cooks of all skill levels. Whether you're hosting a Halloween party, a Thanksgiving feast, or simply craving a cozy autumn snack, this recipe is sure to delight your guests and satisfy your taste buds.
Ingredients:
- 8 oz cream cheese, softened
- 1 cup shredded cheddar cheese
- 1/2 cup canned pumpkin puree
- 1 tsp garlic powder
- 1 tsp onion powder
- 1 tsp dried parsley
- 1/2 tsp ground cinnamon
- 1/4 tsp ground nutmeg
- 1/4 tsp salt
- 1/4 tsp black pepper
- Chopped pecans, for coating
Instructions:
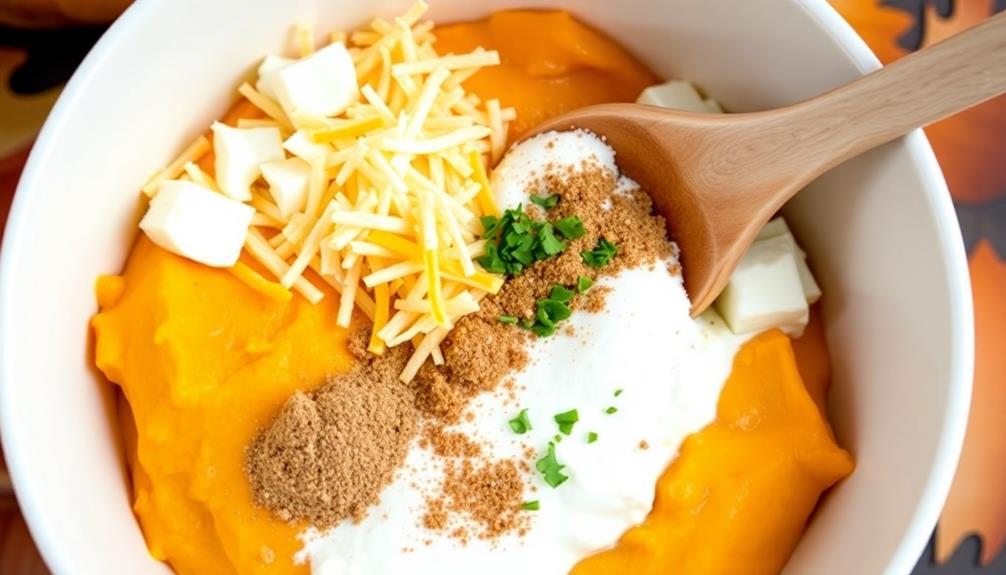
In a medium bowl, combine the softened cream cheese, cheddar cheese, pumpkin puree, garlic powder, onion powder, dried parsley, cinnamon, nutmeg, salt, and black pepper. Mix until well blended and the ingredients are evenly distributed.
Form the mixture into a ball and place it on a serving plate. Cover the cheese ball with the chopped pecans, gently pressing them into the surface to adhere. Refrigerate the Pumpkin Patch Cheese Ball for at least 2 hours, or until firm.
When ready to serve, accompany the Pumpkin Patch Cheese Ball with an assortment of crackers, fresh vegetables, or crusty bread. The cheese ball can be made a day in advance, making it a convenient and stress-free appetizer option for your autumn celebrations.
Enjoy the delightful combination of creamy cheese, vibrant pumpkin, and warming spices in every bite.
Cooking Steps
First, mix the cream cheese and seasonings until well combined.
For an extra layer of flavor, consider incorporating some compound butter recipes into the cheese mixture, which can enhance the overall taste.
Next, roll the cheese mixture into a ball and coat it evenly with the crushed pretzels.
Step 1. Combine Cream Cheese and Seasonings
Next, you'll combine the cream cheese and seasonings. In a large bowl, add the softened cream cheese. You'll want to ensure it's at room temperature for easy mixing.
For an extra layer of flavor, consider incorporating some fresh herbs or spices, similar to how you'd enhance a dish with garlic herb butter. Then, sprinkle in the garlic powder, onion powder, and dried parsley.
Use a hand mixer or a sturdy spoon to blend the ingredients together until they're well incorporated and the mixture is smooth and creamy. Be thorough in your mixing to evenly distribute the seasonings throughout the cream cheese.
Once combined, the flavors will meld together beautifully, creating a delightful base for your pumpkin patch cheese ball. With the cream cheese and seasonings ready, you can move on to the next step of shaping the cheese ball.
Step 2. Roll Cheese Mixture Into Ball
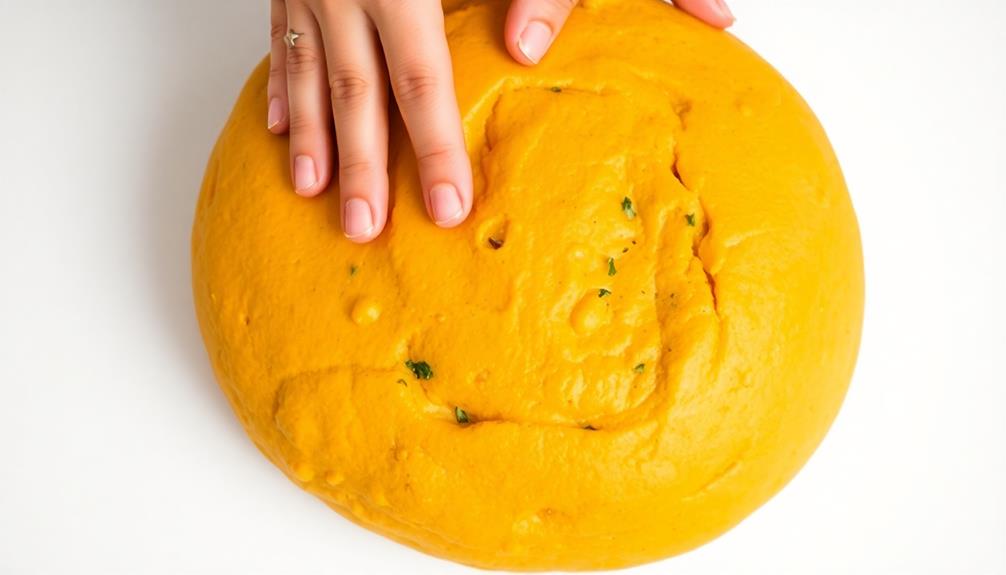
With the cream cheese and seasonings combined, it's time to start shaping your pumpkin patch cheese ball. Take the creamy mixture and begin rolling it between your palms, forming a smooth, round ball. As you roll, the cheese will start to firm up, creating a cohesive shape.
For an extra touch of flavor, consider pairing your cheese ball with a side of sugar-free vanilla ice cream, which can provide a delightful contrast to the savory pumpkin flavors.
Once you've achieved a satisfying sphere, it's time to add the finishing touches. Sprinkle some of the reserved pumpkin pie spice mixture over the surface of the cheese ball, gently pressing it in to adhere. This will give your pumpkin patch cheese ball a delightful, speckled appearance, reminiscent of a real pumpkin.
Don't be afraid to fine-tune the shape as needed, smoothing any imperfections with your hands. The goal is to create a perfectly rounded cheese ball that will be the centerpiece of your pumpkin-themed spread.
With a little care and attention, you'll have a stunning, flavor-packed pumpkin patch cheese ball ready to delight your guests.
Step 3. Coat Cheese Ball in Crushed Pretzels
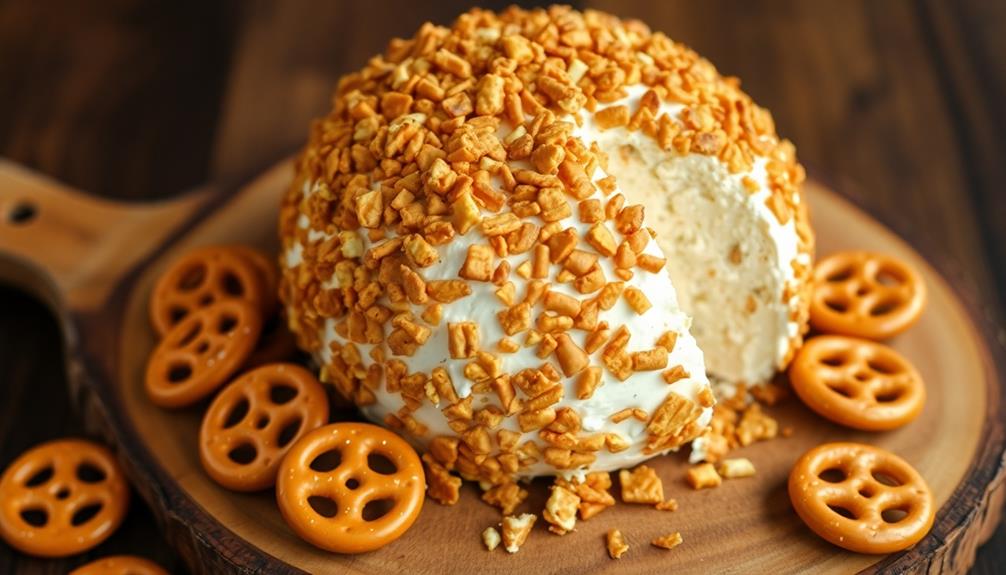
To give your pumpkin patch cheese ball a delightfully crunchy exterior, you'll want to coat it in crushed pretzels. This step adds a satisfying texture that complements the smooth, creamy cheese filling.
Start by placing some crushed pretzels in a shallow bowl or plate. You can crush the pretzels yourself using a rolling pin or food processor, or you can use pre-crushed pretzel pieces.
Gently roll the cheese ball in the crushed pretzels, pressing lightly to help the crumbs adhere. Be sure to cover the entire surface of the cheese ball for a uniform coating.
Once the ball is evenly coated, transfer it to a serving plate or platter. The crunchy pretzel coating not only enhances the appearance of your pumpkin patch cheese ball but also provides a tasty contrast to the rich, creamy interior.
Serve and enjoy this delightful snack with your family and friends.
Step 4. Refrigerate Until Firm

After coating the pumpkin patch cheese ball in the crunchy pretzel crumbs, you'll want to refrigerate it until it's firm. This chilling step is crucial for helping the cheese ball maintain its shape and texture.
Once the cheese mixture has been molded into the desired pumpkin-like shape, pop it into the fridge for at least an hour, or up to 24 hours. The cool temperature will allow the cheese to solidify, making it easier to slice and serve. During this time, the flavors will also have a chance to meld together, enhancing the overall taste.
When you're ready to serve, simply remove the cheese ball from the refrigerator and arrange it on a platter with your favorite crackers or veggie sticks. The firm, pumpkin-shaped cheese ball will be the star of your autumn gathering, impressing guests with its festive appearance and delicious flavor.
Step 5. Garnish With Green Onion
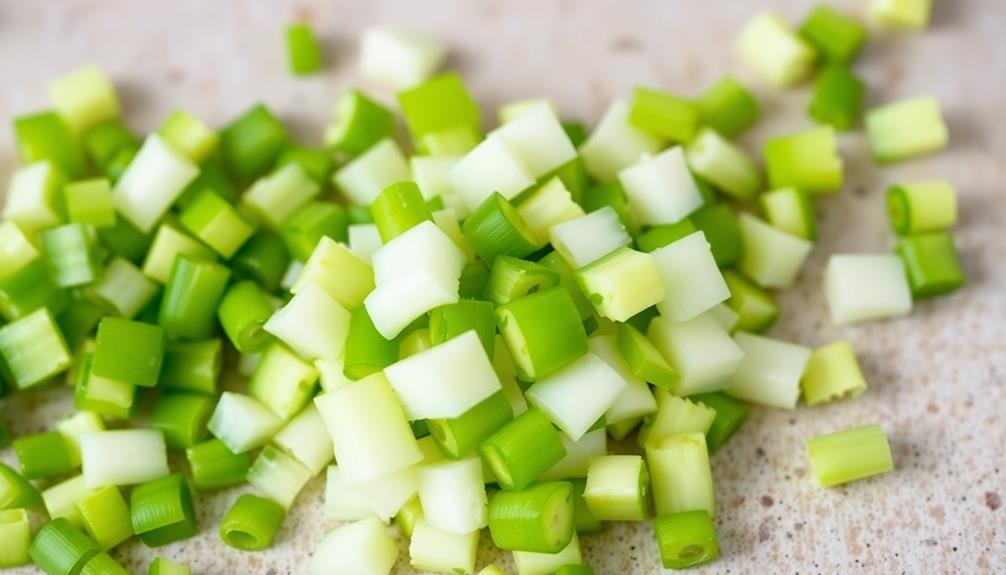
Once the pumpkin patch cheese ball has chilled and solidified, it's time to add the finishing touch. To garnish, simply take some fresh green onions and finely chop them. Sprinkle the chopped onions all over the surface of the cheese ball, ensuring even coverage.
The vibrant green hue of the onions will create a lovely contrast against the orange-tinted cheese, evoking the autumnal theme of the pumpkin patch. Not only does this garnish add a pop of color, but the onions also contribute a savory, slightly pungent flavor that complements the richness of the cream cheese-based cheese ball.
The crunchy texture of the onions provides a nice textural element as well, preventing the dish from feeling too dense or heavy. Once the green onions have been sprinkled over the top, your pumpkin patch cheese ball is ready to serve.
The festive presentation is sure to impress your guests and make for a delightful addition to your autumn-inspired spread.
Final Thoughts
As you've crafted the delightful Pumpkin Patch Cheese Ball, you're likely eager to savor its flavor and share it with loved ones.
This cheese ball is the perfect addition to any gathering, be it a cozy family dinner or a lively party. Its vibrant orange hue and festive pumpkin shape make it a showstopping centerpiece that's sure to impress your guests.
Once you've garnished it with the crisp green onions, you'll have a truly irresistible appetizer. Serve it with an assortment of crackers, breads, or vegetable sticks, and watch as your guests can't resist diving in.
The rich, creamy cheese paired with the subtle pumpkin flavor creates a delightful combination that's both comforting and indulgent.
Enjoy every bite of this delectable Pumpkin Patch Cheese Ball, and don't be surprised if your guests ask for the recipe. It's a seasonal delight that's sure to become a cherished tradition.
Frequently Asked Questions
How Long Can the Cheese Ball Be Stored?
You can typically store a cheese ball for up to 5 days in the refrigerator.
Just make sure to keep it tightly wrapped or in an airtight container to prevent it from drying out.
It's best to consume the cheese ball within 3-4 days for the freshest flavor and texture.
With proper storage, you can enjoy your cheesy creation for several days after preparing it.
Can the Recipe Be Adjusted for Dietary Restrictions?
Absolutely! You can easily adjust the recipe to accommodate various dietary restrictions.
For example, if you need a dairy-free version, simply swap out the cream cheese and regular cheese for non-dairy alternatives.
Prefer a lower-fat option? Use reduced-fat or fat-free cream cheese instead.
Gluten-free? Make sure to use gluten-free crackers or bread for serving.
The great thing about this recipe is its flexibility – you can tweak the ingredients to suit your dietary needs while still enjoying the delicious flavors.
What Is the Best Way to Serve the Cheese Ball?
When serving a cheese ball, you've got plenty of creative options! You can present it as the centerpiece on a platter, surrounded by an assortment of crackers, bread, or fresh veggies.
For a more casual gathering, consider scooping it into a bowl and letting guests help themselves. You could also slice the cheese ball and arrange the pieces on a plate for easy dipping.
Whichever way you choose, be sure to provide plenty of tasty accompaniments to complement the rich and flavorful cheese ball.
Can the Cheese Ball Be Made in Advance?
Yes, you can definitely make a cheese ball in advance!
This is a great option if you're hosting a party or gathering and want to get some prep work done ahead of time. Simply prepare the cheese ball, then cover it tightly and refrigerate it for up to 3 days.
When you're ready to serve, let it sit at room temperature for about 30 minutes so it softens up a bit. This makes entertaining a breeze!
How Do I Prevent the Cheese Ball From Cracking?
To prevent a cheese ball from cracking, you'll want to handle it gently and refrigerate it properly.
First, let the cheese ball chill in the fridge for at least 2 hours before serving. This helps it firm up and hold its shape.
When you're ready to serve, use a gentle touch when rolling it in toppings. Avoid pressing too hard, which can cause cracks.
Finally, keep the cheese ball refrigerated until just before guests arrive to maintain its perfect texture.
With a little care, you can enjoy a flawless cheese ball every time!