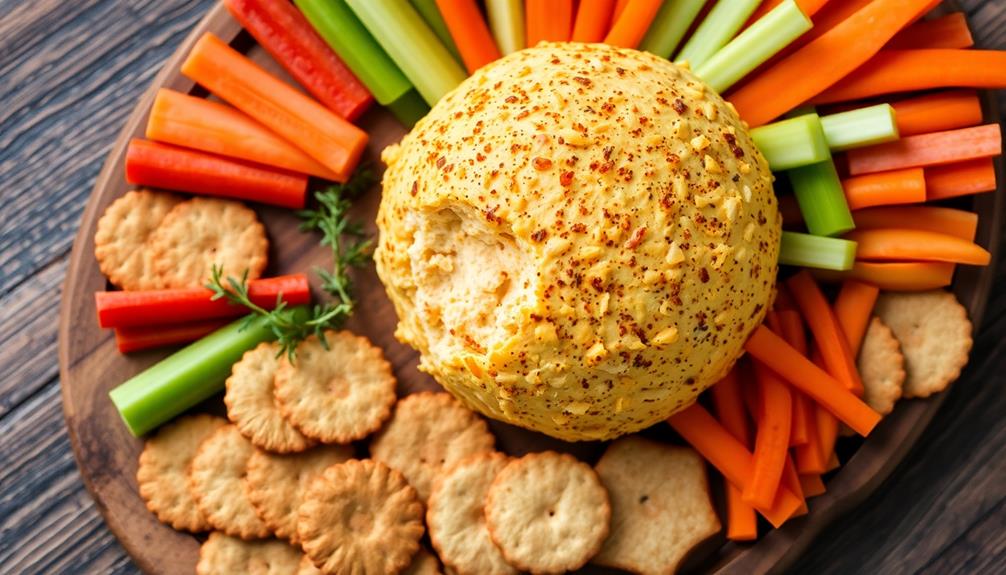
The pumpkin patch cheese ball is a beloved autumn appetizer that combines the rich creaminess of cream cheese with the vibrant flavor of pumpkin puree and warming spices. It's a clever way to bring the bounty of the harvest season to your table, evolving over the decades with various cheese varieties and seasonings. This festive dish serves as the centerpiece of any Thanksgiving or Halloween gathering, pairing perfectly with crackers, crudités, and bread. The preparation is simple yet customizable, allowing you to get creative with the presentation – and if you keep reading, you'll discover even more ways to elevate this delightful treat.
Key Takeaways
- The Pumpkin Patch Cheese Ball is a creative appetizer that combines cream cheese, pumpkin puree, and autumn spices to celebrate the flavors of the fall season.
- This festive cheese ball is typically rolled in crushed Doritos or coated with chopped pecans, providing a crunchy exterior and a visually striking presentation.
- Serving the Pumpkin Patch Cheese Ball with a variety of crackers, crudités, and breads creates a versatile and interactive appetizer for Thanksgiving and Halloween gatherings.
- The rich, creamy interior of the cheese ball offers a delectable taste, with the combination of cheese and seasonings creating a delightful flavor profile.
- The Pumpkin Patch Cheese Ball is a memorable and engaging dish that enhances the social atmosphere of any autumn celebration with its culinary creativity and festive appearance.
Top picks for "pumpkin patch cheese"
Open Amazon search results for this keyword.
As an affiliate, we earn on qualifying purchases.
History
The origins of the pumpkin patch cheese ball can be traced back to the early 1900s, when resourceful homemakers sought ways to utilize the bountiful autumn harvest. As pumpkins became a staple of the season, these clever cooks recognized their potential beyond the ubiquitous pie. By incorporating pumpkin into a savory cheese-based spread, they created a delightful hors d'oeuvre that perfectly captured the essence of the fall.
The versatility of seasonal ingredients often inspired similar dishes, such as a fermented vegetable plate, showcasing the creativity of seasonal cooking.
Over the decades, the pumpkin patch cheese ball evolved, with home chefs experimenting with different cheese varieties, seasonings, and presentations. The signature orange hue and festive shape made it a beloved addition to Thanksgiving and Halloween gatherings, where its creamy texture and subtle pumpkin flavor delighted party guests.
Today, the pumpkin patch cheese ball remains a cherished autumnal tradition, a testament to the ingenuity and culinary creativity of those early homemakers who saw the potential in the humble pumpkin.
Recipe
The Pumpkin Patch Cheese Ball is a delightful and festive appetizer that can be the star of any fall gathering. This savory treat combines the rich, creamy texture of cream cheese with the subtle sweetness of pumpkin and the warmth of autumn spices.
It's the perfect accompaniment to crackers, crudités, or crusty bread, making it a crowd-pleasing addition to your holiday table. Additionally, creating an organized space for your gatherings can enhance the overall experience, as a clutter-free environment promotes mental clarity and reduces stress levels.
Preparing this Pumpkin Patch Cheese Ball is a simple and straightforward process that can be easily tailored to your taste preferences. Whether you're hosting a Thanksgiving feast or a cozy Halloween party, this versatile dish is sure to delight your guests.
Ingredients:
- 2 (8 oz) packages of cream cheese, softened
- 1 cup canned pumpkin puree
- 1/2 cup shredded cheddar cheese
- 1/4 cup chopped pecans
- 2 tablespoons brown sugar
- 1 teaspoon ground cinnamon
- 1/2 teaspoon ground ginger
- 1/4 teaspoon ground nutmeg
- 1/4 teaspoon salt
Instructions:
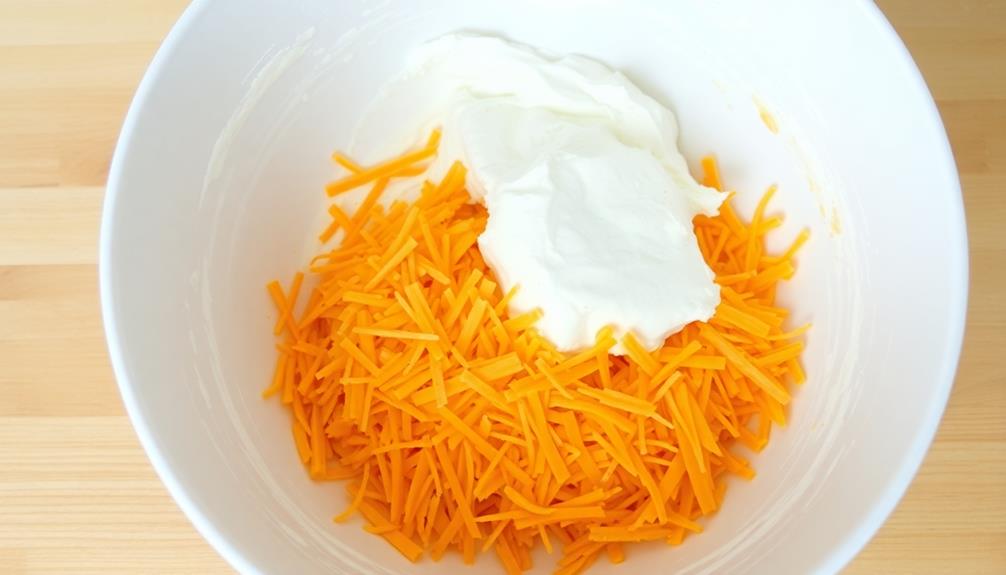
In a large mixing bowl, combine the softened cream cheese, pumpkin puree, cheddar cheese, pecans, brown sugar, cinnamon, ginger, nutmeg, and salt.
Mix until all the ingredients are well-incorporated and the mixture is smooth and creamy. Shape the mixture into a ball and place it on a serving plate or platter. Refrigerate for at least 2 hours, or until firm.
When ready to serve, remove the Pumpkin Patch Cheese Ball from the refrigerator and let it sit at room temperature for 15-20 minutes to soften slightly.
Serve with your favorite crackers, sliced bread, or fresh vegetables. Enjoy the delightful flavors and textures of this seasonal delight.
Cooking Steps
Start by mixing the cream cheese and cheddar together until well combined.
To enhance the flavor, consider adding some garlic powder or chopped green onions.
Next, roll the mixture into a ball shape.
Finally, roll the ball in crushed Doritos to coat it completely, then refrigerate until firm.
Once ready, garnish the cheese ball with fresh parsley for a festive touch.
For a delightful presentation, serve it alongside a vibrant selection of best flowers for hummingbirds to brighten up your gathering.
Step 1. Mix Cream Cheese and Cheddar
In a large bowl, combine the cream cheese and shredded cheddar cheese. Use a hand mixer or stand mixer to blend the ingredients until they're smooth and well-incorporated. This creamy base is the foundation of your pumpkin patch cheese ball.
For added flavor, consider incorporating elements from other savory appetizers like a tangy olive spread to complement the cheese.
Next, add a dash of garlic powder and a pinch of onion powder to the cheese mixture. These savory seasonings will enhance the overall flavor profile.
Mix until the spices are evenly distributed throughout the cheese.
To achieve the perfect texture, you'll want to beat the mixture for a minute or two, scraping down the sides of the bowl as needed. The goal is to create a soft, spreadable consistency that will be easy to shape into your pumpkin design later on.
Once the cheese is thoroughly blended, you're ready to move on to the next step.
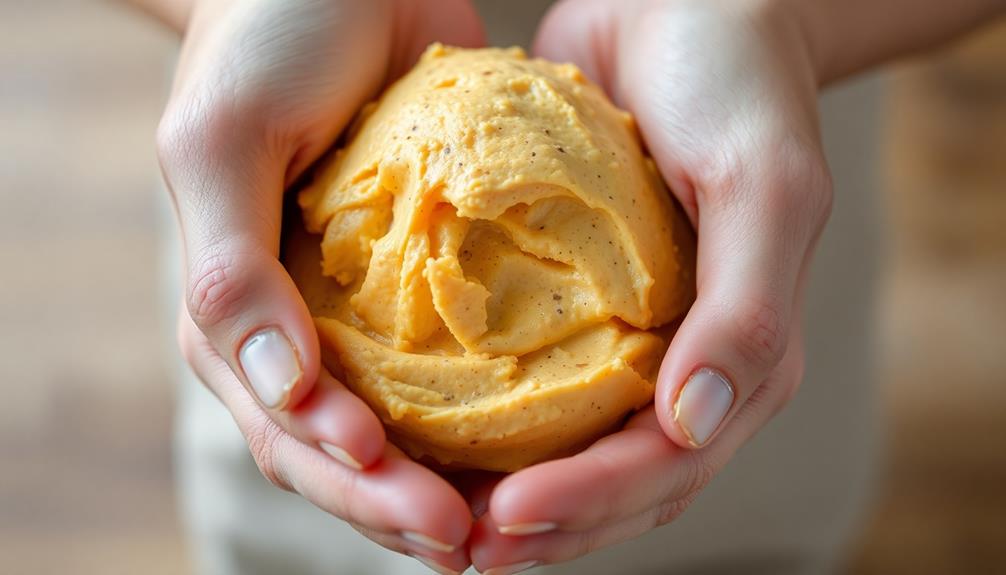
Step 2. Roll Into a Ball
Pumpkin Patch Cheese Ball
Roll Into a Ball (Cooking Steps)
After the cream cheese mixture is well-blended, you'll want to begin shaping it into a ball. This process is simple but important, as the final presentation of your pumpkin patch cheese ball depends on achieving the right shape.
Regular cleaning of your workspace can also enhance your cooking experience, similar to how regular cleaning is essential for optimal performance of air purifiers.
First, lightly grease your hands with a bit of olive oil or non-stick cooking spray. This will prevent the cheese mixture from sticking to your palms as you work it.
Gently scoop up the creamy blend and start rolling it between your palms, pressing and shaping it into a smooth, even ball. If the mixture feels too soft, you can pop it in the fridge for 10-15 minutes to firm up before continuing.
Once you've achieved the desired round shape, you can transfer the cheese ball to your serving dish. Gently smooth out any cracks or uneven spots using your fingers.
At this point, you're ready to move on to the next step – decorating your pumpkin patch cheese ball to perfection!
Step 3. Roll in Crushed Doritos
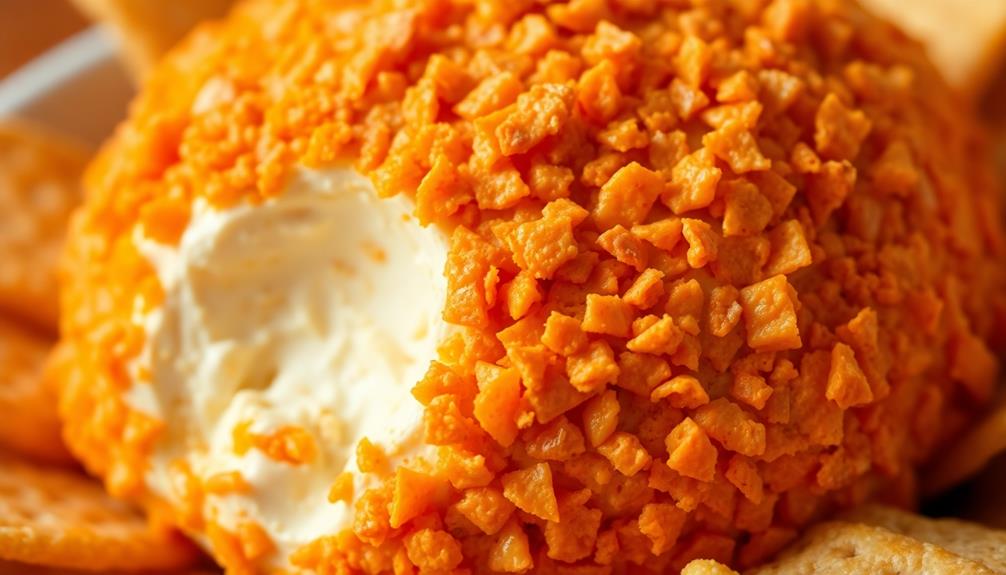
To add the final flourish, roll the smooth cheese ball in crushed Doritos. This step not only adds a delightful crunch but also a vibrant orange hue that perfectly captures the pumpkin patch theme.
For best results, place the cheese ball on a clean work surface and gently press it into a layer of crushed Doritos, ensuring even coverage. Rotate the ball, applying gentle pressure to help the Doritos adhere.
If needed, sprinkle additional crushed Doritos over the surface and continue rolling until the entire cheese ball is coated. The contrasting textures and flavors create a delightful sensory experience, making this pumpkin patch cheese ball irresistible.
Once fully coated, transfer the cheese ball to your serving dish and enjoy the impressive visual appeal. This simple finishing touch elevates the overall presentation, transforming the cheese ball into a festive centerpiece that's sure to impress your guests.
Step 4. Refrigerate Until Firm
Once the cheese ball is coated in crushed Doritos, refrigerate it until firm, about 2 to 3 hours. This chilling process helps the cheese ball hold its shape and allows the flavors to meld together.
During this time, the cream cheese and other ingredients will solidify, creating a cohesive and sturdy texture. Make sure to place the cheese ball on a plate or in a container that can accommodate its size, as it may expand slightly as it firms up.
Resist the temptation to dig in too soon – the wait will be worth it! Once the cheese ball is firm, it's ready to be served with your favorite crackers, chips, or veggies. The Doritos coating will provide a delightful crunch, complementing the creamy, cheesy interior.
Refrigerate any leftovers, and enjoy the pumpkin patch cheese ball over the next few days.
Step 5. Garnish With Fresh Parsley
With the cheese ball now chilled and firm, it's time to add the final touch – a garnish of fresh parsley.
Finely chop a small bunch of vibrant, green parsley leaves, ensuring you have enough to generously cover the entire surface of the cheese ball.
Gently press the chopped parsley onto the cheese ball, covering it completely. This not only adds a visually appealing touch, but the fresh, herbal flavor of the parsley complements the richness of the cheese mixture beautifully.
Be sure to press the parsley in gently, so it adheres well and doesn't fall off when serving.
The pops of green against the orange of the cheese ball create a delightful "pumpkin patch" effect, making this appetizer both festive and delicious.
With the parsley garnish in place, your Pumpkin Patch Cheese Ball is now ready to be enjoyed by family and friends.
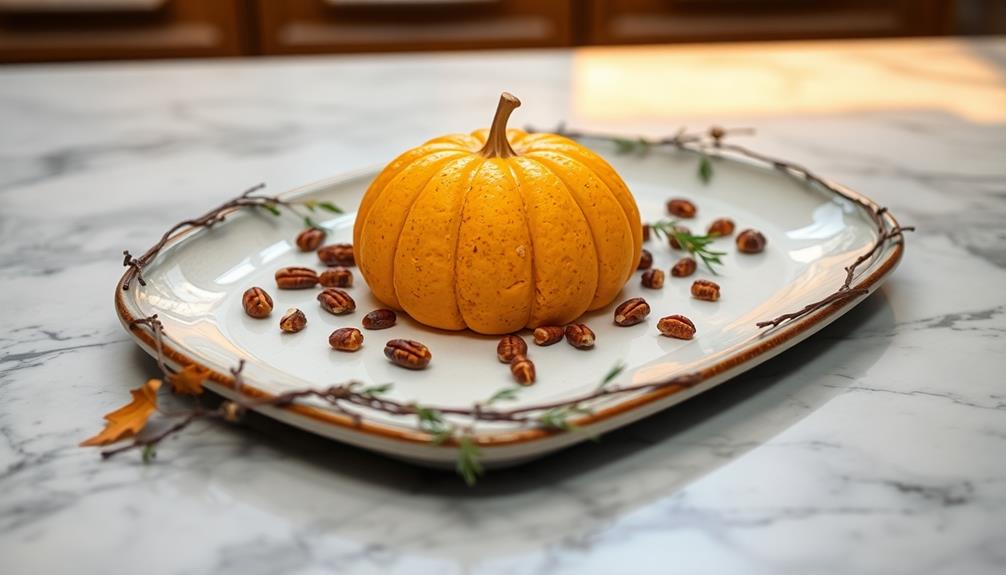
Final Thoughts
The pumpkin-shaped cheese ball is a whimsical centerpiece that's sure to delight guests at your autumn gathering. Its vibrant orange hue and striking resemblance to the beloved fall fruit make it a delightful addition to any holiday table.
But the fun doesn't stop there – the cheese ball's rich, creamy interior is a delectable treat that will have your guests reaching for more.
As you present this festive creation, don't be surprised if it becomes the star of the show. Its unique shape and eye-catching appearance will have your guests marveling at your culinary creativity.
Plus, the satisfying flavors of the cheese and seasonings will keep them coming back for seconds.
When the party is over, simply wrap up any leftovers and enjoy them as a tasty snack throughout the week.
The pumpkin patch cheese ball is a versatile and memorable dish that will have your friends and family asking for the recipe.
Frequently Asked Questions
Can I Use a Different Type of Cheese?
You sure can use a different type of cheese! The great thing about cheese balls is their versatility.
Feel free to experiment with your favorite cheeses – cheddar, Gouda, cream cheese, or even a blend.
Just keep in mind that softer cheeses may be harder to shape, so you might want to stick to firmer varieties.
Have fun trying out new flavor combinations and finding the perfect cheese for your tastes.
How Long Can I Store the Cheese Ball?
You can store the cheese ball for up to 5 days in the fridge.
Wrap it tightly in plastic wrap or aluminum foil to prevent it from drying out.
The cheese ball will last even longer if you freeze it – up to 2 months!
Just let it thaw in the fridge overnight before serving.
Whether you make it ahead or enjoy it right away, this crowd-pleasing cheese ball is sure to be a hit at your next gathering.
Can I Make the Cheese Ball in Advance?
Yes, you can definitely make the cheese ball in advance! In fact, that's a great idea.
You can prepare the cheese ball up to 3 days before you plan to serve it. Just wrap it tightly in plastic wrap and refrigerate it.
When you're ready to serve, simply unwrap it, transfer it to a serving plate, and let it come to room temperature before digging in.
Making it ahead of time will save you time and stress on the day of your event.
Do I Need to Use Fresh Pumpkin Seeds?
You don't necessarily need to use fresh pumpkin seeds for a cheese ball. Roasted, salted pumpkin seeds (also called pepitas) work just fine.
They add a nice crunch and nutty flavor to the cheese ball. You can find them pre-packaged at most grocery stores. If you can’t find them pre-packaged, you can easily make your own by mixing equal parts of different nuts and toasting them in the oven. These nuts also make a great addition to salads or as a topping for giant meatball recipes. If you want to get creative, you can even try coating them in honey or spices for an extra burst of flavor.
Using fresh pumpkin seeds would work too, but you'd need to toast them yourself to get that roasted taste and texture.
Either way, the pumpkin seeds will give your cheese ball a fun, seasonal flair.
Is the Cheese Ball Suitable for a Vegetarian Diet?
Yes, the cheese ball is suitable for a vegetarian diet.
Vegetarians can enjoy this delightful treat, as it's made with cheese, cream cheese, and other dairy-based ingredients, but doesn't contain any meat products.
Just be mindful of any additional toppings or garnishes that may contain non-vegetarian elements.
As long as you stick to the core cheese ball recipe, it's a perfectly vegetarian-friendly appetizer that everyone can savor.