Skeleton bone breadsticks are a delightfully spooky Halloween treat! With their unique bone-like shape and savory, buttery flavor, they'll add whimsy and excitement to any gathering. The recipe is surprisingly simple, using basic ingredients like flour, butter, and water. The key is in the shaping technique, which creates those creepy, knobby appearances. Bake them to golden perfection, brush on some melted butter, and you'll have a memorable holiday snack that'll delight your guests. Curious to learn more about the history and creative serving suggestions for these festive breadsticks? If so, there are plenty of resources and online tutorials available to help you master the skeleton bone breadsticks recipe. Whether you choose to serve them with a hearty bowl of soup or as a spooky appetizer alongside some savory dips, these breadsticks are sure to be a hit at your Halloween gathering. So why not give them a try and bring some eerie fun to your holiday spread?
Key Takeaways
Key points:
- Skeleton Bone Breadsticks are a festive Halloween treat with a unique bone-like shape, popular since the early 19th century.
- The recipe involves kneading the dough, shaping it into long, thin strips, and twisting/bending to create the desired bone-like appearance.
- Baking the breadsticks at 400°F for 15 minutes, followed by a light butter coating, results in a savory, buttery taste and glistening presentation.
- Serving the warm breadsticks creates a memorable dining experience, with the option to add toppings for visual appeal and flavor.
- Skeleton Bone Breadsticks can be a creative appetizer or side dish, complementing the spooky and playful spirit of the Halloween season.
Top picks for "skeleton bone breadstick"
Open Amazon search results for this keyword.
As an affiliate, we earn on qualifying purchases.
History
Beginning in the early 19th century, skeleton bone breadsticks gained popularity as a novelty food item, often served around Halloween. These spooky-looking treats were made by shaping plain breadsticks into the form of human bones, much like the popular family-friendly destinations that attract visitors during festive seasons.
The eerie resemblance to actual skeletal structures added to the thrill and excitement of this culinary creation. As the tradition grew, bakers experimented with different techniques to achieve the most realistic bone-like appearance. Some would score the breadsticks to mimic the knobby texture of real bones, while others would dust them with flour or cornmeal to enhance the chalky, aged look.
The result was a visually striking snack that both delighted and slightly unsettled those who indulged. Over the decades, skeleton bone breadsticks became a staple at Halloween parties and events, serving as a whimsical way to set the spooky mood.
Today, this nostalgic treat remains a beloved part of the holiday's festivities, evoking a sense of playful fear and intrigue in those who dare to take a bite.
Recipe
Halloween is a spooky time of year, and what better way to get into the spirit than with a fun and festive recipe for Skeleton Bone Breadsticks? These savory breadsticks are the perfect addition to any Halloween party or gathering, and they're sure to delight both kids and adults alike.
Not only do they look impressive, but they can also be a great way to teach kids about toilet maintenance and repairs while enjoying a delicious treat.
The key to these Skeleton Bone Breadsticks is the unique shaping technique, which gives them a creepy, bone-like appearance. With just a few simple ingredients and a little bit of creativity, you can whip up a batch of these ghoulish treats in no time.
Ingredients:
- 2 cups all-purpose flour
- 1 teaspoon salt
- 1 teaspoon baking powder
- 1/2 cup unsalted butter, cold and cubed
- 3/4 cup warm water
- 1 egg, beaten
- Sesame seeds (optional)
Instructions:
To make the Skeleton Bone Breadsticks, start by preheating your oven to 375°F (190°C). In a large mixing bowl, combine the flour, salt, and baking powder.
Cut in the cold butter until the mixture resembles coarse crumbs. Gradually add the warm water, mixing until a dough forms. Knead the dough briefly on a lightly floured surface, then divide it into 12 equal pieces.
Roll each piece of dough into a long, thin rope, about 1/2 inch thick. Bend and twist the ropes to create a bone-like shape, pinching the ends to secure the shape.
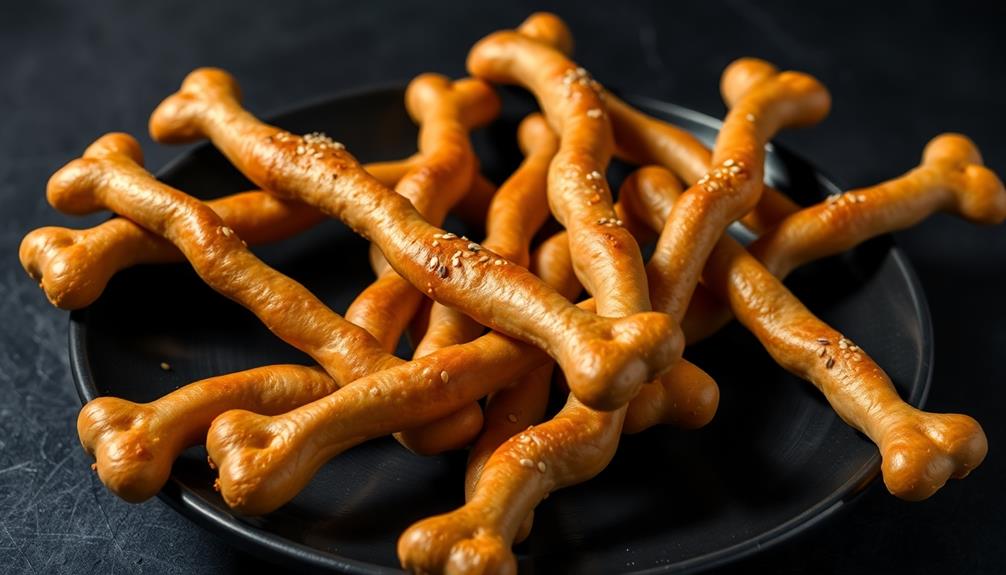
Place the shaped breadsticks on a parchment-lined baking sheet, brush them with the beaten egg, and sprinkle with sesame seeds if desired.
Bake the Skeleton Bone Breadsticks for 18-20 minutes, or until golden brown. Allow them to cool slightly before serving.
These spooky treats are best enjoyed fresh, but they can be stored in an airtight container for up to 3 days.
Cooking Steps
Knead the dough until it's smooth and elastic, making sure to incorporate plenty of flavor just like in Dirt Cups where simple ingredients come together for fun.
Roll the dough into long strips, then twist it into a bone shape. Bake at 400°F for 15 minutes, and brush with butter before serving.
Step 1. Knead Dough Until Smooth and Elastic
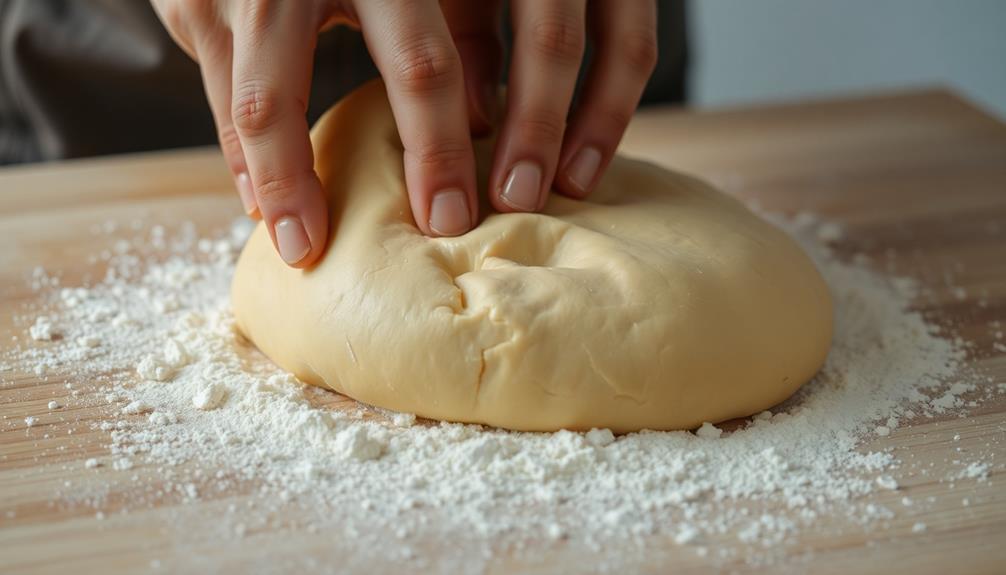
Once you've assembled your dough, it's time to put in a bit of elbow grease. Kneading is a crucial step that develops the gluten structure, creating a smooth, elastic dough. This process is similar to how glycolic acid enhances skin texture by promoting cell turnover.
Grab the dough with both hands and push it away from you, then fold it back towards you, repeating this motion for about 5 minutes. You'll know you've kneaded enough when the dough becomes less sticky and forms a smooth, cohesive ball.
Don't be afraid to add a light dusting of flour if the dough starts sticking to your hands or the surface. The dough should pass the "windowpane test" – you should be able to gently stretch a small piece until it's thin enough to see light through without tearing.
Once your dough is smooth and elastic, you're ready to shape it into your spooky skeleton bone breadsticks!
Step 2. Roll Dough Into Long Strips

With your dough ready, it's time to shape it into spooky skeleton bone breadsticks. Lightly flour your work surface and rolling pin.
Divide the dough into several equal portions. Taking one portion, roll it out into a long, thin strip about 1/4 inch thick and 12 inches long. Use your hands to gently stretch and shape the strip, creating bumps and ridges to resemble bones. This process isn't only fun but also allows you to get creative with your shapes.
For an added twist, consider serving these breadsticks alongside a fermented vegetable plate, which will enhance the overall flavor experience.
Arrange the shaped dough strips on a parchment-lined baking sheet, spacing them a few inches apart. Repeat this process with the remaining dough, creating as many bone-like strips as desired.
Once all the dough is rolled and shaped, cover the baking sheet and let the breadsticks rest for 15-20 minutes. This relaxes the gluten, making them easier to transfer and bake.
Preheat your oven to 375°F. When ready, carefully transfer the breadsticks to the oven and bake for 12-15 minutes, until golden brown. Allow them to cool slightly before serving.
These spooky skeleton bone breadsticks are sure to delight your Halloween guests!
Step 3. Twist Dough Into Bone Shape
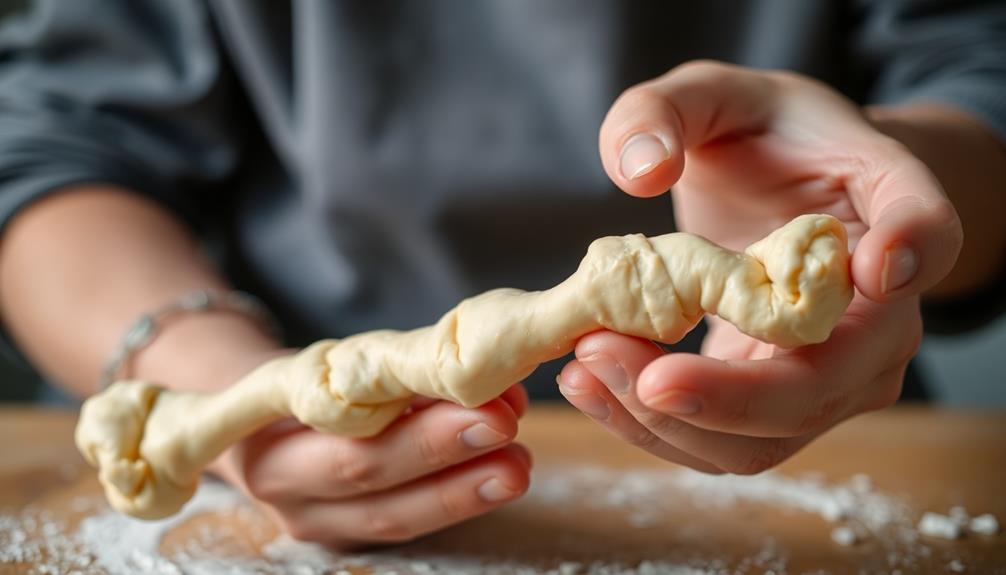
Now that you have your dough ready, it's time to shape it into spooky skeleton bone breadsticks.
Grab a portion of the dough and roll it into a long, thin strip. Don't worry if it's not perfectly even – the irregular shape will add to the bone-like appearance.
Next, use your hands to gently twist and bend the dough strip, creating a curved, knobby shape that resembles a human bone. Pinch and manipulate the dough as needed to achieve the desired bone-like form.
Once you're satisfied with the shape, carefully transfer the twisted dough to a parchment-lined baking sheet.
Repeat this process with the remaining dough, spacing the bone-shaped pieces apart on the sheet. Be sure to work quickly to prevent the dough from drying out.
With a little creativity and a light touch, you'll have a tray of spooky, skeletonized breadsticks ready for the oven.
Step 4. Bake at 400°F for 15 Minutes
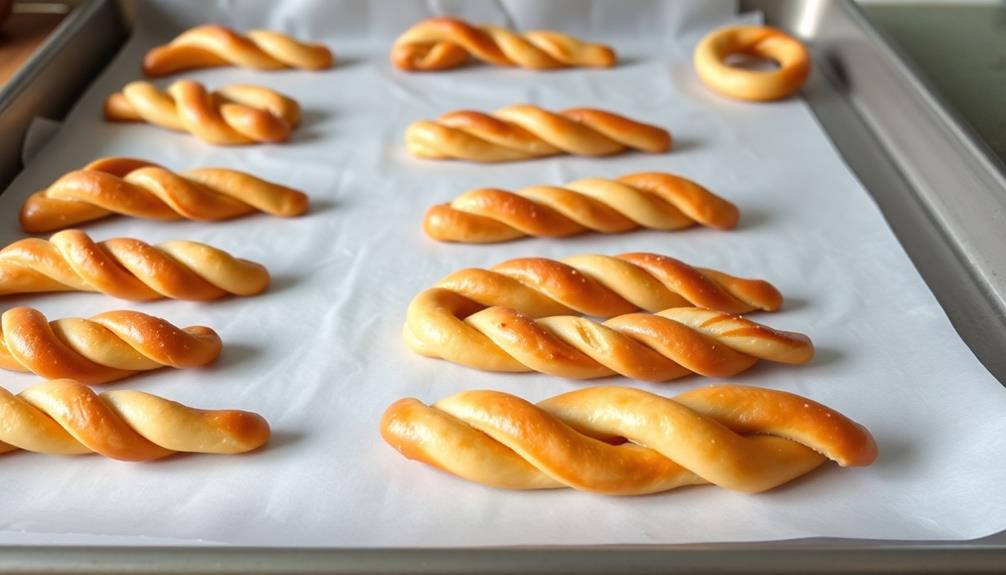
Preheat your oven to 400°F. This is the perfect temperature to bake your spooky skeleton bone breadsticks to perfection.
Once your oven is nice and toasty, you'll want to carefully transfer your twisted dough shapes onto a baking sheet lined with parchment paper. Make sure to space them out a bit, so they don't stick together as they bake.
Now, pop those creepy crawly bones into the oven and set a timer for 15 minutes. During this time, the dough will puff up and develop a delightful golden-brown crust.
Keep an eye on them, as oven temperatures can vary. You'll know they're done when they're lightly browned and have that irresistible aroma wafting through your kitchen.
Step 5. Brush With Butter Before Serving
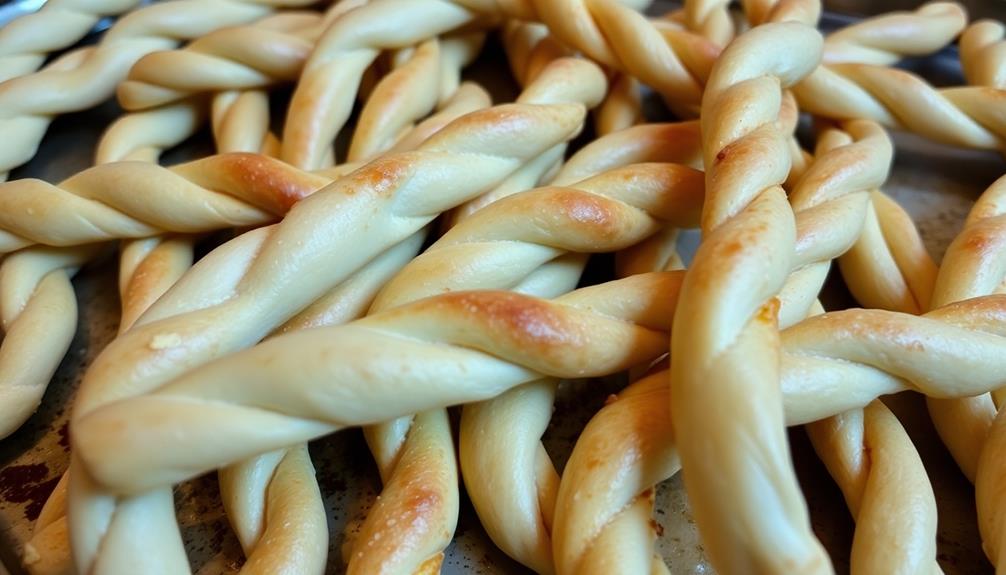
Once the skeleton bone breadsticks have finished baking, you'll want to brush them with a light coating of melted butter. This extra step adds a delightful richness and shine to the crisp, golden-brown exterior.
Simply melt a few tablespoons of butter in the microwave or on the stovetop until it's in a liquid state. Then, using a basting brush, gently sweep the butter over the top and sides of each breadstick. Be sure to cover the entire surface area for maximum flavor and visual appeal.
The butter will soak into the bread, creating a savory, buttery taste that complements the whimsical skeleton bone shape. Allow the buttered breadsticks to rest for a minute or two, giving the butter time to set.
Serve these spooky, yet delectable, treats warm and enjoy the way the butter glistens on the surface. Your guests are sure to be impressed by this final touch that elevates the skeleton bone breadsticks to a new level of Halloween delight.
Final Thoughts
As you've explored the intriguing world of skeleton bone breadsticks, one thing has likely become clear: these unique creations offer a novel and captivating culinary experience.
Whether served as an appetizer or accompanying a hearty meal, these spooky snacks are sure to delight and intrigue your guests.
The final step in crafting these bone-chilling breadsticks is to ensure they're presented in a visually striking manner.
After brushing the shaped dough with melted butter, consider using a variety of toppings to enhance the skeletal aesthetic.
Minced herbs, grated cheese, or a light dusting of paprika can all add depth and character to your ghoulish creations.
As you serve these skeleton bone breadsticks, bask in the reactions of your guests.
Their expressions of delighted surprise and eager anticipation will make all your efforts worthwhile.
Embrace the opportunity to create a memorable and unforgettable dining experience that celebrates the playful spirit of the season.
Frequently Asked Questions
Are Skeleton Bone Breadsticks Safe to Consume?
Are skeleton bone breadsticks safe to consume? Well, that's a tricky question.
While breadsticks made from real bones might sound concerning, the truth is, they're generally safe to eat – as long as they're properly prepared and handled.
Just be sure to check the ingredients and source before indulging. If you're unsure, it's best to steer clear and stick with regular breadsticks.
Your health and safety should always come first!
Where Can I Purchase the Necessary Ingredients?
To purchase the necessary ingredients, you can find them at your local grocery store or specialty baking supply shop.
Look for things like all-purpose flour, yeast, salt, olive oil, and any other basic bread recipe staples.
You may also need some unique items like food coloring or shaped baking pans to create the desired bone-like appearance.
Check the baking aisle and don't be afraid to ask an employee for assistance in locating the right items.
With a bit of creativity, you can make delightfully spooky and tasty breadsticks at home.
How Long Do These Breadsticks Stay Fresh?
The freshness of your homemade breadsticks will depend on several factors.
Generally, they'll stay fresh for 3-4 days when stored at room temperature in an airtight container.
For longer-lasting freshness, you can refrigerate them for up to a week. Just be sure to reheat them briefly before serving to restore the crisp texture.
With proper storage, you can enjoy your delicious breadsticks for several days after baking them.
Can I Freeze the Dough for Later Use?
Absolutely! Freezing the dough is a great way to extend the shelf life of your homemade breadsticks.
Simply shape the dough into your desired breadstick form, place them on a baking sheet, and pop them in the freezer.
Once frozen, transfer the breadsticks to an airtight container or bag.
When you're ready to bake, just thaw the dough in the fridge overnight and then bake as usual.
This makes it easy to enjoy fresh, homemade breadsticks on demand.
Are There Any Dietary Restrictions for These Breadsticks?
When it comes to these breadsticks, there are a few dietary considerations to keep in mind.
They're typically made with wheat flour, so they may not be suitable for those following a gluten-free diet. If you have any other dietary restrictions, like vegan or kosher, you'll want to check the ingredient list and make adjustments accordingly.
The good news is that these breadsticks are generally a versatile option that can be enjoyed by most people. Just be sure to double-check the specifics to ensure they fit your dietary needs.