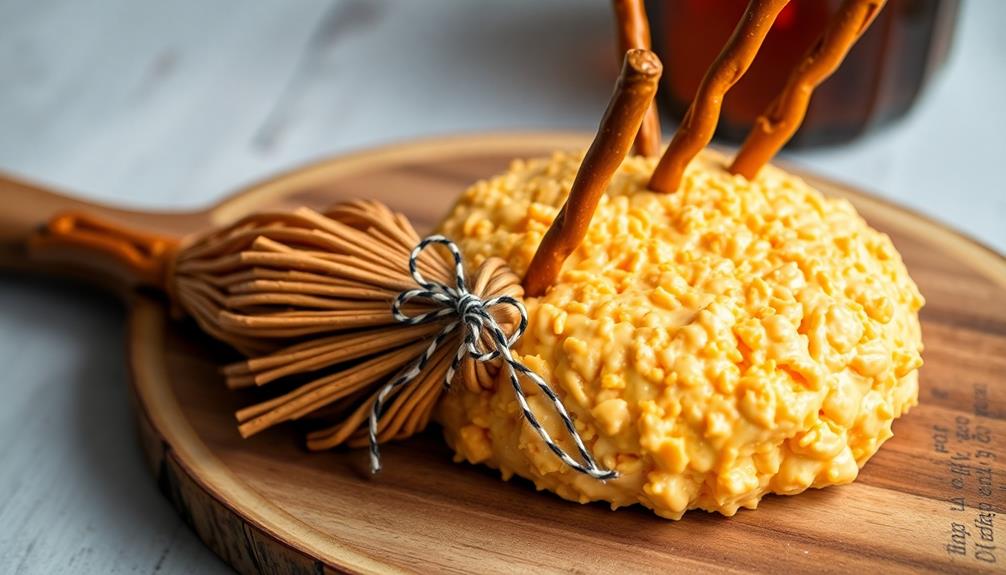

The Witch's Broom Cheese Ball is a whimsical and spooky Halloween treat that'll have your guests enchanted. You'll craft a festive cheese ball in the shape of a witch's broom, complete with a pretzel stick handle and olive "bristles." The savory blend of cream cheese, cheddar, and Parmesan makes for an irresistible flavor profile. After chilling to set the shape, you'll coat the cheese ball in crunchy coatings for added texture and visual appeal. A light dusting of paprika or cayenne brings a touch of heat and color. Serve this showstopping snack surrounded by crackers, veggies, and more for a truly hauntingly delicious experience. And there's more where that came from…
Key Takeaways
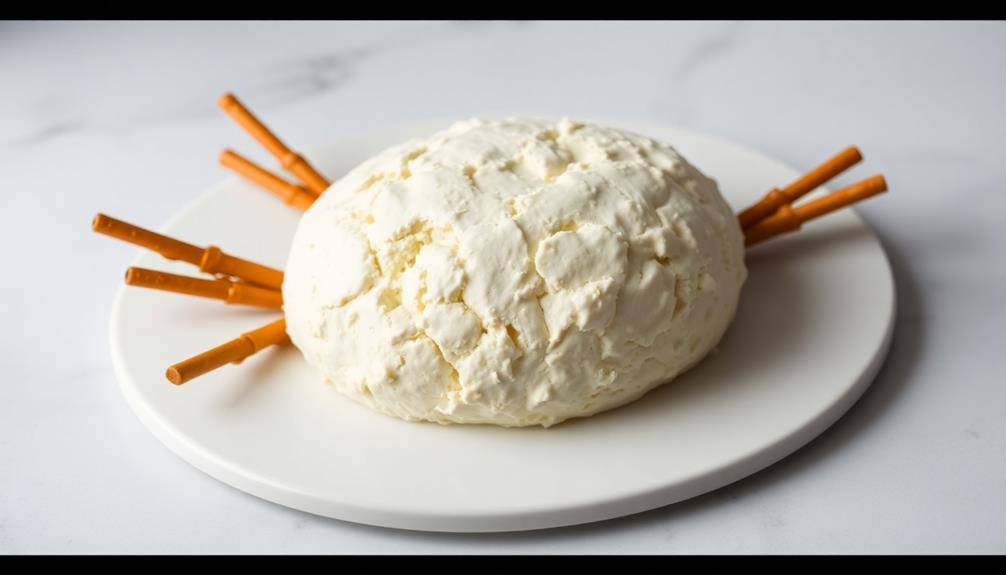
- The Witch's Broom Cheese Ball is a festive and creative Halloween treat that resembles a witch's broom, made from a combination of cream cheese, cheddar, and Parmesan.
- The cheese ball is shaped to resemble a broom, with a pretzel stick serving as the handle, and decorated with black olive "bristles" and a ribbon bow.
- The recipe can be customized to suit various taste preferences and dietary needs, and it is recommended to chill the cheese ball for at least 30 minutes for flavor melding and shape firming.
- The cheese ball is typically coated with a variety of coatings, such as nuts, crackers, or herbs, and can be lightly dusted with paprika or cayenne for an added touch of color and flavor.
- The Witch's Broom Cheese Ball is a visually appealing and delicious snack that can serve as a centerpiece for Halloween gatherings, enchanting guests with its playful presentation.
Top picks for "witch broom cheese"
Open Amazon search results for this keyword.
As an affiliate, we earn on qualifying purchases.
History
The origins of the Witch's Broom Cheese Ball can be traced back to the early 20th century when creative home cooks began experimenting with festive cheese ball presentations. These imaginative chefs sought to transform the simple cheese ball into a whimsical centerpiece, inspired by the spooky and enchanting imagery of witches and their magical broomsticks.
As seasonal ingredients became more accessible, many began incorporating fermented vegetable plates alongside their cheese balls, enhancing the overall flavor profile of Halloween gatherings.
As the tradition evolved, the Witch's Broom Cheese Ball became a beloved Halloween staple, gracing tables and delighting guests with its unique shape and festive flair. The concept is straightforward – a classic cheese ball is molded into the form of a witch's broom, complete with a "handle" made of pretzel sticks or breadsticks.
Decorative touches, such as black olive "bristles" and a ribbon "bow," bring the broom to life, creating a charming and eye-catching presentation.
This creative cheese ball design not only adds a touch of Halloween magic to any gathering but also allows home cooks to showcase their culinary creativity and attention to detail. The Witch's Broom Cheese Ball has become a cherished tradition, blending the flavors of a beloved party staple with the spirit of the spookiest season.
Recipe
A Witch's Broom Cheese Ball is a fun and festive treat perfect for Halloween parties or autumn gatherings. This savory appetizer is a creamy, flavorful cheese ball shaped to resemble a witch's broom, complete with twig-like pretzel sticks and a ribbon topping. Incorporating humor and creativity into your holiday spread can enhance the atmosphere, just as literary references can add depth to conversations, making them more memorable and engaging witty literature quotes.
Preparing this whimsical Witch's Broom Cheese Ball is a simple process that can be easily customized to suit your taste preferences. Whether you're an experienced cook or a beginner in the kitchen, this recipe will guide you through the steps to create a delightful and eye-catching addition to your holiday spread.
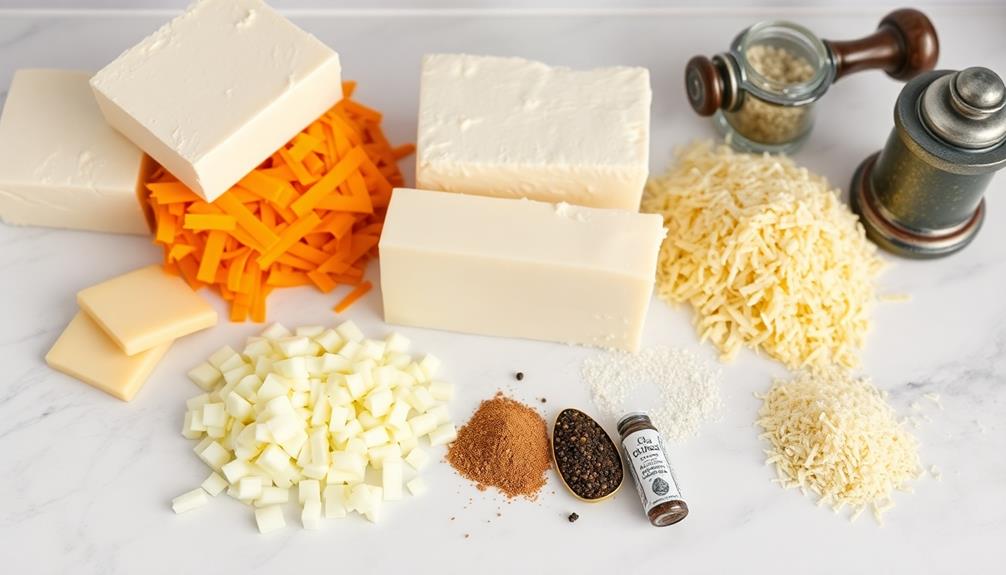
Ingredients:
- 2 (8 ounce) packages cream cheese, softened
- 1 cup shredded cheddar cheese
- 1/2 cup grated Parmesan cheese
- 2 tablespoons minced onion
- 1 teaspoon garlic powder
- 1/2 teaspoon dried basil
- 1/4 teaspoon salt
- 1/4 teaspoon black pepper
- Pretzel sticks
- Ribbon or string (optional)
Instructions:
In a large bowl, combine the softened cream cheese, cheddar cheese, Parmesan cheese, onion, garlic powder, dried basil, salt, and black pepper. Mix until well blended and smooth.
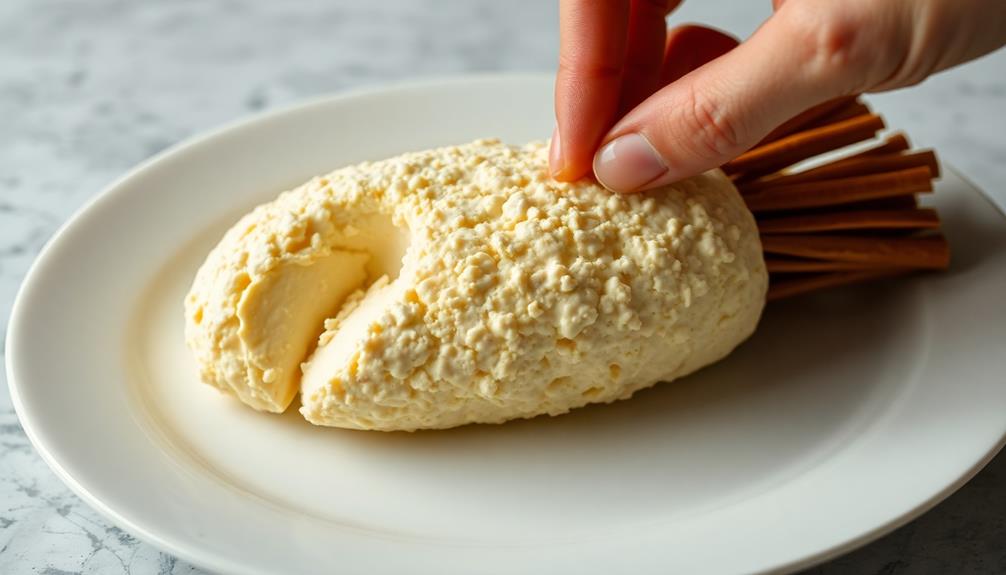
Shape the cheese mixture into a long, oval-shaped "broom" on a serving platter. Gently press the pretzel sticks into the cheese ball, creating the appearance of a witch's broom. Tie a ribbon or string around the "broom" handle, if desired.
For the best results, chill the Witch's Broom Cheese Ball for at least 1 hour before serving to allow the flavors to meld and the shape to firm up. Serve with crackers, bread, or your favorite dipping items. Enjoy this spooky and delicious appetizer with your guests!
Cooking Steps
First, you'll want to mix the cheeses together until they're well-blended.
For an extra touch of creativity, consider pairing this cheese ball with a unique coffee blend to enhance your Halloween gathering, as different brewing methods can elevate the experience of your snacks and drinks varying caffeine levels in coffee.
Then, shape the mixture into a ball and roll it in paprika or cayenne to give it a spooky, witchy look.
Step 1. Mix Cheeses
Mixing the cheeses is a crucial step in crafting the perfect Witch's Broom Cheese Ball. You'll want to use a combination of softened cream cheese, shredded cheddar, and grated Parmesan.
To add a healthy twist, consider incorporating some finely chopped herbs or spices, which can enhance the flavor and provide additional nutrients. Start by placing the cream cheese in a large bowl and using a hand mixer to blend it until smooth and creamy.
Then, gradually fold in the cheddar and Parmesan, mixing until the cheeses are evenly distributed. Be sure to taste the mixture and adjust the proportions to your liking, adding more of any cheese to achieve your desired flavor profile.
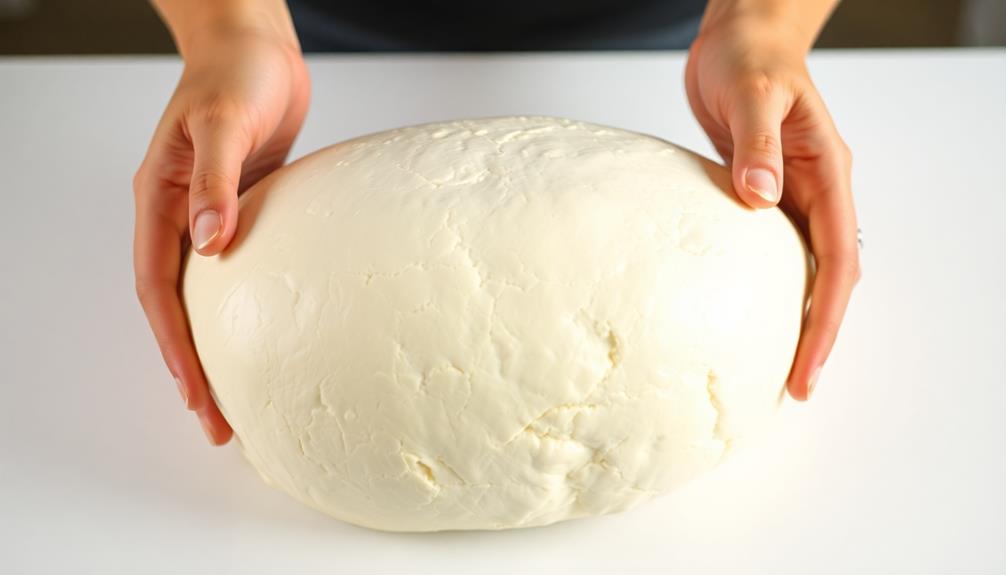
Once the cheeses are perfectly blended, you're ready to shape the cheese ball. Gently gather the mixture and form it into a round ball, smoothing the surface with your hands.
The key is to handle the cheese ball delicately, as you don't want to overwork the mixture and compromise its texture. For extra flavor, you might also want to try adding some low carb high protein options to the mix, making it a more nutritious appetizer.
With the cheeses thoroughly combined, you're one step closer to creating your spooky and delicious Witch's Broom Cheese Ball.
Step 2. Shape Cheese Ball
Once the cheeses are perfectly blended, you can start shaping the cheese ball. Gather a large piece of plastic wrap and place it on a clean work surface. Gently transfer the cheese mixture onto the center of the plastic wrap. Using your hands, begin forming the mixture into a tight, smooth ball.
To achieve a creamy texture in your cheese ball, you might consider adding a touch of cream cheese or sour cream, which can create a delightful contrast in flavor and richness. Additionally, if you're interested in refreshing dessert ideas for your gathering, don't forget to explore some delicious ice cream options like Sugar-Free Vanilla Ice Cream Recipe.
Apply gentle pressure, working the cheese into a cohesive shape. As you shape the ball, you can smooth any rough edges or cracks with your fingers.
Once the cheese ball is formed, wrap the plastic tightly around it, ensuring a compact, uniform shape. Refrigerate the wrapped cheese ball for at least 30 minutes, allowing it to firm up. This step is crucial for maintaining the ball's structure when you're ready to decorate it like a witch's broom.
With the cheese ball chilled and shaped, you can now move on to the decorative touches that will transform it into a spooky and delightful party centerpiece.
Step 3. Roll Cheese Ball
With the cheese ball now chilled and shaped, it's time to start rolling it in your desired coatings. This step adds both texture and flavor to your Witch's Broom Cheese Ball.
Begin by preparing your work surface with parchment paper or a clean countertop. Gather your chosen coatings, such as chopped nuts, crushed crackers, or dried herbs.
Gently roll the cheese ball in the coating, using your hands to ensure even coverage. Don't be afraid to pick up the ball and rotate it to get the coating to adhere evenly.
Once the entire surface is coated, carefully transfer the cheese ball to your serving platter or dish. You can even roll it in multiple coatings for added visual interest and flavor complexity.
With a little bit of care, your Witch's Broom Cheese Ball will be ready to impress your guests with its festive and delicious appearance.
Step 4. Dust With Paprika or Cayenne
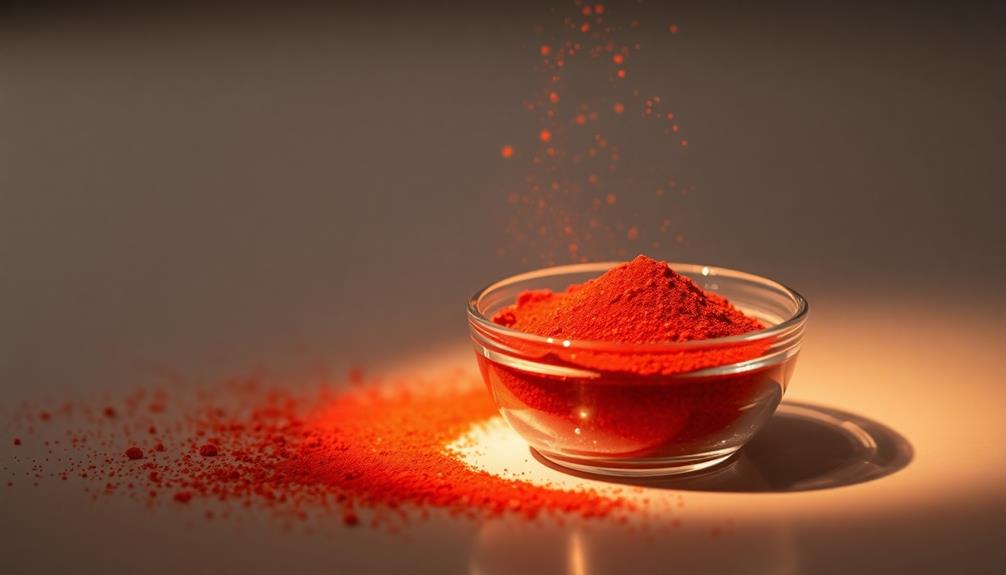
Sprinkle a light dusting of paprika or cayenne pepper across the coated cheese ball, adding a vibrant pop of color and subtle heat to complement the savory flavors.
These spices not only enhance the visual appeal but also provide a delightful contrast to the rich, creamy cheese.
Gently sprinkle the paprika or cayenne, aiming for an even distribution across the entire surface. You can use a small sieve or a spoon to evenly disperse the spice.
Be careful not to overdo it, as a light touch is all that's needed to achieve the desired effect.
The paprika will impart a warm, earthy flavor, while the cayenne will add a gentle kick of heat.
Depending on your personal preference and the tastes of your guests, you can choose either option or even experiment with a combination of both.
Step 5. Chill Cheese Ball Before Serving
After coating the cheese ball with the spices, chill it in the refrigerator for at least 30 minutes before serving. This resting period allows the flavors to meld and the cheese to firm up, creating a more cohesive and delectable texture.
The chilled cheese ball will be easier to handle and slice, ensuring a clean presentation when you're ready to share it with your guests.
Once the cheese ball has had time to chill, remove it from the fridge and arrange it on your serving platter. The cool temperature will help the cheese retain its shape, making it simple to surround with your choice of crackers, breadsticks, or veggie sticks.
Feel free to add a decorative touch by gently pressing additional spices or herbs onto the surface, though the witchy broom appearance will already make it a showstopper.
Serve the chilled cheese ball and watch your guests delight in this spooky, yet delicious, Halloween treat. You can pair the cheese ball with crackers, bread, or even apple slices for a variety of flavors and textures. This spooky gouda appetizer recipe is sure to be a hit at any Halloween party or gathering. Its creepy appearance and tasty flavor make it the perfect addition to any festive spread.
Final Thoughts
As you prepare to serve this whimsical Witch's Broom Cheese Ball, you'll be delighted by the playful presentation and the delicious flavors it offers. The crunchy pretzel sticks, nestled in the creamy cheese, create a delightful visual that's sure to impress your guests.
Once the cheese ball has chilled thoroughly, arrange the pretzel "brooms" around the sides, standing tall and proud. Consider adding a few sprigs of fresh rosemary or thyme to enhance the autumnal aesthetic.
This cheese ball isn't only a feast for the eyes but also a treat for the taste buds. The blend of cream cheese, cheddar, and spices creates a savory and satisfying snack that pairs perfectly with the salty pretzels.
Serve it with an assortment of crackers, sliced vegetables, or even apple wedges for a well-rounded and satisfying platter. As your guests gather around, they'll be enchanted by the Witch's Broom Cheese Ball, making it the star of your Halloween gathering.
Frequently Asked Questions
Can I Use a Different Type of Cheese?
Absolutely! You can use a variety of cheeses to create your perfect cheese ball.
While the original recipe may call for a specific type, feel free to experiment and use your favorite cheese or a blend of different ones.
Just keep in mind that the texture and flavor may vary depending on the cheese you choose.
The key is to find a cheese that melts and binds well to create a delicious, sharable treat.
How Long Does the Cheese Ball Last?
Cheese balls typically last 3-5 days when stored properly in the refrigerator.
The key is to keep it tightly wrapped or in an airtight container to prevent it from drying out. You can extend its shelf life by a day or two by adding a bit of extra moisture, like a damp paper towel in the container.
Just be sure to check for any signs of spoilage before serving. With proper storage, you can enjoy your cheese ball for several days.
Can I Make This Cheese Ball Ahead of Time?
Absolutely! You can definitely make this cheese ball ahead of time.
In fact, it's a great idea to prepare it a day or two in advance. This allows the flavors to meld together beautifully, resulting in an even more delicious and cohesive dish.
Just be sure to cover and refrigerate the cheese ball until you're ready to serve it. This way, you can enjoy the convenience of having it ready to go when you need it.
Is This Cheese Ball Suitable for Vegetarians?
The cheese ball is vegetarian-friendly!
It's made with cream cheese, shredded cheese, and herbs – no meat or animal products. That means your veggie-loving friends can dig in and enjoy it too.
Just be sure to check the labels on any additional ingredients you use to ensure they're all vegetarian.
With a little planning, you can prep this cheese ball ahead of time and have it ready to serve when guests arrive.
Enjoy!
[DIRECTIONS]:Can I Substitute Any Ingredients in the Recipe?
When it comes to recipes, you can often substitute ingredients to suit your dietary needs or preferences.
Consider using plant-based cream cheese or vegan cheese alternatives to make the cheese ball vegetarian-friendly. You could also experiment with different herbs, spices, or nuts to change the flavor profile.
Just be mindful of the consistency and binding properties of the substitutions to ensure the cheese ball holds its shape.
With a little creativity, you can easily adapt the recipe to fit your tastes and dietary requirements.