Witch's Fingers Breadsticks are a spooky twist on classic breadsticks that have bewitched Halloween enthusiasts for generations, originating in early 19th century rural European communities. These fun and eerie treats feature a yeast-based dough shaped into long, gnarled fingers with knuckle-like segments, baked to a golden-brown perfection and brushed with melted butter for a tempting glistening finish. Serve them with a spooky-themed dipping sauce for an extra touch of Halloween flair. Mastering this recipe will impress your guests and satisfy your cravings for a delightfully creepy snack that you can enjoy long after the haunting season has passed.
Key Takeaways
- Witch's Fingers Breadsticks are a spooky twist on classic breadsticks, originating from early 19th century rural European communities and gaining popularity with Halloween celebrations.
- The recipe involves shaping a yeast-based dough into long, gnarled finger-like shapes with knuckle-like segments, giving them a creepy appearance.
- Baking the dough creates a golden-brown crust, which can be further enhanced by brushing with melted butter for a tempting, fragrant finish.
- Serving the Witch's Fingers Breadsticks with a marinara dipping sauce adds to the creepy presentation, and they can be arranged on decorative platters with Halloween-themed decorations.
- These breadsticks are a versatile treat that can be enjoyed not only during Halloween festivities but also year-round, showcasing the creativity and baking skills of the chef.
Top picks for "witch finger breadstick"
Open Amazon search results for this keyword.
As an affiliate, we earn on qualifying purchases.
History
Witch's Fingers Breadsticks traces its origins back to the early 19th century, when bakers in rural European communities would craft these eerily shaped pastries during the spookiest time of year.
These long, gnarled breadsticks were meant to resemble a witch's crooked fingers, evoking a sense of mystery and the supernatural. As Halloween celebrations gained popularity in the following decades, the recipe for Witch's Fingers Breadsticks spread across the continent, becoming a staple treat for festive gatherings.
The tradition of creating themed treats for special occasions isn't unlike the way National Ice Cream Day celebrates the joy of ice cream. The distinctive shape is achieved by shaping the dough into long, tapered fingers before baking.
Many traditional recipes call for adding a touch of green food coloring to the dough, further enhancing the unsettling appearance. Some bakers even go so far as to add almond "nails" to the ends of the breadsticks, completing the eerie illusion.
Whether served as a snack or incorporated into Halloween-themed displays, Witch's Fingers Breadsticks continue to delight and intrigue bakers and partygoers alike.
Recipe
Witch's Fingers Breadsticks are a fun and spooky twist on classic breadsticks. These ghoulish creations are perfect for Halloween gatherings or adding a touch of seasonal flair to any meal.
Additionally, the importance of budgeting for ingredients can help in planning your festive gatherings without overspending, ensuring that you can enjoy the season while maintaining financial health creating a personal budget.
The dough for these breadsticks is a simple yeast-based recipe that can be made in advance, allowing you to focus on the fun of shaping and baking. As the dough rises, you can let your creativity shine by molding the dough into long, gnarled "fingers" complete with knuckle-like segments and tapered ends.
Ingredients:
- 3 cups (375g) all-purpose flour
- 1 teaspoon salt
- 1 teaspoon active dry yeast
- 1 1/4 cups (300ml) warm water
- 2 tablespoons olive oil
- Melted butter or egg wash (for brushing)
- Coarse salt or spices (for seasoning)
Instructions:
Combine the flour, salt, and yeast in a large bowl. Add the warm water and olive oil, then knead the dough until it forms a smooth, elastic ball.
Place the dough in a greased bowl, cover, and let rise for 1 hour or until doubled in size. Punch down the dough and divide it into 12 equal pieces. Roll each piece into a long, finger-like shape, pinching and shaping the dough to create the "knuckle" segments.
Arrange the shaped breadsticks on a parchment-lined baking sheet. Brush the breadsticks with melted butter or egg wash and sprinkle with coarse salt or spices of your choice. Bake at 400°F (200°C) for 15-20 minutes, or until golden brown.
For an extra spooky touch, consider serving the Witch's Fingers Breadsticks with a side of marinara sauce for dipping. The contrast of the savory breadsticks and the vibrant red sauce can create a delightfully creepy presentation.
Enjoy these festive breadsticks and let your imagination run wild!
Cooking Steps
Knead the dough until it's smooth and elastic, ensuring it's well mixed for the best texture.
For an added flavor twist, you might consider incorporating spices or herbs, similar to the way you'd enhance dishes like crab cakes or queso fundido.
Then divide it into finger-shaped pieces. Brush the dough with melted butter before baking until they're golden brown.
Step 1. Knead Dough Until Smooth and Elastic
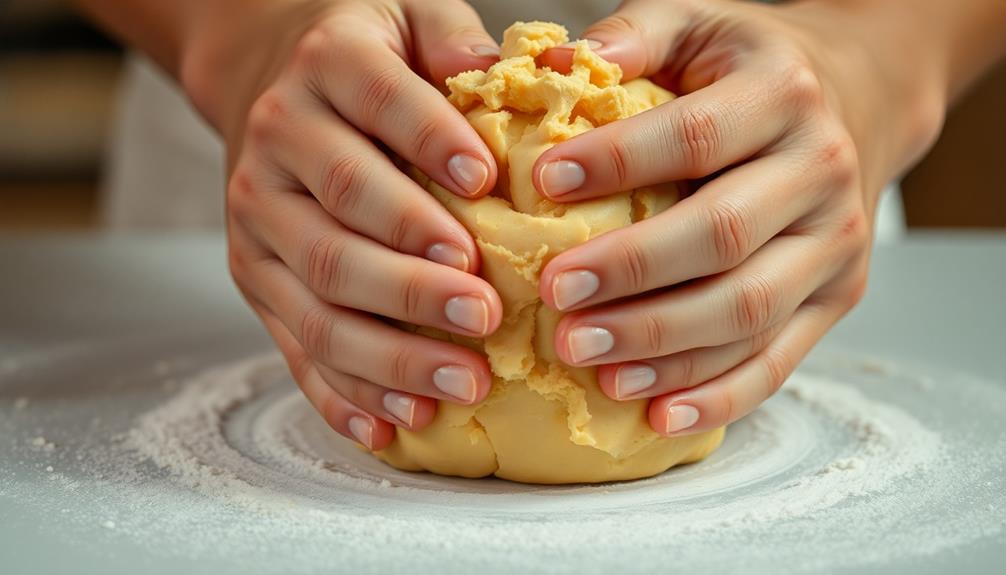
Once the dough has been thoroughly mixed, it's time to begin the kneading process. This crucial step develops the gluten in the flour, giving the breadsticks their signature chewy texture. To enhance your baking experience, consider using essential oils like eucalyptus oil for its aromatic properties that can make the kitchen feel more inviting.
Start by turning the dough out onto a lightly floured surface. Using the heels of your hands, push the dough away from you, then fold it back over itself. Give the dough a quarter turn and repeat. Continue this motion, kneading for about 5 minutes, until the dough becomes smooth and elastic.
You'll know it's ready when it springs back when poked. If the dough sticks to the surface, add a light dusting of flour. Knead gently, being careful not to overwork the dough, as this can make the breadsticks tough.
Once the dough has reached the desired consistency, you're ready to shape it into those spooky witch's fingers!
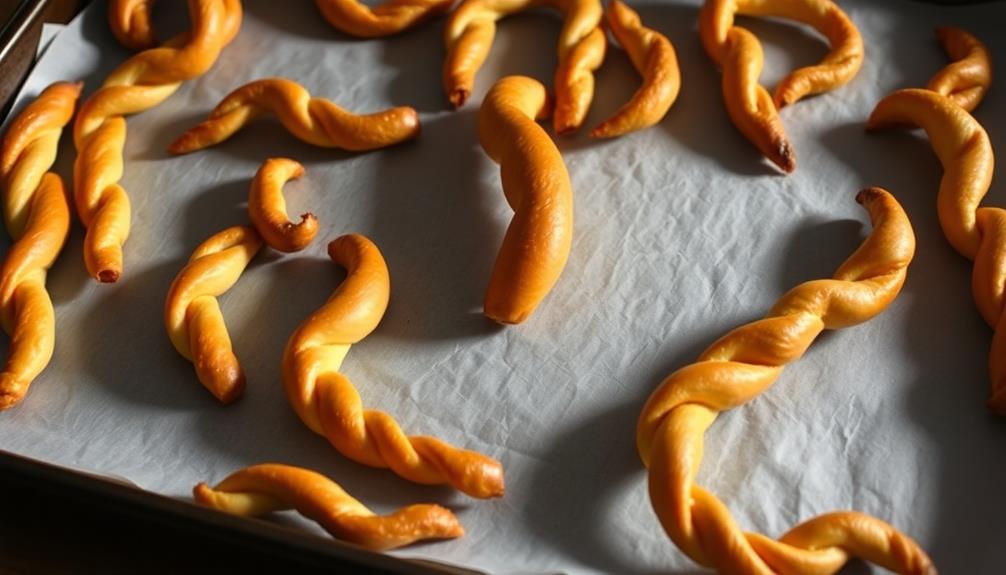
Step 2. Divide Dough Into Finger-Shaped Pieces

Take the dough and divide it into equal-sized pieces. You'll want to create finger-shaped portions that resemble creepy, twisted witch's fingers.
As you shape the dough, consider pairing these spooky treats with a rich cup of coffee to enhance the eerie atmosphere of your gathering, especially if you opt for a brewing method like the French press coffee that emphasizes a smooth flavor.
Gently roll each piece between your palms to elongate it, tapering one end to form the "fingertip." Use your fingers to gently pinch and stretch the dough, giving it those eerie, gnarled appearances. Be careful not to overwork the dough, as that could make it tough.
Arrange the witchy breadsticks on a parchment-lined baking sheet, spacing them apart so they've room to expand during baking. You can even use a knife to add little "knuckle" indentations for extra creepy detail.
Once you've shaped all the dough, you're ready to bake these spooky treats. Just remember to keep an eye on them in the oven, as the thin, elongated shape means they'll cook quickly.
With a little creativity, you'll have a batch of delightfully unsettling witch's fingers breadsticks.
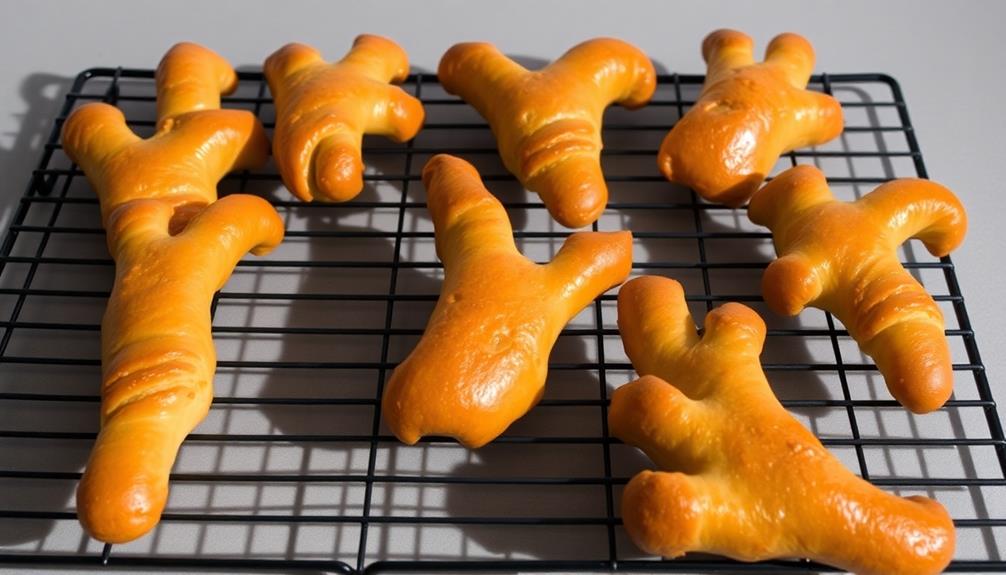
Step 3. Bake Until Golden Brown
Preheat your oven to the desired temperature, typically around 400°F (200°C). This high heat will help your witch's fingers breadsticks develop a lovely golden-brown crust.
Once the oven's ready, carefully transfer the shaped dough pieces onto a baking sheet lined with parchment paper. Make sure to space them out evenly, giving each piece enough room to bake properly.
Keep a close eye on the oven as the breadsticks bake, which should take around 12-15 minutes. You'll know they're done when they've turned a gorgeous golden-brown hue. The tops may even start to get a few delightful little spots of darker brown.
At this point, use oven mitts to remove the baking sheet from the oven. Let the breadsticks cool for a minute or two before serving them up warm and fresh.
The combination of the crisp exterior and soft, pillowy interior is simply irresistible. Enjoy your homemade witch's fingers!
Step 4. Brush With Melted Butter Before Baking
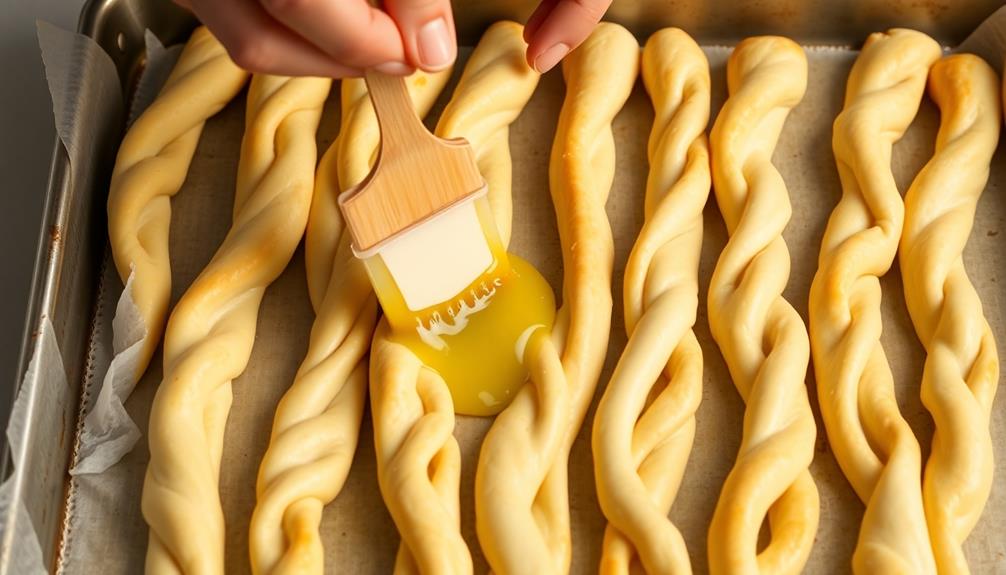
Before popping those golden-brown witch's fingers breadsticks into the oven, take a moment to brush them with melted butter. This simple step adds a delightful sheen and rich flavor to the final product.
Use a pastry brush to evenly coat the tops and sides of each breadstick, ensuring every nook and cranny is touched by the buttery goodness. Don't be shy – a generous brushing is key to achieving that irresistible, glistening appearance.
The melted butter will also help the breadsticks develop an even more tempting, golden-brown hue as they bake. Once coated, pop the tray into the preheated oven and let the magic happen.
In just a few minutes, you'll be rewarded with fragrant, buttery witch's fingers that are sure to delight your guests. Remember, a little melted butter goes a long way in elevating these spooky-yet-scrumptious breadsticks to the next level.
Step 5. Let Fingers Cool Before Serving
Once the witch's fingers breadsticks have emerged from the oven, let them cool for a few minutes before serving. This brief rest period is crucial, as the breadsticks will be piping hot straight out of the oven.
Allowing them to cool slightly will prevent any accidental burns or scalding when your guests bite into them. Plus, it'll give the breadsticks time to set up and firm up a bit, making them easier to handle and enjoy.
While you wait, take a moment to admire your spooky creation. The twisted, gnarled shapes of the witch's fingers should be a delightfully eerie sight.
Once they've had a chance to cool, the breadsticks will be ready to serve. Arrange them on a platter or plate, perhaps alongside a spooky-themed dipping sauce for an extra touch of Halloween flair.
Your guests are sure to be impressed by your baking prowess and the ghoulish presentation. Just remember to let those fingers cool before diving in!
Final Thoughts
Ultimately, these Witch's Fingers Breadsticks are a spooky and delightful treat that can easily elevate any Halloween gathering. These eerily shaped breadsticks not only look the part, but also taste amazing with their soft and fluffy texture. With just a few simple ingredients, this delicious homemade breadstick recipe is sure to impress all your guests and add a fun and festive touch to your Halloween spread. Whether you’re hosting a party or just looking for a fun snack to enjoy with your family, these Witch’s Fingers Breadsticks are the perfect choice.
They're perfect for setting the mood with their eerie, gnarled appearance, and the combination of savory dough and creamy cheese makes them utterly irresistible.
Once you've mastered the technique, they're a breeze to prepare, and your guests will be impressed by your baking skills.
Don't be afraid to get creative with the presentation, either.
Serve them in a dark, cauldron-like bowl or arrange them on a platter adorned with fake spider webs and other Halloween decorations.
The more dramatic, the better!
And remember, these breadsticks aren't just for Halloween – they can be enjoyed year-round as a fun and unique snack.
Frequently Asked Questions
Can I Use a Different Type of Cheese?
Yes, you can definitely use a different type of cheese in your recipe.
The key is to choose a cheese that complements the other flavors and textures of your dish. Consider experimenting with sharp cheddar, parmesan, or even a blend of cheeses to add depth and richness.
Just be sure to adjust the amount used, as different cheeses have varying levels of saltiness and intensity.
Have fun with it and find the cheese that works best for your personal taste preferences!
Do I Need to Use Fresh Herbs?
You don't necessarily need to use fresh herbs for this recipe. Dried herbs can work just as well and often have a more concentrated flavor.
Just be sure to adjust the amount you use – typically, you'll want to use about half the amount of dried herbs compared to fresh. This can save you time and money if you don't have access to fresh herbs.
However, fresh herbs will provide a more vibrant, herbal aroma and flavor if you have them on hand.
How Long Do the Breadsticks Last?
The shelf life of homemade breadsticks can vary, but they'll generally last 3-5 days when stored properly.
Keep them in an airtight container at room temperature. If they start to get stale, you can refresh them by misting with a little water and popping them in a 300°F oven for a few minutes.
This'll help restore their crisp texture. With proper storage, you can enjoy those tasty homemade breadsticks for several days after baking.
Can I Freeze the Dough?
Absolutely, you can freeze the dough!
Freezing the dough is a great way to have homemade bread on hand whenever you need it. Simply shape the dough into logs or rolls, wrap them tightly in plastic, and pop them in the freezer.
When you're ready to bake, let the dough thaw in the fridge overnight, then shape and bake as usual.
This makes for a quick and easy homemade bread solution anytime.
Is It Necessary to Use Food Coloring?
You don't necessarily need to use food coloring for your baked goods, but it can certainly add a fun, festive touch.
If you're going for a Halloween theme or want to make the color more vibrant, a few drops of food coloring can do the trick.
However, the breadsticks will still be delicious without it.
Play around and see what look you prefer – the choice is yours!