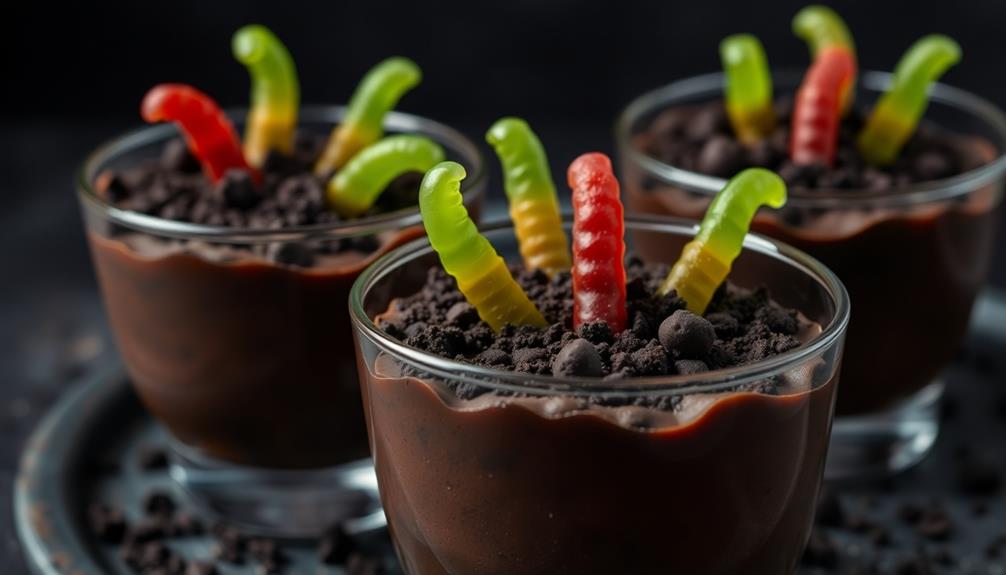
Graveyard dirt pudding cups are a spooky and delicious Halloween dessert that have enchanted both kids and adults for decades. These tasty treats feature creamy chocolate pudding layered with crushed Oreo "dirt" and gooey gummy worms, creating a visually striking and flavor-packed treat. The recipe is simple to follow, allowing you to assemble these individual servings with ease. Top them off with Halloween decorations like plastic tombstones or gummy critters for an extra festive touch. Once chilled, the combination of sweet, crunchy, and chewy elements will have your guests eagerly digging into these graveyard-themed cups. Continue reading to uncover more details about this beloved Halloween classic.
Key Takeaways
- Graveyard Dirt Pudding Cups are a spooky and delicious Halloween dessert featuring layers of chocolate pudding and crushed Oreo cookie "dirt".
- The recipe is inspired by graveyard aesthetics, with optional gummy worms and Halloween decorations for a playful, festive presentation.
- These individual servings are easy to prepare and serve, making them ideal for Halloween parties and gatherings.
- The combination of creamy pudding, crunchy Oreo crumbs, and chewy gummy worms creates a satisfying texture and flavor profile.
- Graveyard Dirt Pudding Cups have become a beloved Halloween tradition, delighting both children and adults with their spooky yet tasty appeal.
History
The origins of Graveyard Dirt Pudding Cups can be traced back to the early 20th century, when enterprising home cooks sought to create spooky desserts for Halloween celebrations.
These inventive recipes were inspired by the eerie atmosphere of graveyards, with layers of crushed Oreo "dirt" and green-tinted vanilla pudding evoking the unsettling aesthetics of a freshly dug grave.
To enhance the experience, many have begun to pair these desserts with seasonal treats, such as fermented vegetable plates, adding a unique twist to Halloween parties. To add a savory element to the spread, some hosts are also incorporating delicious pumpkin pot pies into the mix. The combination of sweet and savory treats allows guests to indulge in a variety of flavors, making for a truly memorable and enjoyable dining experience. It’s a fun way to celebrate the season and impress friends and family with unique and delicious offerings.
As Halloween grew in popularity throughout the decades, Graveyard Dirt Pudding Cups became a beloved tradition, offering a delightfully creepy twist on classic pudding.
The versatile dessert lent itself well to individual servings, allowing hosts to serve up a ghoulish treat with ease.
Today, Graveyard Dirt Pudding Cups remain a staple of Halloween gatherings, capturing the playful spirit of the holiday while delighting both children and adults with their clever, macabre presentation.
From humble homemade origins to a widespread Halloween phenomenon, this dessert has become a beloved part of the season's festivities.
Recipe
Graveyard Dirt Pudding Cups is a delightfully spooky and delicious dessert perfect for Halloween or any time of year. This creamy, chocolatey pudding layered with crushed Oreo cookies and topped with gummy worms creates a realistic "graveyard" effect that's sure to delight your guests.
For those looking to add a personal touch to their Halloween festivities, consider exploring personalized gifts that can complement your spooky theme.
Preparing this dish is a fun and easy activity that can be enjoyed by the whole family. The hands-on process of assembling the pudding cups allows for creativity and customization, making each one unique.
Whether you're hosting a Halloween party or simply want to add a whimsical touch to your dessert routine, Graveyard Dirt Pudding Cups are a fantastic choice.
Ingredients:
- 1 (3.9 oz) package of instant chocolate pudding mix
- 2 cups of cold milk
- 1 (14.3 oz) package of Oreo cookies, crushed
- Gummy worms (for garnish)
Instructions:
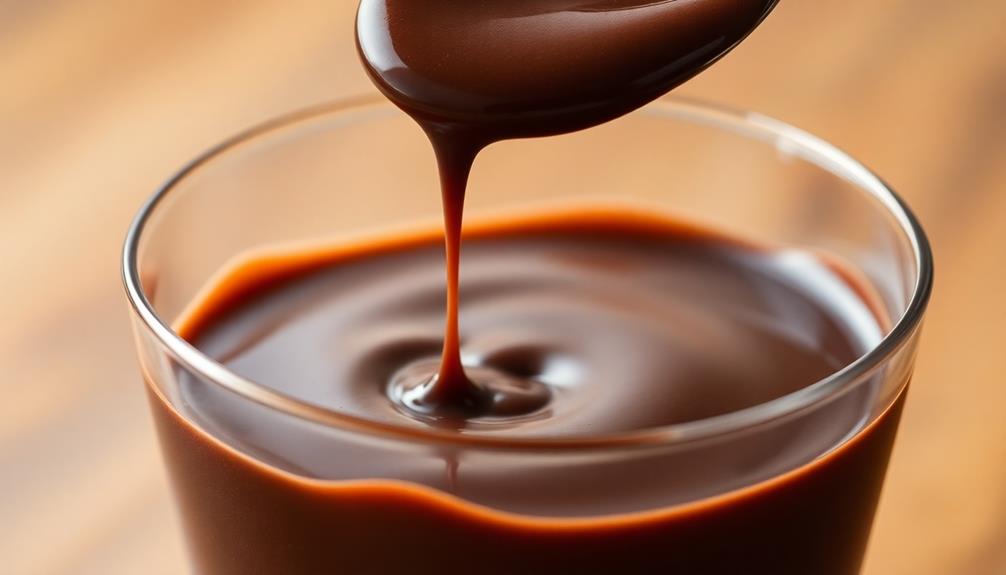
In a medium bowl, whisk together the instant chocolate pudding mix and cold milk until the mixture is smooth and thickened, about 2-3 minutes.
Spoon the chocolate pudding into individual serving cups or bowls. Top each serving with a layer of crushed Oreo cookies, pressing them gently into the pudding.
Garnish the top of each pudding cup with gummy worms, arranging them to resemble a graveyard scene.
Tips:
For an extra spooky touch, consider adding a small amount of green food coloring to the pudding mix to create a more ominous color.
You can also experiment with different cookie varieties, such as chocolate or vanilla wafers, to achieve different flavor profiles.
Additionally, you can use edible decorations like crumbled graham crackers or crushed chocolate cookies to enhance the "dirt" effect.
Refrigerate the Graveyard Dirt Pudding Cups for at least 30 minutes before serving to allow the flavors to meld and the pudding to set.
Cooking Steps
First, crush the Oreos into fine crumbs.
A high-quality projector can enhance your Halloween movie night experience, making the spooky scenes come to life.
Next, layer the chocolate pudding into the cups, then sprinkle the Oreo crumbs on top.
For an even more immersive experience, consider factors like the role of contrast ratio when choosing your projector.
Step 1. Make Crushed Oreo Crumbs

Next, you'll want to create the crushed Oreo crumbs. Grab a resealable plastic bag and add your Oreo cookies. Seal the bag, ensuring no air can escape.
Using a rolling pin or the back of a spoon, gently crush the cookies into fine crumbs. You don't want to pulverize them – leave some small chunks for texture. This step is similar to expense categorization in budgeting, where you separate different elements for a clearer picture.
Once you've achieved the desired consistency, pour the crushed Oreo crumbs into a bowl. This will be the "dirt" layer for your graveyard pudding cups.
Take a moment to admire your handiwork – the dark, rich crumbs should resemble freshly turned soil, perfect for your spooky dessert.
With the Oreo crumbs ready, you can now start assembling the pudding cups. Layer the crushed cookies in the bottom of each serving cup, followed by a generous portion of the chocolate pudding mixture.
Repeat the layers, finishing with the Oreo crumbs on top. Your graveyard dirt pudding cups are now ready to chill and serve.
Step 2. Layer Pudding
With the Oreo crumbs ready, you can now start layering the pudding. Grab your small cups or jars and spoon in a layer of the rich, chocolatey Oreo mixture.
For a delightful twist, consider pairing your dessert with some easy homemade flautas for a fun family dinner or festive gathering.
Next, it's time for the star of the show – the delectable chocolate pudding. Using a piping bag or a spoon, carefully pipe or scoop the pudding on top of the Oreo layer, making sure to spread it evenly. Don't be afraid to really pack it in there!
For the final touch, top the pudding layer with another generous sprinkle of the crushed Oreos. The contrast between the dark cookie crumbs and the smooth, creamy pudding is simply divine.
You can even get creative and add a spooky element, like gummy worms or edible tombstone decorations, to really drive home the "graveyard" theme.
Once you've assembled all your pudding cups, pop them in the fridge and let the flavors meld together while you eagerly await the big reveal.
Step 3. Sprinkle Crumbs Atop Pudding Layer
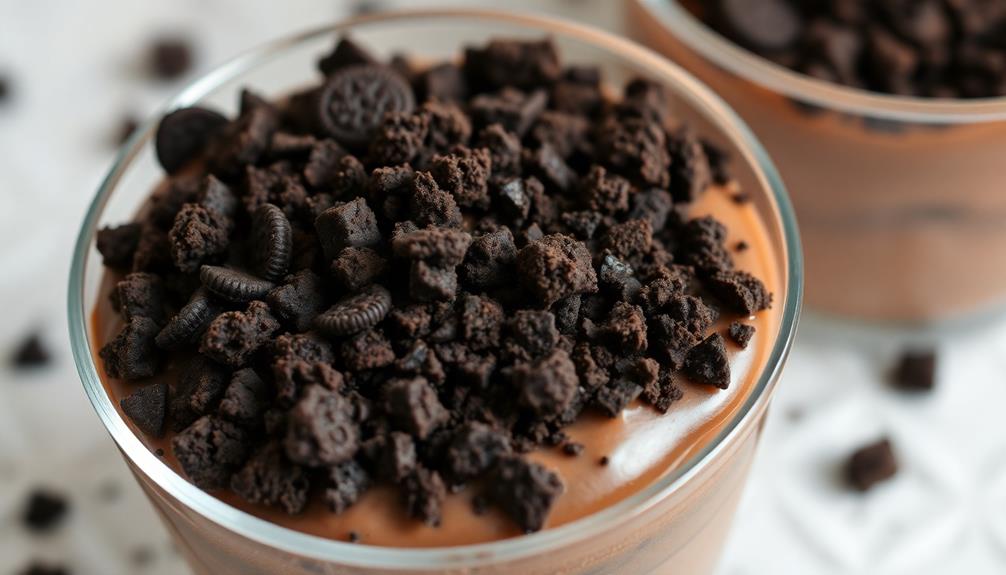
A generous sprinkle of the crushed Oreo crumbs should now top the pudding layer. This layer of crumbs will add a crunchy texture and an authentic "graveyard dirt" look to your Graveyard Dirt Pudding Cups.
Be sure to evenly distribute the crumbs across the surface of the pudding, covering it completely. You can use your fingers or a spoon to gently press the crumbs into the pudding, ensuring they adhere well.
The Oreo crumbs won't only enhance the visual appeal of your dessert, but they'll also provide a delightful contrast in texture. The soft, creamy pudding will be complemented by the satisfying crunch of the cookie crumbs.
Feel free to be generous with the amount of crumbs you use – the more, the better for that authentic graveyard dirt effect.
Once the crumbs are in place, your Graveyard Dirt Pudding Cups are nearly complete and ready to chill until serving.
Step 4. Garnish With Halloween Decorations
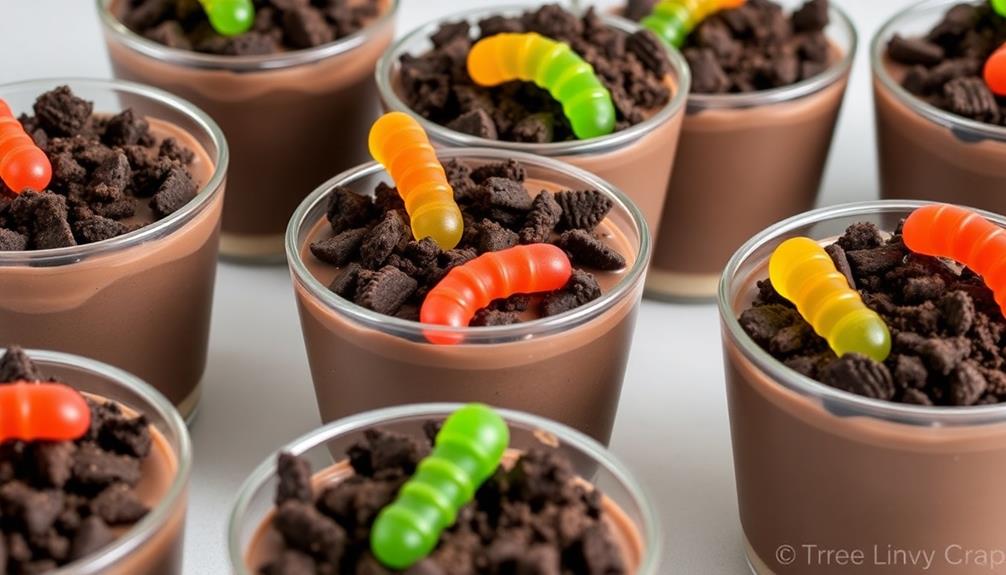
To complete the Graveyard Dirt Pudding Cups, adorn the tops with Halloween-themed decorations. Start by carefully placing small plastic or candy tombstones around the edge of each pudding cup. These fun gravestones will instantly transform your dessert into a spooky graveyard scene.
Next, scatter a few plastic skeleton bones, gummy worms, or other creepy crawly candies across the surface of the pudding. These added elements will make your Graveyard Dirt Pudding Cups even more realistic and visually appealing.
For an extra touch of Halloween magic, you can gently press a small gummy bat or spider into the center of the pudding.
To finish, consider adding a dusting of crushed Oreo cookie crumbs or edible "dirt" around the edges of the cups. This final touch will complete the graveyard look and make your Graveyard Dirt Pudding Cups irresistible for all your Halloween guests.
Step 5. Refrigerate Until Ready to Serve
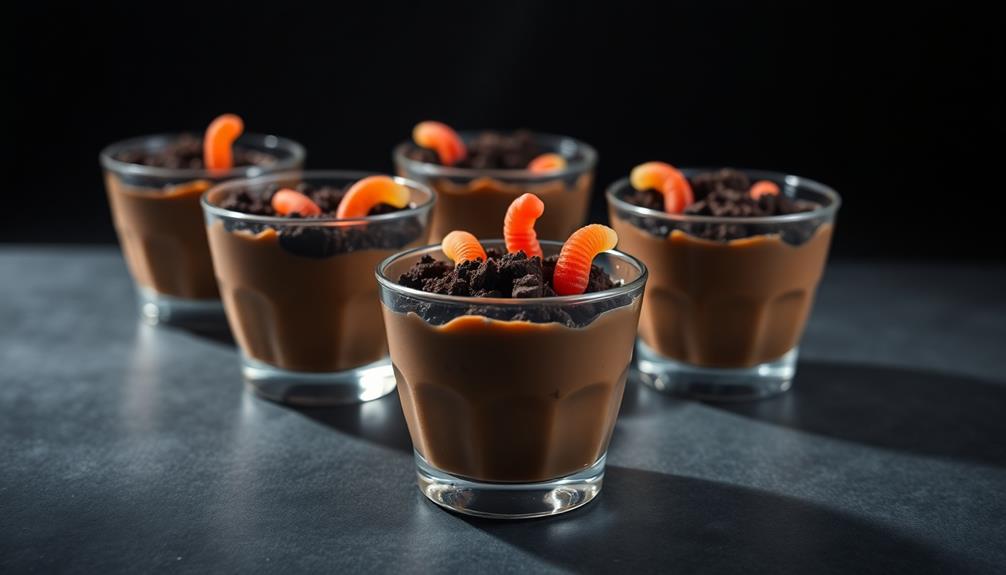
Once the Graveyard Dirt Pudding Cups are garnished with the Halloween decorations, refrigerate them until you're ready to serve. This will help the pudding set and keep the decorations in place.
Refrigerating the cups ensures the dessert stays chilled and firm, creating the perfect texture for your ghoulish treat. Be sure to keep the pudding cups in the fridge for at least 2 hours, or until you're ready to enjoy them. This will allow the flavors to meld and the decorations to remain in position.
When you're ready to serve, simply take the cups out of the refrigerator and marvel at your spooky creation. The chilled pudding, crunchy cookie crumbs, and festive decorations will delight your guests.
Remember to handle the cups carefully, as the decorations may be delicate. Serve the Graveyard Dirt Pudding Cups cold and watch your friends and family eagerly dig into this hauntingly delicious dessert.
Final Thoughts
As you prepare to serve this graveyard dirt pudding cups recipe, consider the delightful blend of flavors and textures that will tantalize your guests' taste buds. The rich, creamy chocolate pudding provides a decadent base, while the crushed Oreo cookie "dirt" adds a satisfying crunch.
The gummy worms wriggling through the soil-like mixture offer a playful, spooky touch that's perfect for Halloween or any ghoulish gathering.
The individual serving cups make for an easy, no-fuss presentation that your guests will appreciate. Simply top each pudding cup with the crushed cookie "dirt" and gummy worms, and you're ready to serve.
The convenience of this recipe allows you to focus on other aspects of your event, knowing this dessert will be a crowd-pleasing hit. With its irresistible combination of sweet, crunchy, and chewy elements, this graveyard dirt pudding cups recipe is sure to delight and impress your guests, leaving them craving more of this delightfully spooky treat.
Frequently Asked Questions
Can I Use Any Type of Dirt for the Pudding?
You're better off using soil from a reputable source, like a garden center or nursery, rather than just any type of dirt.
While it might be tempting to scoop up dirt from your backyard, that could contain contaminants or harmful particles that you don't want in your food.
Stick to clean, high-quality soil to ensure your pudding is safe and delicious.
With the right ingredients, you can create a fun and festive treat!
How Long Do the Pudding Cups Last Before Spoiling?
The duration these pudding cups can last before spoiling depends on various factors, such as the ingredients used and storage conditions.
Generally, homemade pudding cups made with fresh dairy products and properly refrigerated can last 3-5 days in the fridge.
However, it's always best to check for any signs of spoilage, like an off smell or discoloration, before consuming.
Proper storage and food safety are key to ensuring your pudding cups remain fresh and enjoyable.
Are the Oreo Crumbs Essential for the Graveyard Look?
The Oreo crumbs aren't essential for the graveyard look, but they do add a nice touch.
You can use any dark-colored cookie crumbs or even crushed graham crackers instead. The key is creating that spooky, gravelly texture. Just sprinkle them on top of the pudding cups to mimic the look of dirt.
Feel free to get creative with other Halloween-themed toppings too, like gummy worms or edible flowers.
The pudding cups themselves will last 3-4 days in the fridge, so you can make them ahead of time.
Can I Use Premade Pudding Instead of Making It From Scratch?
Absolutely! Using premade pudding is a great time-saver for this recipe. Just follow the instructions on the pudding package and you're good to go.
The Oreo crumbs aren't essential, but they do add a nice touch of spookiness to the "graveyard" look. Feel free to experiment with different toppings like crushed graham crackers or chocolate shavings to make it your own.
The key is to have fun and get creative with the presentation!
Is the Gummy Worm Topping Mandatory for the Recipe?
The gummy worm topping isn't mandatory for the recipe, but it does add a fun, Halloween-themed element.
If you'd prefer a different topping, feel free to get creative! Some tasty alternatives could be crushed Oreos, crumbled graham crackers, or even spooky-shaped candies.
The key is to choose toppings that complement the pudding and match the overall spooky vibe you're going for. Ultimately, it's your recipe, so make it your own!