Connect with us

Cooking

Cobweb Cotton Candy

Transporting you back in time, cobweb cotton candy is a magical confection that captivates with its ethereal web-like structure and delicate flavors.

Published

on

sweet spun sugar delight

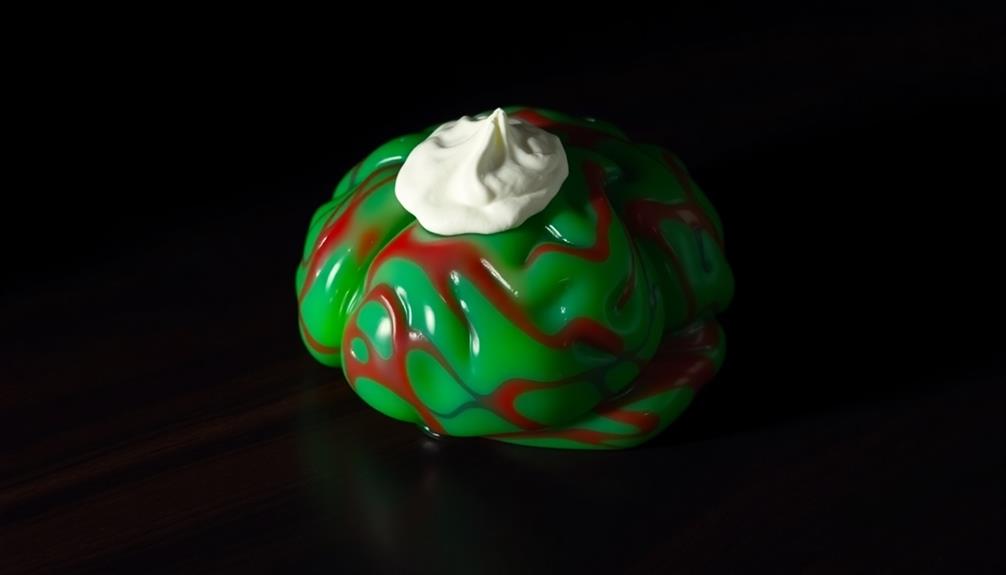
Cobweb cotton candy is a magical confection that'll transport you back in time. It emerged in the late 1800s when pioneering confectioners began experimenting with spun sugar techniques. This delicate treat soon captivated audiences at world fairs and carnivals, evoking nostalgia and joy. Over decades, the production process has been refined for consistent, large-scale manufacturing. Today, cobweb cotton candy remains a beloved specialty, enchanting all who experience its ethereal web-like structure, fluffy texture, and delicate flavors. Serve it immediately for optimal freshness and texture, then get ready to be amazed by the creative possibilities.

Key Takeaways

  • Cobweb cotton candy is a delicate and ethereal treat that emerged in the late 19th century, captivating audiences at world fairs and carnivals.
  • The intricate production process involves heating sugar and corn syrup, then carefully spinning the hot syrup into airy, whimsical strands using a cotton candy machine.
  • Cobweb cotton candy is known for its translucent web-like structure, fluffy texture, and delicate flavors, which create a unique sensory experience.
  • Proper presentation and immediate serving are crucial to maintain the ephemeral nature and cloud-like texture of the cobweb cotton candy.
  • Experimentation with different flavors, colors, and techniques is encouraged to create unique and personalized variations of this magical culinary delight.

History

When did cobweb cotton candy first emerge? The origins of this unique confection can be traced back to the late 19th century. In the 1880s, candy makers began experimenting with new techniques to create intricate, web-like structures out of spun sugar.

This delicate art form was initially showcased at world's fairs and carnivals, captivating audiences with its ethereal beauty and delicate texture. Interestingly, similar to how coffee's health benefits can enhance mood and cognitive function, the delightful experience of enjoying cobweb cotton candy can evoke feelings of nostalgia and joy.

Over the decades, the production process has been refined, allowing for more consistent and larger-scale manufacturing. Today, cobweb cotton candy is a cherished treat found at various events and specialty shops.

Its mesmerizing appearance, combined with its light and airy flavor, has made it a beloved favorite among children and adults alike. Whether enjoyed as a whimsical dessert or a decorative element, cobweb cotton candy continues to enchant and delight those who encounter its delicate, web-like strands.

Recipe

Cobweb Cotton Candy is a delightful and whimsical treat that captures the essence of a spooky Halloween night. Imagine a fluffy, ethereal confection that mimics the delicate strands of a spider's web, with a delicate sweetness that melts on the tongue.

Advertisement

The process of creating this enchanting dessert involves a bit of culinary magic, as the sugar is spun and stretched to create the intricate, web-like patterns, similar to how businesses must navigate essential services for startup guidance. The result is a delightful visual spectacle that's sure to delight both children and adults alike.

Ingredients:

  • 1 cup granulated sugar
  • 1/4 cup light corn syrup
  • 1/4 cup water
  • Food coloring (optional)

Cooking Instructions:

In a medium saucepan, combine the sugar, corn syrup, and water. Heat the mixture over medium-high heat, stirring occasionally, until it reaches 300°F on a candy thermometer.

Remove the pan from the heat and let the mixture cool for 30 seconds. Dip the tines of a fork or a candy spider web maker into the hot sugar mixture and quickly wave it back and forth to create the delicate web-like strands.

Transfer the cobweb cotton candy to a parchment-lined baking sheet and allow it to cool completely before serving.

Advertisement

Tips:

It's important to work quickly when spinning the sugar, as it will harden quickly. If the sugar becomes too thick, you can reheat it briefly to make it more pliable.

Additionally, you can experiment with different food colorings to create unique and visually stunning cobweb cotton candy.

Cooking Steps

First, you'll need to heat the sugar until it's molten and ready to spin into thin, delicate strands.

This process requires careful temperature control, similar to budgeting essentials for managing your finances.

Advertisement

Then, gather those cobweb-like cotton candy threads and shape them into whimsical forms.

Step 1. Heat Sugar

heat sugar to melt

Grab a heavy-bottomed saucepan and place it over medium heat. Add the sugar and a splash of water, then stir until the sugar is fully dissolved.

As the mixture heats up, it'll start to bubble and caramelize. Keep a close eye on it, gently swirling the pan occasionally, to ensure the sugar doesn't burn. For an added health benefit, consider pairing your cotton candy with a refreshing drink like Cranberry Juice that offers antioxidants.

Once the syrup reaches 300°F on a candy thermometer, it's ready. Carefully pour the hot sugar into the center of your cotton candy machine, allowing it to spin and create those delightful wispy strands.

Work quickly, as the sugar will begin to harden as it cools. Adjust the speed and motion of the machine to control the thickness and texture of the cotton candy.

Step 2. Spin Sugar Into Thin Strands

spin sugar thin strands

Once your sugar syrup has reached the ideal temperature, it's time to transform it into the airy, wispy strands that define cotton candy.

Grab your cotton candy spinner and position it on a secure surface. Switch it on, allowing the inner bowl to heat up and reach the optimal spinning speed. Dip your ladle into the hot syrup, carefully scooping up a small amount. Gently pour the syrup into the spinning bowl, watching as it's immediately transformed into delicate, gossamer-like threads.

Advertisement

Dreams, much like this process, can evoke strong emotions and memories, providing a sense of comfort and connection to the past, especially in times of grief such as dreams of deceased loved ones.

As the sugar strands accumulate, use your hands to gently pull and shape the cotton candy, creating a fluffy, cloud-like confection. Work quickly, as the sugar will harden and lose its airy texture if left in the spinner for too long.

Continue this process, adding more syrup as needed, until you've created the perfect, ethereal cotton candy. With a little practice, you'll be spinning sugar into heavenly strands in no time.

Step 3. Gather Cobweb-like Cotton Strands

collect cotton strands carefully

With the sugar syrup at the ideal temperature, it's now time to transform it into the signature wispy strands of cotton candy.

Grab your trusty cotton candy machine and let the magic begin. Slowly pour the hot syrup into the spinning head, letting it melt and spread into delicate threads.

Watch in awe as the sugar spins and stretches, creating a mesmerizing display of cobweb-like cotton strands. Gently guide the forming cotton candy with your hands, gathering it into a soft, fluffy ball.

Advertisement

Be careful not to handle it too much, as the gentle strands can easily tear. Gradually build up the size of your cotton candy creation, layer by layer, until you have a beautifully wispy and ethereal confection.

With a few simple motions, you've captured the essence of the classic carnival treat, ready to delight and enchant all who behold it.

Step 4. Shape Into Whimsical Forms

whimsical shape transformation process

After gathering the delicate cotton strands, you can shape them into whimsical forms. Start by lightly pinching a small portion of the wispy fibers and gently pulling them apart. As you stretch the cotton, it will begin to take on a delicate, web-like appearance.

Experiment with different techniques, such as twisting, curling, or folding the strands, to create intricate patterns and shapes. You can even try draping the cotton over various objects, like a wire frame or the edge of a bowl, to form unique structures.

The key is to handle the cotton with a light touch, as it's incredibly fragile. Work quickly, as the fibers tend to stick together and lose their airy, cloud-like texture if left unattended.

With a little practice, you'll be able to craft mesmerizing cotton candy sculptures that resemble enchanting cobwebs. Display your creations on a platter or tray for a truly whimsical presentation that's sure to delight your guests.

Advertisement

Step 5. Serve Immediately

serve the dish promptly

Now that you've skillfully crafted your cotton candy into whimsical shapes, it's time to serve them immediately. Cotton candy is best enjoyed fresh, as its delicate, airy texture quickly begins to deteriorate once exposed to air.

As soon as you've finished shaping your creations, carefully transfer them to serving plates or trays.

Be gentle when handling the cotton candy, as it's incredibly fragile. Use your fingertips to gently lift and place each piece, taking care not to crush or distort the shapes.

Arrange the cotton candy in a visually appealing manner, allowing the intricate designs to be fully showcased.

Serve the cotton candy immediately, as it will begin to lose its lofty, cloud-like consistency within minutes. Encourage your guests to enjoy the treats right away, savoring the delicate sweetness and ethereal textures.

The true magic of cobweb cotton candy lies in its ephemeral nature, so seize the moment and indulge in these whimsical confections without delay.

Advertisement

Final Thoughts

Ultimately, the Cobweb Cotton Candy is a delightful and whimsical treat that captures the essence of a magical, ethereal experience. When executed properly, this fluffy confection transforms into a stunning, translucent web that mesmerizes the senses.

The key to success lies in serving it immediately, as the cobweb structure is fleeting and requires prompt attention.

While the process may seem daunting, the reward of presenting this edible artwork is well worth the effort. Embrace the playful nature of this dessert and have fun experimenting with different techniques and flavors.

Don't be afraid to get creative and put your own unique spin on the classic cotton candy. Ultimately, the Cobweb Cotton Candy is a delightful way to bring a touch of magic to any occasion, leaving your guests in awe of its ethereal beauty and delightful taste.

Frequently Asked Questions

Can Cobweb Cotton Candy Be Made in Different Flavors?

Yes, you can absolutely create cobweb cotton candy in a variety of flavors!

Advertisement

The airy, delicate texture of cotton candy lends itself perfectly to experimenting with different taste profiles. From classic options like strawberry and vanilla to more unique flavors like chai or lavender, the possibilities are endless.

All you'll need is your basic cotton candy equipment and some creative flavor extracts or infusions.

How Long Does Cobweb Cotton Candy Last Before It Loses Its Texture?

Cobweb cotton candy typically lasts for around 2-3 days before it starts to lose its delicate, web-like texture.

To preserve the quality, store it in an airtight container at room temperature and away from moisture.

Avoid refrigerating it, as the cool, humid environment can cause the candy to become sticky and lose its signature lightness.

Advertisement

Enjoy your cobweb cotton candy as soon as possible for the best texture and flavor experience!

Is Cobweb Cotton Candy Safe for Children to Consume?

Consuming cotton candy can be perfectly safe for children, as long as it's made with high-quality ingredients and proper food safety practices.

However, the delicate texture of cobweb cotton candy may pose a choking hazard for younger kids.

It's best to supervise children closely and avoid giving them cobweb cotton candy until they're old enough to handle it safely.

When in doubt, it's always better to err on the side of caution when it comes to children's health and wellbeing.

Advertisement

Can Cobweb Cotton Candy Be Made Gluten-Free or Nut-Free?

Yes, cobweb cotton candy can be made gluten-free or nut-free!

The key is to use alternative ingredients that don't contain gluten or nuts. For a gluten-free version, you'd replace the wheat-based sugar with a gluten-free sugar substitute.

And for a nut-free version, you'd avoid any nut-based ingredients.

With a few simple tweaks, you can enjoy this fun treat without worrying about dietary restrictions.

Just be sure to check the ingredients carefully and follow any specific allergy-friendly recipes.

Advertisement

Does Cobweb Cotton Candy Have Any Nutritional Value or Benefits?

Cobweb cotton candy doesn't have much in the way of nutritional value or health benefits.

It's essentially just spun sugar, so you won't find any significant vitamins, minerals, or other nutrients.

The main appeal of this type of cotton candy is its unique, delicate texture and elaborate appearance.

While it may make for a fun and visually striking treat, it's best enjoyed in moderation as part of a balanced diet.

The real nutritional value comes from the joy and celebration it brings!

Advertisement
Continue Reading
Advertisement

Cooking

Haunted Haystack Cookies

Overcome your sweet tooth with the hauntingly delicious Haunted Haystack Cookies, a spooky Halloween treat that combines buttery crumbs, toasted coconut, and melted chocolate.

Published

on

spooky themed cookie recipe

Haunted Haystack Cookies emerged during colonial America, inspired by mysterious "haunted haystacks" inhabited by mischievous spirits. This Halloween-themed treat combines a buttery, crumbly base with toasted coconut and chocolate candies, creating a striking dessert with crisp cookie, chewy coconut, and sweet chocolate. It's an ideal party treat, pairing well with beverages to enhance the overall experience. Bake these cookies to 350°F, cool them thoroughly, and decorate with melted chocolate for a festive presentation. Haunted Haystacks are sure to delight guests and add to the spooky Halloween spirit – there's more to discover about these bewitching cookies.

Key Takeaways

  • Haunted Haystack Cookies are a Halloween-themed treat popular in America, inspired by the mysterious "haunted haystacks" of the colonial era.
  • The cookies feature a buttery, crumbly base topped with toasted coconut and chocolate candies, combining crisp, chewy, and sweet flavors.
  • The recipe involves simple baking techniques, with key ingredients including butter, sugar, flour, and shredded coconut.
  • Proper baking and cooling techniques are essential for achieving the desired texture and shape of the haystack-like cookies.
  • The cookies can be further decorated with melted chocolate for a spooky, festive presentation, making them a perfect addition to Halloween gatherings and celebrations.

History

According to legend, the haunted haystack cookies first emerged during the early colonial period in America. As settlers ventured into the wilderness, they often encountered strange phenomena, including the mysterious "haunted haystacks" that dotted the landscape.

These peculiar piles of hay were rumored to be inhabited by mischievous spirits, which inspired the creation of the haunted haystack cookie. This whimsical treat can be likened to the enduring love of a mother, as it brings warmth and comfort to those who enjoy it, reminiscent of the heartfelt tributes we create to honor our loved ones a mother's enduring love.

The recipe for these whimsical treats evolved over time, blending traditional colonial baking techniques with the supernatural element of the haunted haystacks. Bakers would shape the dough into clusters, mimicking the lofty, irregular form of the haystacks, then bake them until they developed a golden, crispy exterior.

The result was a delightfully crunchy cookie that captured the essence of the legendary haunted haystacks.

Today, the haunted haystack cookie remains a beloved part of American culinary heritage, a delicious reminder of the country's rich folklore and the ingenuity of its early settlers.

Advertisement

Recipe

Haunted Haystack Cookies are a Halloween-themed treat that will delight both children and adults alike.

These spooky cookies are made with a buttery, crumbly base topped with a mound of toasted coconut "haystack" and a handful of chocolate "spiders" or other festive candies. The combination of the crisp cookie, the chewy coconut, and the sweet chocolate creates a delightful and visually striking dessert that's sure to be a hit at any Halloween party or gathering.

For those who enjoy pairing their treats with a beverage, understanding the different brewing methods can enhance the overall experience.

Ingredients:

  • 1 cup (2 sticks) unsalted butter, softened
  • 1 cup granulated sugar
  • 1 egg
  • 2 teaspoons vanilla extract
  • 2 1/4 cups all-purpose flour
  • 1 teaspoon baking powder
  • 1/4 teaspoon salt
  • 2 cups shredded sweetened coconut
  • Chocolate spiders or other Halloween candies

Instructions:

In a large bowl, cream the butter and sugar together until light and fluffy. Beat in the egg and vanilla.

Advertisement

In a separate bowl, whisk together the flour, baking powder, and salt. Gradually add the dry ingredients to the wet ingredients, mixing until just combined. Chill the dough for at least 30 minutes.

Preheat the oven to 350°F (177°C) and line two baking sheets with parchment paper. Scoop tablespoon-sized balls of dough and place them about 2 inches apart on the prepared baking sheets.

Bake for 10-12 minutes, or until the edges are lightly golden. Remove from the oven and immediately top each cookie with a mound of toasted coconut, pressing it down gently to adhere. Allow the cookies to cool on the baking sheets for 5 minutes before transferring them to a wire rack to cool completely.

Once the cookies are cool, top each coconut "haystack" with a chocolate spider or other Halloween candy. Serve and enjoy your Haunted Haystack Cookies!

Cooking Steps

Preheat your oven to 350°F, then grab a bowl and combine the ingredients for the Haunted Haystack Cookies.

Advertisement

For a delightful morning treat, consider whipping up Cinnamon Sugar French Toast Bites as well.

Spoon the cookie dough onto a baking sheet and pop it in the oven for 10-12 minutes until the cookies are golden brown.

Once they've cooled completely, you're ready to enjoy these delightfully spooky treats.

Step 1. Preheat Oven to 350°F

preheat oven 350 f

Preheating the oven to 350°F is the first crucial step in baking these Haunted Haystack Cookies. This temperature strikes the perfect balance, ensuring the cookies bake evenly and develop that irresistible crunch. Regularly checking your oven's calibration can help maintain this balance, just like optimal usage timing is essential for air purifiers to function effectively.

Begin by locating your oven and giving the door a gentle tug to make sure it opens smoothly. Consult your oven's manual if you're unsure about the controls. Most modern ovens have digital displays that make temperature selection a breeze. Simply press the "Bake" button and use the up and down arrows to set the temperature to 350°F.

Once the oven is preheated, you'll hear a chime or see a light indicating it's reached the desired temperature. This is your cue to begin preparing the cookie dough.

Advertisement

Keep in mind that oven temperatures can fluctuate, so it's a good idea to use an oven thermometer to double-check the heat level. With the oven set and ready, you're one step closer to baking up a batch of spooky-good Haunted Haystack Cookies.

Step 2. In a Bowl, Combine Ingredients

combine ingredients in bowl

Now that your oven is preheated, let's move on to the next step. In a large bowl, combine the dry ingredients – flour, baking soda, and salt. Whisk them together until evenly mixed.

In a separate bowl, cream the butter and sugar until light and fluffy. It's important to be aware that many popular candies, for example, can contain high sugar levels, impacting health when consumed excessively (sugar overload risks).

Beat in the egg and vanilla extract, incorporating them fully. Gradually add the dry ingredients to the wet ingredients, mixing until just combined. Don't overmix, or your cookies will become tough.

Fold in the chocolate chips and crushed cookies, distributing them evenly throughout the dough. The cookie dough should have a nice, thick consistency, perfect for shaping into the iconic haystack design.

Using a spoon or cookie scoop, portion the dough into rounds and place them onto the prepared baking sheets, spacing them a few inches apart. This will allow the cookies to spread and develop their unique, rustic shape during baking.

Advertisement

Now you're ready to pop them in the oven and let the magic happen!

Step 3. Spoon Cookie Dough Onto Baking Sheet

spoon dough onto sheet

With the dry ingredients thoroughly combined, it's time to portion the cookie dough onto the prepared baking sheets.

Grab a spoon or small scoop and start scooping the dough, placing mounds about 2 inches apart on the sheets.

Don't worry if the dough doesn't look perfectly round – the cookies will spread and take shape as they bake.

Once you've filled the sheets, gently press down on the dough mounds to flatten them slightly.

This will help them bake evenly and achieve that classic haunted haystack look.

Advertisement

Be sure to work quickly, as you don't want the dough to dry out.

If it starts to get too firm, try scooping with a warm spoon or re-kneading the dough lightly before portioning.

With the cookies ready for the oven, you're one step closer to enjoying the spooky, delicious results of your labors.

Just pop the sheets in and get ready for the haunting aroma to fill your kitchen!

Step 4. Bake 10-12 Minutes Until Golden Brown

bake until golden brown

Slip the prepared baking sheets into the preheated oven and let the cookies bake for 10 to 12 minutes, or until they're golden brown around the edges.

The aroma of the cookies will start to fill your kitchen, tempting you with their delightful scent. Keep a close eye on them, as the baking time can vary depending on your oven. You'll know they're ready when the tops are lightly golden, and the edges have a slightly crisp texture.

Advertisement

Once the cookies are done, carefully remove the baking sheets from the oven. Allow the cookies to cool on the sheets for a few minutes before transferring them to a wire rack.

This will help them retain their shape and prevent them from becoming too soft. Remember, the cookies will continue to firm up as they cool, so don't be tempted to move them too soon.

With a little patience, you'll have a batch of perfectly baked Haunted Haystack Cookies, ready to be enjoyed by all.

Step 5. Let Cookies Cool Completely

cool cookies completely first

After removing the cookies from the oven, let them cool completely on the baking sheets for at least 10 minutes. This resting period is crucial for the cookies to firm up and maintain their shape.

As they cool, the butter and other ingredients will set, preventing the cookies from crumbling when you try to transfer them. Be patient – resist the temptation to start munching right away. The extra time allows the flavors to meld and the texture to reach its optimal state.

Once the cookies have cooled, you can carefully transfer them to a wire rack or serving platter. This will ensure even cooling and prevent the bottoms from getting soggy.

Advertisement

Final Thoughts

As you put the finishing touches on your Haunted Haystack Cookies, you can't help but feel a sense of accomplishment. These spooky, whimsical treats are the perfect addition to your Halloween festivities.

You've carefully crafted each cookie, ensuring they're baked to perfection and cooled completely before decorating.

Now, it's time to unleash your creativity. Drizzle the melted chocolate over the cookies, creating intricate web patterns or ghostly designs. Sprinkle the crushed cookies or candies over the tops, transforming your cookies into haunted haystacks.

The visual contrast of the dark chocolate and the light, fluffy cookie base is truly captivating.

As you step back and admire your handiwork, you can't help but feel a sense of pride. These Haunted Haystack Cookies aren't just delicious, but they also showcase your baking skills and attention to detail.

Advertisement

Savor the moment, for these delightful cookies are sure to delight your guests and bring a touch of spooky magic to your Halloween celebrations.

Frequently Asked Questions

Are Haunted Haystack Cookies Gluten-Free?

Haunted haystack cookies are a popular Halloween treat, but are they gluten-free?

Unfortunately, there's no simple answer, as the ingredients can vary widely from recipe to recipe. Some versions may use gluten-free ingredients like rice cereal or gluten-free oats, while others could contain wheat flour or other gluten-containing components.

To know for sure, you'd need to check the specific recipe or ask the baker. If you have a gluten sensitivity, it's best to inquire about the ingredients before indulging.

What Is the Shelf Life of These Cookies?

The shelf life of these cookies can vary, but they generally last about 2-3 weeks when stored properly.

Advertisement

Keep them in an airtight container at room temperature, and they'll stay fresh and delicious.

Avoid storing them in the fridge, as that can cause them to dry out.

With proper storage, you can enjoy these tasty treats for up to a couple of weeks.

Just be sure to keep an eye on them and consume them before they start looking stale or lose their flavor.

Can I Substitute Ingredients in the Recipe?

Absolutely! Substituting ingredients in recipes can be a fun way to customize them to your tastes.

Advertisement

Just keep in mind that it may affect the final result, so it's best to make any changes gradually and test them out before committing to the full recipe.

Feel free to experiment with different types of flours, sweeteners, or even add-ins like nuts or dried fruit.

The key is to have fun and be willing to adjust as you go.

Do These Cookies Contain Any Artificial Preservatives?

The cookies don't contain any artificial preservatives.

Preservatives are often added to baked goods to extend their shelf life, but these homemade cookies rely on natural ingredients without any synthetic additives.

Advertisement

You can feel good about serving them, knowing you're providing a wholesome treat without any questionable chemicals.

The simple, straightforward recipe ensures these cookies are free from artificial preservatives, allowing you to enjoy their fresh, homemade flavor.

Are Haunted Haystack Cookies Suitable for Vegan Diets?

Unfortunately, haunted haystack cookies aren't suitable for vegan diets. These traditional holiday treats typically contain butter, milk, and sometimes even eggs – all ingredients that vegans avoid.

If you're looking for a vegan-friendly alternative, you could try making "spooky haystack" cookies using plant-based butter, dairy-free milk, and egg substitutes. This would allow you to enjoy the classic flavors and textures, just without the animal-derived ingredients.

Ultimately, haunted haystack cookies aren't the best choice for those following a vegan lifestyle.

Advertisement
Continue Reading

Cooking

Midnight Black Bean Dip

Kick-start your party with the rich, earthy flavors of Midnight Black Bean Dip, a crowd-pleasing appetizer with ancient Mesoamerican roots and regional variations.

Published

on

midnight black bean delight

Midnight Black Bean Dip traces its roots back to ancient Mesoamerican civilizations, where black beans were a dietary staple often transformed into a creamy dip. Over time, this appetizer evolved through cultural exchanges, leading to unique regional variations. The classic Mexican version features spices like cumin and chili peppers, while Caribbean renditions may include herbs and coconut milk. Today, this versatile dip remains a beloved crowd-pleaser, appreciated for its rich, earthy flavor and creamy texture. Serve it with tortilla chips, pita bread, or fresh veggies for a delightful snacking experience. And if you're intrigued to learn more, keep reading to uncover the full recipe and cooking steps.

Key Takeaways

  • Midnight Black Bean Dip is a versatile appetizer with origins in ancient Mesoamerican civilizations, featuring a creamy texture and bold, earthy flavors.
  • The dip's key ingredient, black beans, provides a hearty base, while spices like cumin, chili powder, and jalapeño add depth and subtle heat.
  • Blending the beans with garlic, lime juice, and a touch of olive oil creates a smooth, creamy consistency that is enhanced by refrigeration.
  • This dip can be served with tortilla chips, pita bread, or fresh vegetables, and can also be used as a topping for tacos or burgers.
  • The infusion of flavors during refrigeration results in a rich, balanced taste that appeals to a wide range of palates, making it a crowd-pleasing appetizer.

History

Black bean dip has a rich history that dates back to ancient Mesoamerican civilizations. These cultures, such as the Maya and Aztec, were among the first to cultivate and consume black beans, which were a staple in their diets. They often prepared the beans in various ways, including mashing them into a creamy dip that was enjoyed as part of their traditional cuisine.

Similar to the way Cacciucco represents coastal culinary heritage, black bean dip has evolved through cultural exchanges and adaptations.

Over time, the popularity of black bean dip spread throughout the Americas, with each region developing its own unique recipes and flavor profiles. In Mexico, for instance, the dip may be seasoned with aromatic spices like cumin and chili peppers, while in the Caribbean, it might incorporate fragrant herbs and coconut milk.

As black beans and their dip became more widely known, the dish evolved to reflect the diverse culinary traditions of the Americas.

Today, black bean dip remains a beloved appetizer and snack, appreciated for its rich, satisfying taste and versatility in various cultural contexts.

Advertisement

Recipe

Midnight Black Bean Dip is a delicious and versatile appetizer that can be enjoyed at any time of the day. This dip is perfect for parties, game nights, or a casual snack. The deep, rich color and bold flavors make it a stand-out dish that your guests are sure to love.

Incorporating healthy snacks into your diet is essential for maintaining overall well-being, especially when considering nutritional adjustments that can enhance your snacking experience.

The key to this dip is the use of black beans, which provide a hearty texture and a unique, earthy taste. Combined with a blend of spices and a touch of heat, this dip is sure to elevate your snacking experience.

Ingredients:

  • 2 (15 oz) cans black beans, drained and rinsed
  • 1 jalapeño, seeded and finely chopped
  • 1 clove garlic, minced
  • 1 teaspoon ground cumin
  • 1 teaspoon chili powder
  • 1/2 teaspoon smoked paprika
  • 1/4 cup fresh cilantro, chopped
  • 2 tablespoons lime juice
  • Salt and pepper to taste

To prepare, simply combine all the ingredients in a food processor or high-powered blender and blend until smooth and creamy. Adjust seasoning to taste.

For best results, let the dip sit for 30 minutes to allow the flavors to meld.

Advertisement

When serving, consider pairing the Midnight Black Bean Dip with tortilla chips, pita bread, or fresh veggies. The dip can also be used as a topping for tacos, burgers, or even as a spread for sandwiches.

For a creamier texture, you can stir in a tablespoon or two of sour cream or Greek yogurt. Enjoy!

Cooking Steps

First, rinse and drain the black beans thoroughly. It's important to ensure that the beans are well-drained to prevent any excess moisture that could affect the dip's texture.

While preparing the dip, consider that black beans are rich in fiber and nutrients, which can contribute to overall health nutritional benefits include high fiber.

Next, puree the beans with the spices until smooth.

Advertisement

Then, transfer the bean dip to a serving bowl and garnish it with chopped cilantro.

Step 1. Rinse and Drain Black Beans

rinse and drain beans

To begin, rinse the canned black beans under cool running water in a colander or mesh strainer. This step helps remove any excess sodium or impurities that may be present, which is particularly beneficial for those monitoring their sodium intake.

Gently swish the beans around with your hand to ensure they're thoroughly rinsed, just as regular maintenance is essential for appliances like air purifiers to keep them functioning optimally filter replacement recommendations.

Once rinsed, transfer the beans to a clean paper towel-lined plate or baking sheet to drain. Let them sit for a few minutes, allowing the excess water to drip off. This simple step helps prevent the dip from becoming watery or overly thin in consistency.

By rinsing and draining the black beans, you'll start with a clean, fresh base that allows the other flavors in the dip to shine. Plus, it's an easy way to control the sodium content and texture of your midnight black bean dip.

Once drained, you're ready to move on to the next step in the recipe.

Advertisement

Step 2. Puree Beans With Spices

puree beans with spices

With the black beans rinsed and drained, you can now move on to pureeing them with the flavorful spices.

Grab your food processor or blender and add the beans, cumin, smoked paprika, garlic powder, and a pinch of salt. To elevate your dip, consider pairing it with a side of easy tomato focaccia, which adds a delightful texture contrast.

Pulse the mixture until it reaches a smooth, creamy consistency, scraping down the sides as needed. The spices will infuse the beans with a warm, earthy flavor that's simply irresistible.

For an extra silky texture, you can add a tablespoon or two of olive oil while blending. Taste the dip and adjust the seasonings to your liking, adding more salt or spices as desired. The key is to find the perfect balance of bold flavors that will make your taste buds dance.

Once you've achieved the ideal taste and texture, your midnight black bean dip is ready to serve. Scoop it into a bowl and get ready to enjoy this delightful, nutrient-packed treat.

Step 3. Transfer to Serving Bowl

transfer to serving bowl

Transferring the silky smooth black bean dip to a serving bowl is the final step.

First, select a bowl that's the right size to accommodate all the dip. You want a bowl that's large enough to allow for easy dipping, but not so big that the dip gets lost in it.

Advertisement

Gently pour the dip from the food processor into the serving bowl, using a spatula to scrape down the sides and ensure you get every last delicious drop.

Once the dip is in the bowl, use the spatula to smooth the top and create an even surface. This not only looks more appetizing, but it also allows the flavors to mingle together evenly.

Finally, add any garnishes you desire, such as a sprinkle of chopped cilantro or a drizzle of olive oil.

Your midnight black bean dip is now ready to serve and enjoy with your favorite crunchy dippers.

Step 4. Garnish With Chopped Cilantro

garnish with chopped cilantro

Once the black bean dip is nestled in the serving bowl, it's time to add the finishing touch – a sprinkle of freshly chopped cilantro. This verdant garnish not only enhances the dip's visual appeal but also infuses it with a vibrant, herbal aroma.

Using a sharp knife, finely chop a handful of cilantro leaves, ensuring they're evenly distributed across the surface of the dip. The fresh, fragrant cilantro provides a delightful contrast to the rich, creamy texture of the black beans, creating a sensory experience that will delight your guests.

Advertisement

As they dip their tortilla chips into the midnight-hued dip, the cilantro will release its aromatic oils, tantalizing their taste buds. This simple finishing touch takes the dip from great to exceptional, elevating the overall dish and leaving your guests craving more.

With the cilantro garnish in place, your Midnight Black Bean Dip is now ready to be served and savored.

Step 5. Refrigerate for One Hour Before Serving

chill for one hour

After assembling the Midnight Black Bean Dip, you'll want to refrigerate it for one hour before serving. This chilling period allows the flavors to meld and intensify, creating a truly delectable dip. The coolness also enhances the creamy texture, making it an irresistible addition to your appetizer spread.

During the refrigeration time, the spices and seasonings will have a chance to infuse the beans, developing a rich, balanced taste. The garlic, cumin, and chili powder will marry beautifully, while the lime juice and zest provide a bright, tangy counterpoint. Refrigerating the dip ensures these flavors have time to fully incorporate, resulting in a harmonious blend that will delight your guests.

Once the hour is up, give the dip a gentle stir and transfer it to your serving bowl. The cooled, thickened consistency will make it perfect for scooping with crisp tortilla chips or fresh vegetable crudités. Enjoy this Midnight Black Bean Dip at its flavor-packed best!

Final Thoughts

With a simple yet delicious recipe under your belt, the Midnight Black Bean Dip is a true crowd-pleaser.

Advertisement

The key to its success lies in the fusion of bold flavors and the smooth, creamy texture that sets it apart. As you serve this dip, you'll find that it pairs exceptionally well with a variety of dippers, from crunchy tortilla chips to fresh vegetable sticks.

The richness of the black beans is perfectly balanced by the tangy notes of lime juice and the subtle heat from the jalapeño, creating a flavor profile that will have your guests coming back for more.

Whether you're hosting a casual gathering or looking to impress at a potluck, this Midnight Black Bean Dip is sure to be a hit.

Embrace its versatility and let it shine as the star of your next snacking spread.

Frequently Asked Questions

How Long Does the Dip Last After Being Refrigerated?

The refrigerated dip should last about 3-5 days when stored properly.

Advertisement

Just make sure to keep it in an airtight container in the fridge.

Give it a good stir before serving, and you'll enjoy that creamy, flavorful dip for several days.

Keep an eye on it, though – if you notice any changes in color, smell, or texture, it's best to play it safe and toss it.

With a little care, you can savor that dip for a while!

Can I Use Canned Black Beans Instead of Dried?

Absolutely! Using canned black beans is a great alternative to dried beans for your recipe.

Advertisement

Canned beans are already cooked, so they'll save you the time and effort of soaking and simmering dried beans. Just be sure to rinse and drain the canned beans before using them in your dip.

This will help prevent the dip from becoming too watery. The flavor and texture will be just as delicious using canned beans.

Give it a try – it's a convenient shortcut!

Is the Dip Suitable for Vegans or Vegetarians?

The dip is definitely suitable for vegans and vegetarians! Since it's made with just black beans, spices, and other plant-based ingredients, there's no animal products involved.

That means vegans and vegetarians can enjoy this tasty dip without any worries.

Advertisement

And you can easily use canned black beans instead of dried for a quick and convenient option. Just be sure to drain and rinse them first before adding to the recipe.

What Are Some Alternative Toppings for the Dip?

When it comes to topping your dip, the possibilities are endless! You could try diced tomatoes, sliced olives, chopped scallions, or even crumbled feta cheese.

For a plant-based twist, consider roasted red peppers, sautéed mushrooms, or a sprinkle of toasted pumpkin seeds.

Get creative and have fun experimenting with different flavors and textures to find your perfect dip topping combo. The key is to choose toppings that complement the dip's flavor profile and add a delightful contrast.

Can I Make the Dip Ahead of Time?

Yes, you can definitely make this dip ahead of time!

Advertisement

In fact, it's a great option for preparing in advance. The flavors will meld together and intensify if you make it a day or two before serving.

Just store it in an airtight container in the fridge, and when you're ready to serve, give it a good stir.

This makes it super convenient to have on hand for parties or casual gatherings.

Enjoy your delicious homemade dip!

Advertisement
Continue Reading

Cooking

Freaky Fruit Kabobs

Unleash your taste buds with the vibrant and healthy Freaky Fruit Kabobs, a delightful culinary experience that will leave you craving more.

Published

on

spooky skewered fruit treats

Freaky Fruit Kabobs take you on a vibrant, healthy journey through the culinary world. These skewers blend seasonal fruits into a feast for the senses, with sweet pineapple, tart kiwi, juicy mango, and more. The colorful presentation engages guests, encouraging them to savor each bite and explore new flavor combinations. Whether you're hosting a party or seeking a nutritious snack, Freaky Fruit Kabobs offer a customizable and delightful experience. Prepare the kabobs, chill them, and watch as their beauty captivates your guests – though the best part is yet to come when you take that first delicious bite.

Key Takeaways

  • Freaky Fruit Kabobs feature a colorful and healthy assortment of fresh fruits skewered for a visually appealing snack or dessert.
  • The customizable recipe allows for seasonal variations by incorporating local ingredients and reflecting diverse culinary influences.
  • Combining sweet, tart, and juicy fruits creates a refreshing balance of flavors and textures, engaging guests with a unique taste experience.
  • Attention to the artistic presentation of the kabobs can elevate the overall dining experience and spark conversations about the culinary process.
  • The kabobs can be paired with complementary beverages and garnishes to further enhance the flavors and visual appeal.

History

The history of fruit kabobs can be traced back to ancient civilizations, where skewered fruits were enjoyed as refreshing snacks and ceremonial offerings. In Mesopotamia, date palm sticks were used to thread together pomegranate seeds, figs, and grapes, creating vibrant and flavorful displays.

Similarly, the Egyptians crafted intricate fruit skewers adorned with exotic produce like persimmons and dragonfruit, often incorporating them into temple rituals and royal banquets. As the tradition of historic farmhouse recipes emerged, these colorful arrangements reflected the rich agricultural bounty of the land, showcasing the importance of fresh, local produce.

As trade routes expanded, the concept of fruit kabobs spread across the Mediterranean and into Asia. In India, bamboo skewers became the foundation for colorful arrangements featuring mangoes, papayas, and bananas, reflecting the region's diverse tropical bounty.

Meanwhile, in China, delicate fruit skewers were crafted using delicate twigs, showcasing the artistic mastery of the culture.

Today, the tradition of fruit kabobs continues to captivate and delight, with creative interpretations emerging worldwide, blending local ingredients and culinary influences to offer refreshing and visually striking snacks and desserts.

Advertisement

Recipe

Freaky Fruit Kabobs are a fun and colorful way to enjoy a healthy snack or dessert. These vibrant skewers aren't only visually appealing but also packed with a variety of refreshing flavors. Engaging with healthy foods can also align with your mindset shifts necessary for achieving weight loss goals and promote a positive relationship with nourishment.

Whether you're hosting a party or looking for a nutritious treat, these kabobs are sure to delight your taste buds.

The beauty of Freaky Fruit Kabobs lies in their versatility. You can customize the fruit selection to suit your preferences or what's in season. The combination of sweet, tart, and juicy fruits creates a harmonious balance that's both satisfying and refreshing.

Ingredients:

  • 1 pineapple, cut into 1-inch cubes
  • 2 kiwi fruits, peeled and cut into 1-inch slices
  • 1 mango, peeled and cut into 1-inch cubes
  • 12 strawberries, hulled
  • 1 cup seedless grapes, halved
  • 1 cup cantaloupe, cut into 1-inch cubes
  • Wooden or metal skewers

Instructions:

Arrange the prepared fruit on the skewers, alternating the different fruits to create a visually appealing pattern. Place the skewers on a serving platter or tray.

Advertisement

Tips:

For a touch of sweetness, you can drizzle the assembled kabobs with a honey or agave nectar glaze. Additionally, you can experiment with different fruit combinations, such as adding berries, citrus fruits, or even mini marshmallows for a playful twist.

Serving the Freaky Fruit Kabobs chilled can enhance the refreshing experience.

Cooking Steps

First, wash and prepare your fruits, ensuring they're clean and ready to go.

You might consider pairing your kabobs with a refreshing herbal tea, which can enhance the flavors of the fruits; for instance, herbal teas like chamomile can provide a calming complement to your dish.

Advertisement

Next, skewer the fruits sequentially, creating a visually appealing kabob.

Step 1. Wash and Prepare Fruits

wash and prepare fruits

Gather your assortment of vibrant fruits and have them ready for the next step. First, thoroughly wash each piece of fruit under cool, running water. This helps remove any dirt, debris, or pesticide residues.

Gently pat the fruits dry with a clean paper towel or cloth. It's also wise to consider your savings goals when planning for any special occasion that might require extra ingredients or supplies.

Next, prepare the fruits by cutting them into bite-sized pieces. Use a sharp knife and be extra careful, especially with softer fruits like strawberries and kiwis. Aim for uniform sizes to ensure even cooking.

For fruits with pits or seeds, such as peaches or mangoes, carefully remove the core before cutting.

Once your fruits are washed and chopped, it's time to start assembling the kabobs. Arrange the prepared pieces on skewers, alternating colors and textures for a visually appealing result.

Advertisement

This step is where you can unleash your creativity and make those kabobs truly "freaky"!

Step 2. Skewer Prepared Fruits Sequentially

sequentially skewer prepared fruits

With your fruits washed and chopped, you can now start assembling the kabobs. Grab a sturdy skewer and begin threading your prepared fruits onto it. Start with a larger piece, like a pineapple chunk or a strawberry, and then alternate with smaller fruits, such as grapes or berries. This creates a visually appealing pattern that adds interest to your kabob.

For added flavor and nutrition, consider incorporating some fermented vegetable plates to complement your fruit kabobs and enhance your meal with probiotics.

As you skewer the fruits, be mindful of the order and try to create a balanced and cohesive design. You can mix and match different colors and textures to make your kabobs truly "freaky." For instance, you might pair bright green kiwi with juicy red raspberries and golden pineapple pieces.

Experiment with different fruit combinations to find your favorite flavor pairings.

Once your kabob is complete, set it aside and repeat the process until you've used up all your prepared fruits. With your colorful and creative kabobs ready, you can now move on to the next step: chilling them before serving.

Advertisement

Step 3. Arrange Kabobs Aesthetically

aesthetic kabob arrangement step

Carefully arrange the kabobs to showcase their vibrant colors and textures. Alternate the fruit pieces in a visually appealing pattern, ensuring a balance of hues and shapes. Place the kabobs on a serving platter or board, leaving a bit of space between each one to highlight their individual beauty.

Consider grouping similar-colored fruits together, creating a gradient or mosaic effect. Alternate between round and oblong shapes, or arrange the kabobs in a spiral or zigzag design. Experiment with different fruit combinations, such as pairing tropical options like pineapple and mango with crisp apples and juicy grapes.

Garnish the platter with fresh herbs, edible flowers, or a drizzle of honey for an extra touch of elegance. Encourage guests to admire the vibrant display before indulging in the delicious and visually stunning kabobs.

The artful arrangement will elevate the overall presentation and make your Freaky Fruit Kabobs a true centerpiece of your gathering.

Step 4. Refrigerate Until Ready to Serve

chill before serving time

Once assembled, refrigerate the Freaky Fruit Kabobs until you're ready to serve them. Chilling the kabobs helps preserve their vibrant colors and fresh flavors.

Simply place them on a platter or in a covered container, and pop them in the fridge. They'll stay crisp and delightful for up to 2 days.

When it's time to serve, take the kabobs out of the refrigerator about 15 minutes beforehand. This allows the fruit to reach room temperature, enhancing their natural sweetness and juiciness.

Advertisement

Arrange the colorful kabobs on a serving tray, and let your guests admire their freaky and fabulous appearance. These kebabs are a guaranteed conversation starter!

The chilled fruit combined with the skewers' artful design creates an irresistible presentation.

Now sit back, relax, and enjoy the compliments as your guests dive into these refreshing and imaginative Freaky Fruit Kabobs.

Step 5. Serve Chilled to Guests

chill before serving guests

When ready to serve, take the Freaky Fruit Kabobs out of the refrigerator about 15 minutes beforehand. This allows the fruit to reach a chilled, refreshing temperature without becoming too cold.

Arrange the kabobs on a serving platter or plate, making sure they're displayed beautifully for your guests. The vibrant colors and creative shapes will instantly grab their attention.

Encourage your guests to pick up the kabobs and enjoy them as a light, healthy snack. The combination of sweet and tart flavors, along with the contrasting textures, creates a truly unique and delightful experience.

Advertisement

Advise your guests to take their time savoring each bite, allowing the flavors to dance on their palates.

As your guests indulge, share any interesting facts or serving suggestions you may have about the Freaky Fruit Kabobs. This can spark engaging conversations and further pique their curiosity.

Ensure everyone has the opportunity to savor these visually stunning and flavorful kabobs before the gathering comes to an end.

Final Thoughts

As you assemble your freaky fruit kabobs, don't forget to step back and admire your culinary creation. These vibrant skewers aren't just a treat for the taste buds, but a feast for the eyes as well.

The contrasting colors and unique shapes of the fruits you've chosen create a visual masterpiece that's sure to impress your guests.

Advertisement

Once your kabobs are complete, take a moment to appreciate the time and effort you've put into crafting these delightful treats.

Consider how the different flavors and textures complement each other, creating a harmonious and exciting flavor profile.

As your guests take their first bite, they'll be delighted by the burst of flavor and the unexpected combinations you've put together.

Frequently Asked Questions

Are the Fruit Kabobs Gluten-Free and Vegan-Friendly?

The fruit kabobs are both gluten-free and vegan-friendly. Since they're made entirely from fresh fruits, they contain no gluten or animal-derived ingredients.

You can enjoy these colorful skewers without worrying about dietary restrictions. Just be sure to select your favorite fruits and get creative with the arrangement.

Advertisement

These kabobs make a delicious and healthy snack or side dish that everyone can enjoy, regardless of their dietary needs.

How Long Do the Fruit Kabobs Stay Fresh?

The fruit kabobs will stay fresh for 3-4 days when stored properly.

Keep them refrigerated in an airtight container or resealable bag. The cool temperature and lack of air exposure will help preserve the fruit's flavor and texture.

You can also lightly mist the kabobs with water before refrigerating to maintain moisture.

With a little care, you can enjoy the juicy goodness of these colorful fruit skewers all week long!

Advertisement

Can the Fruit Kabobs Be Made in Advance?

Yes, you can definitely make fruit kabobs in advance! The key is to choose durable fruits that won't get too soft or mushy.

Firm fruits like apples, pineapples, and melons work great. Prepare the kabobs a day or two ahead, then store them in the fridge until ready to serve.

Just be sure to cover them loosely to prevent the fruit from drying out. With a little planning, you can enjoy delicious, fresh-tasting kabobs anytime!

What Are the Best Fruits to Use for the Kabobs?

When choosing fruits for kabobs, think about a variety of colors, textures, and flavors. Classics like strawberries, pineapple, and grapes work well, but you can also get creative with kiwi, mango, or melon.

Firm fruits like apples and pears hold their shape, while softer options like raspberries and blackberries add bursts of sweetness. The best fruits will be ripe but not mushy.

Advertisement

Have fun experimenting to find your favorite combinations!

Can the Fruit Kabobs Be Grilled or Baked?

Absolutely! Fruit kabobs can be grilled or baked to delicious results.

The high heat caramelizes the natural sugars, creating a lovely, sweet flavor. Just be sure to use fruits that hold their shape well, like pineapple, melon, and berries.

Thread the fruit onto skewers, brush with a bit of oil or honey, and grill or bake until lightly charred and tender.

It's a fun, healthy way to enjoy your favorite fruits!

Advertisement
Continue Reading
Advertisement

Affiliate Disclaimer
As an affiliate, we may earn a commission from qualifying purchases. We get commissions for purchases made through links on this website from Amazon and other third parties.

Advertisement
Advertisement

Vetted

Vetted2 months ago

Book Review: “The Creative Spark: Unleashing Your Inner Artist”

Rekindling Creativity in the Digital Era In a world increasingly dominated by digital distractions, “The Creative Spark: Unleashing Your Inner...

Vetted4 months ago

Review: “Sleep Solutions for New Parents”

Overview “Sleep Solutions for New Parents: How to Establish Healthy Sleep Habits from Day One” by Margaret Blake, Esther Harper,...

Vetted4 months ago

“Survival Guide for New Dads”: A Paradigm Shift in Paternal Literature

In the burgeoning field of parenting literature, “Survival Guide for New Dads: The Ultimate Baby Book for New Dads” emerges...

versatile ladders for home versatile ladders for home
Vetted4 months ago

15 Best Multi-Position Ladders for Versatile Home Improvement Projects

Discover the top 15 multi-position ladders for versatile home improvement projects, including innovative features and safety-focused designs - essential for...

effortless lawn care top picks effortless lawn care top picks
Vetted4 months ago

15 Best Zero Turn Mowers for 3 Acres – Top Picks for Effortless Lawn Care

Looking for the ultimate zero-turn mower for 3 acres? Discover top picks with cutting-edge features for effortless lawn care and...

top robot vacuums list top robot vacuums list
Vetted4 months ago

15 Best Robot Vacuum Cleaners to Keep Your Floors Spotless

Seeking the best robot vacuum cleaners for spotless floors? Discover top picks from Eufy, iRobot, Shark, and more for effortless...

budget friendly furniture transformation guide budget friendly furniture transformation guide
Vetted4 months ago

15 Best Affordable Furniture Pieces to Transform Your Home on a Budget

Jazz up your home with budget-friendly furniture finds that promise style and savings - discover the top picks for a...

luxurious bathtubs for transformation luxurious bathtubs for transformation
Vetted4 months ago

15 Best Bathtubs for a Luxurious Soak – Transform Your Bathroom Today

Dive into luxury with the 15 best bathtubs for a transformative bathing experience - discover your ultimate relaxation spot.

spotless ride with cordless vacuums spotless ride with cordless vacuums
Vetted4 months ago

15 Best Cordless Car Vacuums for a Spotless Ride – Reviews & Rankings

Cruise through our top 15 cordless car vacuums with powerful suction and convenient features for a sparkling clean interior.

stylish file cabinets for organization stylish file cabinets for organization
Vetted4 months ago

15 Best File Cabinets for Organizing Your Home Office in Style

Find the perfect file cabinet to elevate your home office organization and style with these top picks starting with the...

luxury egyptian cotton sheets luxury egyptian cotton sheets
Vetted4 months ago

15 Best Egyptian Cotton Sheets for the Ultimate Luxury Sleep Experience

Indulge in the epitome of luxury with the 15 best Egyptian cotton sheets that promise the ultimate sleep experience.

top canister vacuums reviewed top canister vacuums reviewed
Vetted4 months ago

15 Best Canister Vacuum Cleaners That Will Keep Your Home Spotless

Get ready for a game-changer in home cleaning with the 15 best canister vacuum cleaners that promise spotless floors and...

Trending

Copyright © 2024 ID Times or In-Depth Times Affiliate disclaimer As an affiliate, we may earn a commission from qualifying purchases. We get commissions for purchases made through links on this website from Amazon and other third parties.