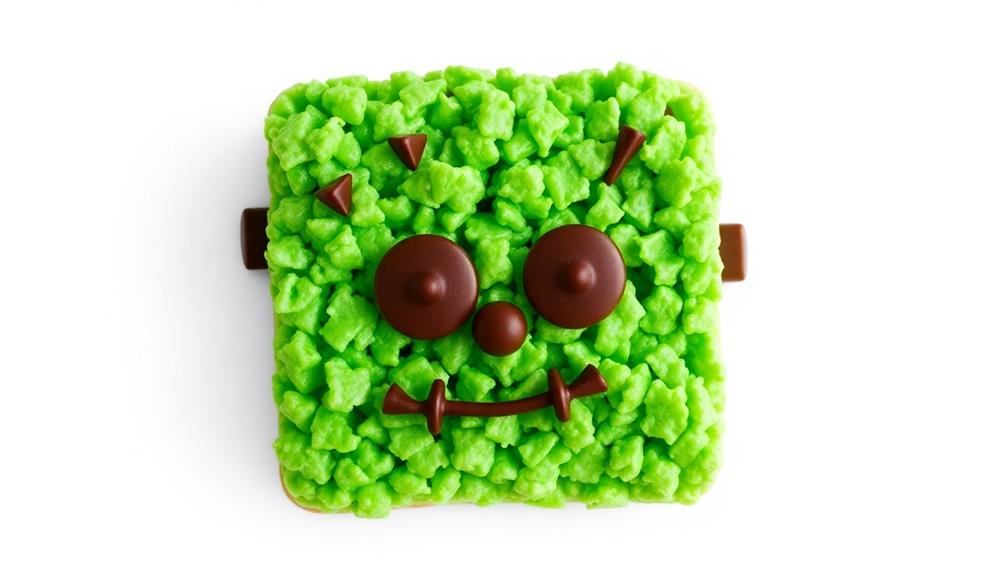

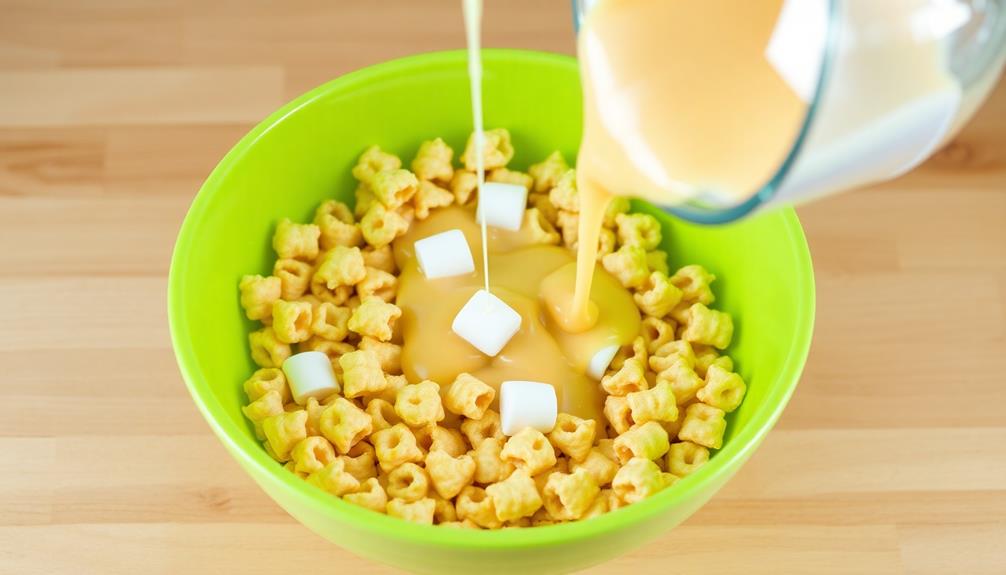
Frankenstein Rice Krispie Treats have been a beloved Halloween staple for decades, blending the classic crunchy cereal with vibrant green marshmallow and delightful candy decorations to create a spooky and delicious treat that's perfect for festive gatherings. You'll start by melting butter and marshmallows, then gently mixing in the Rice Krispies and green food coloring. After pressing the mixture into a pan and allowing it to cool, you can slice the treats into Frankenstein-themed shapes and decorate them with chocolate chip eyes and other festive touches. These easy-to-make treats are sure to impress your guests – and there's much more to discover about them.
Key Takeaways
- Frankenstein Rice Krispie Treats are a popular Halloween-themed dessert, featuring crunchy Rice Krispies cereal, gooey marshmallow, and vibrant green food coloring.
- The treats can be decorated with chocolate chips or M&Ms for eyes, enhancing the spooky Frankenstein appearance.
- The recipe is simple and accessible, making it suitable for all skill levels.
- Allowing the mixture to cool and solidify before cutting ensures the treats hold their shape.
- Frankenstein Rice Krispie Treats are a fun and visually appealing addition to Halloween parties and gatherings.
History
When did the iconic Frankenstein Rice Krispie Treats first come to be? While the exact origins may be shrouded in mystery, these delightfully spooky treats have captivated the hearts and palates of Halloween enthusiasts for decades.
The classic Rice Krispie Treat, with its crunchy cereal, gooey marshmallow, and buttery goodness, has long been a beloved staple. However, it was the ingenious minds of creative cooks who first decided to transform this classic into a Frankenstein-inspired masterpiece.
By adding green food coloring, chocolate chips for eyes, and other ghoulish decorations, the humble Rice Krispie Treat became a festive Halloween sensation. This evolution mirrors how investment strategies can adapt over time to meet modern tastes and preferences.
Today, Frankenstein Rice Krispie Treats are a staple at Halloween parties, bake sales, and family gatherings. Their popularity has only grown, as more and more people discover the joy of creating these spooky, yet delicious, treats. These spooky rice krispie treats are so much fun to make, and kids especially love getting involved in the process. With just a few simple ingredients and a little creativity, anyone can whip up a batch of these irresistible Franken-treats. Whether it’s the green food coloring, googly eyes, or the classic marshmallow and cereal combination, there’s something enchanting about these spooky rice krispie treats that keeps people coming back for more.
Whether you're an experienced baker or a novice in the kitchen, these Frankenstein-themed confections are sure to delight and impress.
Recipe
Frankenstein Rice Krispie Treats are a delightfully spooky and fun take on the classic treat. These gooey, marshmallow-y squares are perfect for Halloween parties, or anytime you want to add a bit of monster-inspired whimsy to your desserts.
The vibrant green color and playful Frankenstein-inspired design make these Rice Krispie Treats a standout addition to any holiday spread, much like how astrology influences attractiveness can enhance personal appeal at festive events. With just a few simple ingredients and some basic shaping techniques, you can create a batch of these ghoulishly good treats that are sure to delight both kids and adults.
Ingredients:
- 3 tablespoons unsalted butter
- 4 cups miniature marshmallows
- 6 cups Rice Krispies cereal
- Green food coloring
- Chocolate chips or M&Ms for the eyes and mouth
Instructions:
Melt the butter in a large saucepan over low heat. Add the marshmallows and stir constantly until completely melted and smooth. Remove from heat and stir in a few drops of green food coloring until the desired shade is achieved.
Gently fold in the Rice Krispies cereal until evenly coated. Press the mixture into a greased 9×13-inch baking pan, using a spatula to smooth the top. Allow to cool completely, then cut into squares and decorate with chocolate chips or M&Ms to create the Frankenstein face.
For best results, work quickly when assembling the Rice Krispie Treats, as the mixture can become difficult to shape as it cools. If the mixture seems too sticky, lightly grease your hands or the spatula to prevent sticking.
These Frankenstein Rice Krispie Treats are best served at room temperature for the perfect gooey, marshmallow-y texture.
Cooking Steps
Melt the butter and marshmallows in a large saucepan over low heat, stirring constantly until the mixture is smooth.
For a fun twist, consider pairing these treats with a scoop of Birthday Cake Ice Cream for a delightful dessert combo.
Immediately remove the pan from the heat and stir in the Rice Krispies cereal, mixing well to coat.
Add a few drops of green food coloring and stir until the mixture is evenly tinted.
Spread the Frankenstein-colored treat mixture into a prepared pan, pressing it down firmly, then allow it to cool completely before cutting into squares.
Step 1. Melt Butter and Marshmallows
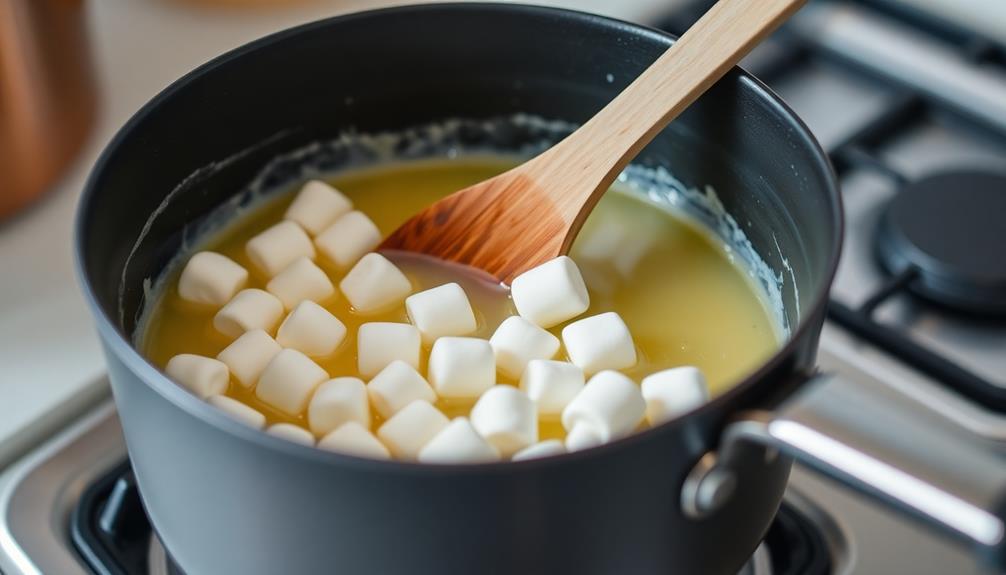
Grabbing a large saucepan, you'll want to melt the butter over medium heat. Once the butter's fully melted, it's time to add the marshmallows. Toss them in, stirring frequently, until they're completely softened and transformed into a gooey, sticky mess. This'll take around 5 minutes, so be patient and keep a close eye on the mixture, stirring to prevent burning.
Achieving the perfect texture is crucial, just like ensuring color accuracy in home cinema projectors enhances the visual experience.
As the marshmallows melt, you'll notice the mixture becoming smooth and uniform. This is exactly what you're going for – a homogeneous blend of butter and marshmallow that'll provide the perfect base for your Frankenstein Rice Krispie Treats.
Once the marshmallows have fully melted, remove the saucepan from the heat. Be careful, as the mixture will be extremely hot. With the hard part done, you're ready to move on to the next step – adding the cereal and shaping your spooky treats.
Step 2. Add Rice Krispies Cereal
With the melted marshmallow mixture ready, it's time to add the Rice Krispies cereal. This is where the magic really happens! Grab your trusty box of Rice Krispies and pour them into the gooey, delightful mixture.
Gently stir everything together, ensuring the cereal is evenly coated. You'll want to work quickly, as the marshmallow mixture will start to firm up. Keep folding and mixing until the Rice Krispies are fully incorporated, creating a cohesive and perfectly textured base for your Frankenstein treats. Incorporating energy-saving features in your kitchen can enhance your cooking experience, just like choosing the right heat pump can optimize your home's efficiency energy-saving features.
Be careful not to overmix, as you don't want to crush the precious cereal pieces. The key is to achieve a nice balance, where the Rice Krispies retain their signature crunch while being enveloped in the soft, sweet marshmallow coating.
Once you're satisfied with the texture, it's time to transfer the mixture to your prepared pan, ready for the next step in bringing your Frankenstein creation to life!
Step 3. Add Green Food Coloring
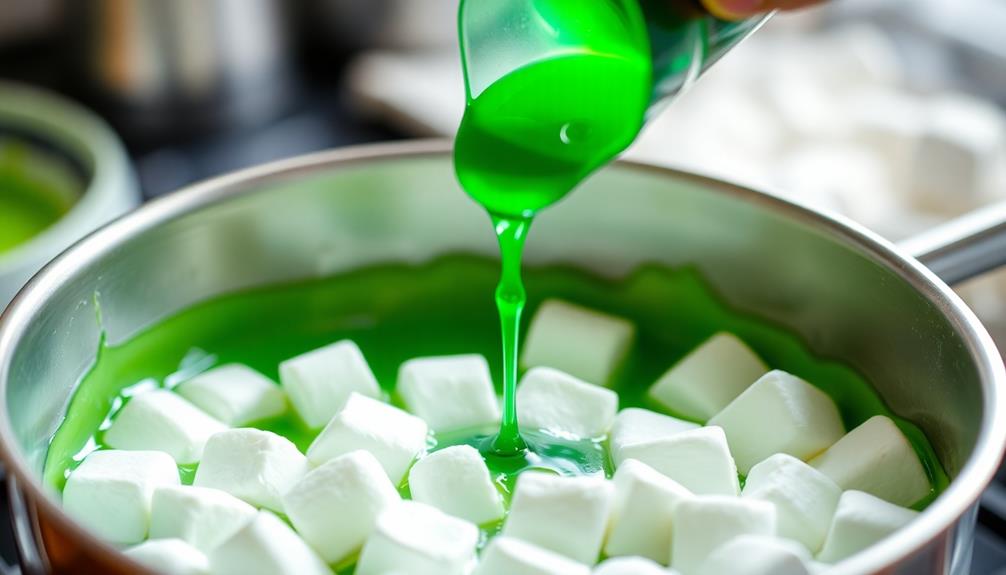
To give your Frankenstein Rice Krispie Treats a delightfully ghoulish green hue, add a few drops of green food coloring to the marshmallow mixture.
Start by melting the butter and marshmallows as instructed in the previous step. Once the mixture is smooth and fully combined, begin adding the food coloring.
Start with just a couple of drops and stir thoroughly to incorporate the color. Assess the intensity and add more drops as needed until you achieve your desired shade of green.
Be careful not to overdo it, as too much food coloring can overwhelm the flavor. The green color will give your Frankenstein treats a spooky, Halloween-inspired appearance, perfect for setting the mood.
Fold in the crispy Rice Krispies cereal as usual, mixing gently to preserve the light and airy texture.
With the vibrant green hue, your Frankenstein Rice Krispie Treats are now ready to be molded and decorated, bringing your Halloween vision to life.
Step 4. Spread Mixture Into Prepared Pan
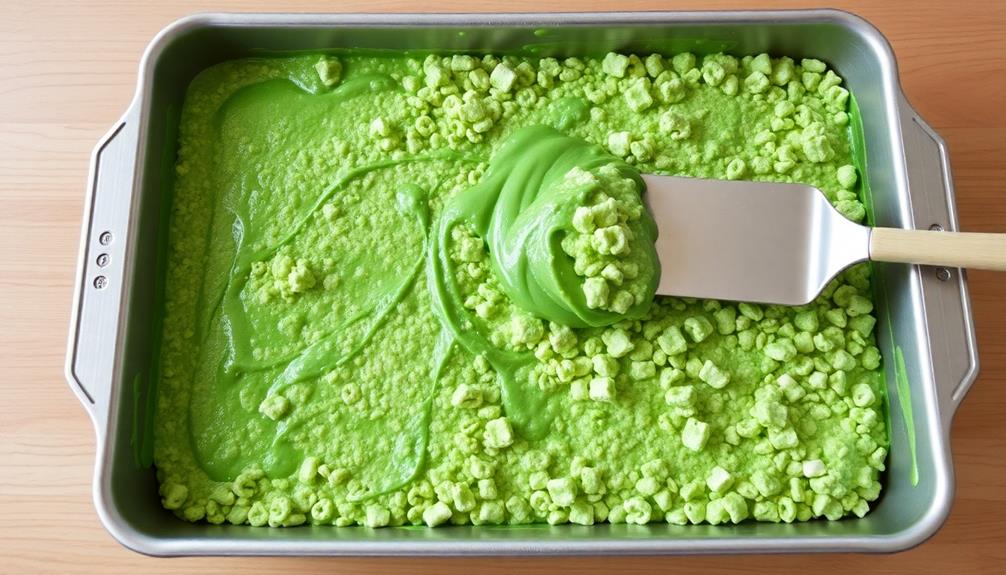
After adding the food coloring and mixing in the crispy Rice Krispies, it's time to transfer the vibrant green mixture to your prepared pan.
Using a sturdy spatula or spoon, begin carefully scooping the Frankenstein-inspired treat into the baking dish. Spread the mixture out evenly, ensuring you reach all the corners and sides.
Press down gently to compact the ingredients and create a smooth, level surface. Be mindful not to pack the Rice Krispies too tightly, as you want to maintain their light and airy texture.
Once the pan is filled, use your spatula or fingers to gently smooth the top, creating a neat and presentable appearance. This step is crucial for ensuring your Frankenstein Rice Krispie Treats hold their shape and have a cohesive, uniform look.
With the mixture now spread into the pan, you're one step closer to enjoying these spooky, Halloween-themed treats.
Step 5. Allow to Cool Before Cutting
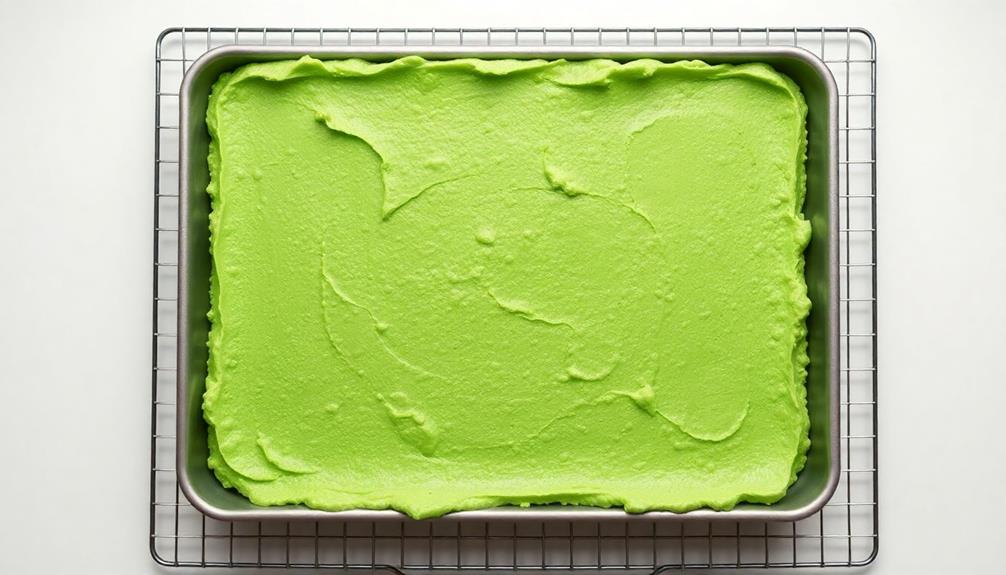
Now that you've carefully spread the vibrant green Frankenstein Rice Krispie mixture into the prepared pan, it's time to let it cool before cutting.
This step is crucial, as allowing the treats to cool will help them set and firm up, making them easier to slice into perfect Frankenstein-inspired shapes.
Be patient and resist the temptation to dig in right away. Give the pan at least 30 minutes to cool completely at room temperature. This will give the marshmallow and cereal mixture time to solidify, ensuring your spooky treats hold their shape when you start cutting.
Once the mixture has cooled, use a sharp knife or cookie cutters to cut the Rice Krispie treats into your desired Frankenstein-themed shapes, such as squares, rectangles, or even Frankenstein's iconic head.
Handle the cuts gently to prevent the treats from crumbling. With a little care, you'll have a tray of oozing green Frankenstein Rice Krispie masterpieces ready to delight your guests.
Final Thoughts
Reflecting on the process of creating these Frankenstein Rice Krispie Treats, you'll find they're a delightfully spooky and fun treat for any Halloween gathering.
The vibrant green color and creative design make them a showstopper, sure to delight both kids and adults. While the initial assembly may seem daunting, the step-by-step instructions provided earlier ensure the process is straightforward and enjoyable.
Don't be afraid to get creative with the decorations, using your imagination to truly bring these Frankenstein-inspired treats to life. The possibilities are endless, from using different candy eyes to adding unique facial features.
Remember, the beauty of these Rice Krispie Treats lies in their customizable nature, allowing you to put your personal stamp on each one.
As you prepare to serve these ghoulish delights, take pride in your handiwork.
These Frankenstein Rice Krispie Treats are sure to be the talk of the party, a delicious and visually stunning addition to your Halloween festivities.
Frequently Asked Questions
Are Frankenstein Rice Krispie Treats Difficult to Make?
Making Rice Krispie treats isn't too difficult – the basic recipe is simple and straightforward.
You'll need to melt butter and marshmallows, then mix in the cereal. The key is to work quickly before the mixture starts to harden.
With a little practice, you'll be whipping up tasty treats in no time. Just be sure to let them cool completely before cutting into squares.
It's a fun, easy recipe that's perfect for a quick snack or dessert.
Can I Use Different Cereal Types?
Absolutely! You can use different types of cereal to make your own unique treats.
Rice Krispies are a classic, but try swapping them out for Cheerios, Corn Flakes, or even a mixture of cereals.
Just be sure to follow the same basic recipe – melt the marshmallows, stir in the cereal, and press into a pan.
The different textures and flavors can create some truly delicious and creative results.
Get creative and have fun with it!
How Long Do Frankenstein Treats Stay Fresh?
Your homemade treats will typically stay fresh for 3-5 days when stored properly.
Keep them in an airtight container at room temperature, away from direct sunlight or heat.
The cereal and marshmallow components can become stale over time, so enjoy your creations within the first few days for the best texture and flavor.
With a little care, you can ensure your tasty treats stay fresh and delicious.
Are the Treats Suitable for Vegetarians or Vegans?
Are these treats suitable for vegetarians or vegans?
Unfortunately, traditional rice krispie treats aren't usually vegan-friendly, as they often contain butter and marshmallows, which are dairy-based.
However, you can easily make these treats plant-based by swapping the butter for a vegan alternative like coconut oil or plant-based margarine, and using vegan marshmallows.
With a few simple substitutions, you can enjoy these treats while accommodating your dietary preferences.
Can I Customize the Frankenstein Design?
Absolutely! The great thing about making your own treats is the ability to customize them however you'd like.
Feel free to get creative with the design – you can turn them into spiders, bats, or even jack-o'-lanterns.
Just use your imagination and simple decorating techniques like piping or shaping the treats into different forms.
The possibilities are endless when you're making homemade treats, so have fun and unleash your inner artist!