Ghostly meringue pops have a spellbinding history, originating in the late 1800s when bakers experimented with whipped egg whites. These airy, cloud-like confections became a Halloween staple, with bakers infusing unique flavors and shapes to captivate guests. The recipe calls for simple ingredients – egg whites, sugar, vanilla, and cream of tartar – whipped into stiff peaks and piped into ghostly forms before baking. With patience and care, you'll end up with a tray of delicate, crisp meringues that melt in your mouth, creating an enchanting addition to any Halloween celebration. Keep reading to uncover more bewitching details.
Key Takeaways
- Ghostly Meringue Pops are light, airy, and vanilla-flavored Halloween treats that originated in the late 19th century with bakers experimenting with whipped egg whites.
- These meringue pops are piped into ghost-like shapes, baked until crisp, and can be enhanced with spooky elements like food coloring.
- The recipe requires patience during the crafting process, including whipping the egg whites until stiff peaks form and gradually folding in sugar.
- Proper baking techniques, such as ensuring the egg whites are at room temperature and using grease-free equipment, are crucial for achieving the optimal texture.
- Ghostly Meringue Pops can be served on a platter surrounded by Halloween-themed decorations, creating a whimsical and captivating dessert for any celebration.

HOKKIEAM 5 PCS Cake Pop Mold Set with 7.8-inch Tray, 5 Shape Cake pop Cutter | Heart, square, cloud, oval and round, home baking, birthday parties, wedding desserts
- Variety of Shapes: Includes heart, square, cloud, oval, round
- Food-Safe & Durable: Made from food-grade, reusable plastic
- Organized Baking: Includes 7.87-inch tray for organization
As an affiliate, we earn on qualifying purchases.
As an affiliate, we earn on qualifying purchases.
History
The origins of ghostly meringue pops can be traced back to the late 19th century, when inventive bakers experimented with whipping egg whites into airy confections.
These delicate, cloud-like treats soon became popular at Halloween parties, their ghostly white forms and delicate textures captivating guests.
To enhance these ethereal desserts, some bakers even began to explore using essential oils for flavoring, adding unique twists to the traditional recipes.
Over time, bakers began to incorporate spookier elements, such as piping the meringue into haunting shapes or adding subtle food coloring for a ghastly effect.
Recipe
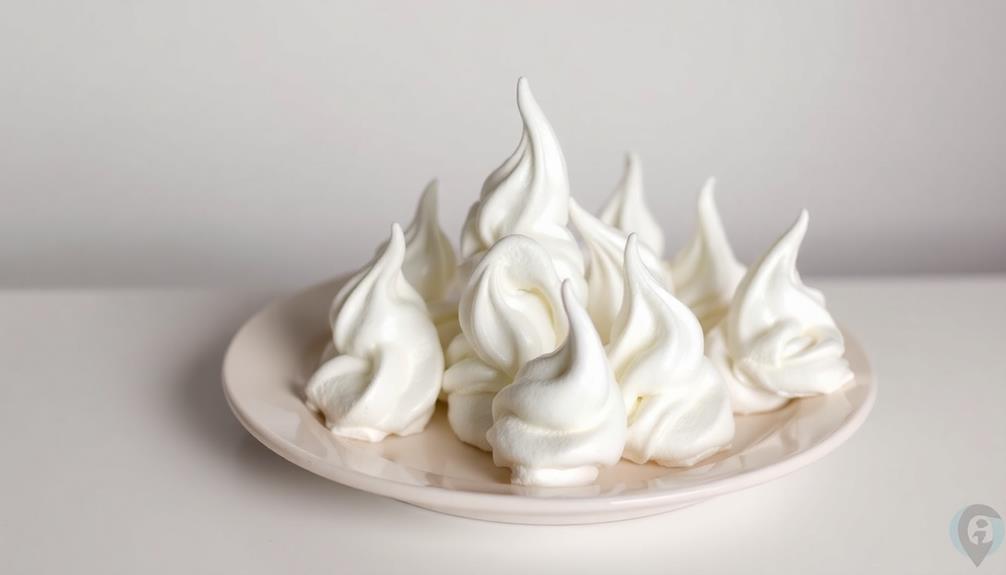
Ghostly Meringue Pops are a delightfully spooky and delicious treat perfect for Halloween. These light and airy meringue lollipops are infused with a subtle vanilla flavor and dressed up in a ghostly white coating, making them a fun and festive addition to any Halloween celebration.
Crafting these Ghostly Meringue Pops is a whimsical process that requires a bit of patience, but the end result is well worth the effort. The meringue mixture is piped into ghost-like shapes and baked until crisp on the outside yet soft and marshmallowy on the inside. Keeping a positive mindset while cooking can enhance your enjoyment of the process, aligning with the idea that self-love in attracting ideal partners can also apply to creating delightful treats.
Ingredients:
- 3 large egg whites, at room temperature
- 3/4 cup granulated sugar
- 1 teaspoon vanilla extract
- 1/4 teaspoon cream of tartar
- Black food coloring (optional)
Directions:
Preheat the oven to 225°F (110°C). Line a baking sheet with parchment paper.
In a large bowl, beat the egg whites with an electric mixer on medium speed until they're foamy. Gradually add the sugar, one tablespoon at a time, beating well after each addition. Continue beating until the meringue is glossy and holds stiff peaks.
Fold in the vanilla extract and cream of tartar. If desired, add a small amount of black food coloring to create ghostly gray meringue.
Spoon the meringue into a piping bag fitted with a large round tip. Pipe the meringue into ghost-like shapes, about 2 inches tall, onto the prepared baking sheet.
Bake for 1 hour and 15 minutes, or until the meringues are crisp on the outside. Turn off the oven and leave the meringues inside with the door closed for an additional 30 minutes.
Remove from the oven and let cool completely before serving.
To ensure the best results, make sure the egg whites are at room temperature and the bowl and beaters are completely grease-free. Additionally, be cautious when adding food coloring, as too much can result in a grayish meringue rather than the desired ghostly white appearance.
Cooking Steps
Preheat your oven to 225°F, then whisk those egg whites until they form stiff peaks.
For an added health boost, consider pairing your ghostly meringue pops with a cup of herbal tea, as certain blends can help alleviate symptoms of fibromyalgia.
Fold in the sugar, one tablespoon at a time, until the meringue is perfectly smooth.
Now, pipe the meringue onto your baking sheet and bake it for a delightful 1.5 hours.
Step 1. Preheat Oven to 225°F
Preheat your oven to 225°F. This low temperature is crucial for achieving the perfect meringue texture – crisp on the outside, yet soft and pillowy on the inside.
Ensuring the right environment for baking, much like selecting the right projector type for your space, can significantly impact the final outcome.
the role of contrast ratio can also enhance the visual appeal of your meringue. Ensure your oven has reached the desired temperature before proceeding.
Once the oven is ready, line a baking sheet with parchment paper. This will prevent the delicate meringue from sticking to the pan.
If you don't have parchment, a silicone baking mat works just as well. With the oven preheated and your baking surface prepared, you're one step closer to whipping up those ghostly meringue pops.
Step 2. Whisk Egg Whites Until Stiff Peaks

To create the perfect ghostly meringue pops, you'll need to start by whisking your egg whites until they form stiff, glossy peaks. This crucial step is the foundation for your delightfully light and airy meringue, similar to the lightness found in herbal tea, which is also known for its calming effects.
Begin by separating the eggs, making sure there are no traces of yolk in the whites. Place the egg whites in a clean, dry bowl, and start whisking them with an electric mixer or a hand whisk. Gradually increase the speed, and continue whisking until the egg whites become thick and shiny, with peaks that hold their shape when you lift the whisk.
Be patient and persistent – it may take several minutes of whisking to achieve the perfect stiff peaks. Once you've reached this stage, you're ready to start piping or spooning the meringue onto your baking sheet, creating those hauntingly beautiful ghostly shapes.
Remember to work quickly, as the meringue can start to deflate if left to sit for too long.
Step 3. Fold in Sugar, One Tablespoon at a Time

Once you have achieved those stiff, glossy peaks, it's time to start folding in the sugar, one tablespoon at a time. This delicate process is crucial for creating the perfect meringue texture.
Gently incorporate the sugar, taking care not to overmix and deflate the egg whites. Begin by adding the first tablespoon and folding it in using a rubber spatula, making sure to scrape the sides and bottom of the bowl.
Continue this process, adding the sugar a tablespoon at a time, and folding it in with care. Patience is key – resist the urge to rush, as this could compromise the airy, light structure you've worked hard to achieve.
Slowly but surely, the meringue will transform, becoming shiny, thick, and glossy. Once all the sugar has been incorporated, your meringue is ready for the next step in creating those ghostly, delightful pops.
Step 4. Pipe Meringue Onto Baking Sheet

With your perfectly whipped meringue ready, you can now begin piping it onto a baking sheet.
Prepare a baking sheet by lining it with parchment paper or a silicone baking mat. This will ensure the meringue pops release easily once baked.
Fit a large piping bag with a medium-sized round piping tip, then spoon the meringue into the bag. Gently squeeze the bag, piping the meringue into small, evenly-spaced mounds onto the prepared baking sheet.
Space the mounds about 2 inches apart to allow for expansion during baking. For a ghostly effect, you can pipe the meringue in a swirling motion to create peaks and texture.
Once the entire baking sheet is filled, gently tap it on the counter to remove any air bubbles. This will help the meringue pops bake into smooth, even shapes.
With your meringue piped and ready, you can now move on to baking these delightful ghostly treats.
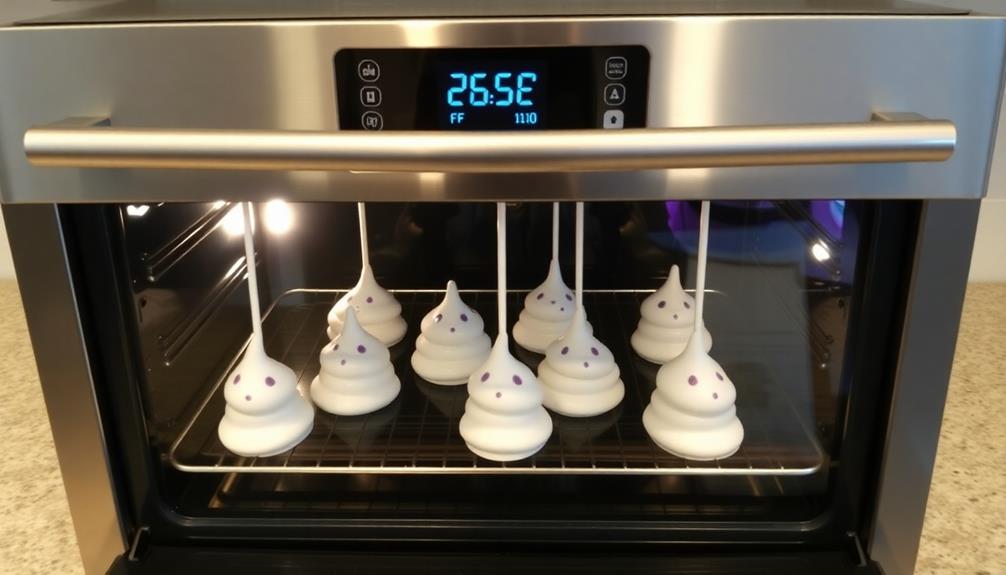
Step 5. Bake for 1.5 Hours

Preheat your oven to 200°F (95°C). Once it's reached the right temperature, you'll want to line a baking sheet with parchment paper. This'll make it easier to transfer the meringue ghosts later on.
Next, spoon the meringue mixture onto the prepared baking sheet, forming small mounds that resemble ghosts. Be sure to leave about an inch of space between each one – they'll need room to expand as they bake.
Now, pop the tray in the oven and let those ghostly meringues bake for 1.5 hours.
You'll know they're done when the meringues are dry, crisp, and have a delicate, airy texture. The longer you bake them, the more solid and crunchy they'll become.
Just be patient and let them do their thing in the oven. Soon, you'll have a tray of spooky, delicious meringue pops ready to serve up for Halloween!
Final Thoughts
The ghostly meringue pops make for a delightful and whimsical Halloween treat. These delicate, cloud-like confections are sure to delight both kids and adults alike. They are the perfect combination of eerie and sweet, and they make a great addition to any Halloween party or gathering. The spooky meringue pops are easy to make and can be customized with fun and frightening designs to fit the Halloween theme. Whether they’re served as a snack or used as a decorative touch, these ghostly and spooky meringue pops are sure to be a hit at any Halloween event.
While the baking process may take some time, the end result is well worth the effort. The pale, airy meringue ghosts simply melt in your mouth, leaving behind a sweet and satisfying flavor.
When serving these meringue pops, be sure to display them in a spooky setting, perhaps on a platter surrounded by dried leaves or glow sticks. Their ethereal appearance will surely captivate your guests.
Don't be afraid to get creative with decorations, such as adding edible glitter or drizzling them with a dark chocolate ganache. These ghostly treats are the perfect addition to any Halloween celebration, adding a touch of whimsy and delight to the festivities.
Frequently Asked Questions
Can I Use a Different Flavor of Extract?
Absolutely! You can absolutely use a different flavor of extract in your recipe.
This is a great way to experiment and create unique flavor combinations. Just keep in mind that the amount of extract you use may need to be adjusted based on the strength of the new flavor.
Start with a small amount, taste, and add more as needed to achieve your desired level of flavor.
Have fun exploring new possibilities!
How Do I Make the Meringue Extra Crunchy?
To make your meringue extra crunchy, there are a few tricks you can try.
First, make sure to beat the egg whites until they form stiff, glossy peaks. This helps create a firm, airy texture.
You can also try baking the meringues at a slightly lower temperature for a longer time, which will slowly dry them out.
Finally, add a bit of cornstarch or cream of tartar to the meringue mixture – this helps stabilize the structure and prevent them from becoming chewy.
With these tips, you'll have delightfully crunchy meringues in no time!
Can I Bake the Meringue Pops Instead of Drying?
You can definitely bake the meringue pops instead of drying them.
Baking will give you a crunchy, toasted exterior while keeping the interior light and airy. Just be sure to bake the pops at a lower temperature, around 225°F, and keep a close eye on them to prevent over-browning.
This method is a bit quicker than air-drying, and you'll end up with a similarly delightful, crunchy texture.
Give it a try!
How Long Do the Meringue Pops Last?
The meringue pops can last a good while when stored properly.
If you keep them in an airtight container at room temperature, they'll stay fresh for 5-7 days. Just make sure to protect them from humidity, which can make them soggy.
You can even freeze the meringue pops for up to 3 months. When you're ready to serve, simply thaw them at room temperature.
Easy to store, these tasty treats will delight for days to come.
Can I Decorate the Meringue Pops With Edible Glitter?
You can definitely decorate your meringue pops with edible glitter!
The glitter will add a shimmery, festive touch. Just be sure to use food-grade edible glitter, as regular craft glitter isn't safe to eat.
Apply the glitter gently with a small brush or your fingers, taking care not to crush the delicate meringue. The glitter should stick nicely to the pops' smooth, crisp surfaces.
Have fun getting creative with this sparkling, eye-catching decoration!