

Witch's Brew Chili is a spooky yet satisfying dish that combines the bold flavors of the American Southwest with the cozy charm of autumn. Originating from traditional Mexican recipes, this chili features a rich blend of earthy spices like chili powder and cumin, which create a complex, smoky flavor profile. The cauldron-like appearance of the dish makes it a perfect choice for Halloween gatherings or chilly evenings, while the tender beef and hearty beans provide a comforting and filling meal. With a straightforward cooking process and the option to customize the recipe, Witch's Brew Chili is a must-try dish that will delight your taste buds and ignite your culinary imagination.
Key Takeaways
5 Key Points About Witch's Brew Chili:
- Witch's Brew Chili originated in the American Southwest, evolving from traditional Mexican chili recipes.
- The dish's name references its cauldron-like appearance, enhancing its appeal during autumn and Halloween.
- The recipe combines earthy spices and tender beef, creating a comforting and rich dish.
- Longer simmering times deepen the flavor, making it ideal for sharing with friends and family.
- The adaptable recipe allows for unique interpretations, allowing home cooks and chefs to experiment.
History
The origins of Witch's Brew Chili can be traced back to the American Southwest, where it's believed to have evolved from traditional Mexican chili recipes. The dish's name likely references the cauldron-like appearance of the chili, evoking images of witchcraft and spookiness, which may have added to its appeal during the autumn and Halloween seasons.
Much like Balinese Interior Design Ideas, which emphasize natural materials and earthy color palettes, Witch's Brew Chili draws from its surroundings, using local ingredients to create a comforting and rich dish.
Over time, Witch's Brew Chili has become a beloved staple in many households, particularly in the regions where it first emerged. The blend of spices, such as chili powder, cumin, and garlic, create a delightfully complex flavor profile that warms the soul on cool evenings.
The inclusion of ingredients like black beans, pumpkin, and even chocolate further enhances the richness and depth of the dish, making it a true culinary delight.
As the popularity of Witch's Brew Chili has spread, home cooks and professional chefs alike have experimented with various interpretations, adding their own unique twists to the traditional recipe. This adaptability has helped the dish maintain its relevance and popularity over the years.
Recipe
Witch's Brew Chili is a deliciously spooky and flavorful dish perfect for Halloween or any chilly autumn evening. The combination of earthy spices, tender beef, and just the right amount of heat create a comforting and satisfying meal.
For those planning to enjoy this chili while camping, consider how to keep your pop-up camper canvas dry to ensure a cozy dining experience outdoors, especially during unexpected weather conditions waterproofing pop-up camper canvas.
This recipe is sure to impress your guests with its bold flavors and festive presentation. Whether you're hosting a Halloween party or simply craving a cozy dinner, Witch's Brew Chili is a must-try.
Ingredients:
- 2 lbs ground beef
- 1 large onion, diced
- 4 cloves garlic, minced
- 2 tablespoons chili powder
- 2 teaspoons ground cumin
- 1 teaspoon dried oregano
- 1 teaspoon smoked paprika
- 1 teaspoon ground coriander
- 1/2 teaspoon cayenne pepper
- 1 (28 oz) can diced tomatoes
- 2 (15 oz) cans kidney beans, drained and rinsed
- 1 (15 oz) can black beans, drained and rinsed
- 1 cup beef broth
- Salt and pepper to taste
Instructions:
In a large pot or Dutch oven, cook the ground beef over medium-high heat until browned and crumbled. Drain any excess fat.
Add the diced onion and minced garlic, and sauté until the onion is translucent, about 5 minutes. Stir in the chili powder, cumin, oregano, smoked paprika, coriander, and cayenne pepper. Cook for 2-3 minutes to toast the spices.
Pour in the diced tomatoes, kidney beans, black beans, and beef broth. Bring the mixture to a boil, then reduce the heat and let it simmer for 30-45 minutes, stirring occasionally, until the chili has thickened. Season with salt and pepper to taste.
Serve the Witch's Brew Chili hot, garnished with your favorite toppings, such as shredded cheese, sour cream, or diced avocado. The longer the chili simmers, the more the flavors will meld together, so feel free to let it simmer for up to an hour for even deeper flavor. If you’re looking for something to pair with the Witch’s Brew Chili, consider serving it alongside a side of cornbread or a simple green salad. And for a spooktacular beverage to go along with your meal, be sure to check out our bubbling halloween punch recipe, guaranteed to delight all of your ghoulish guests.
Enjoy this spooky and delicious chili with friends and family this Halloween season!
Cooking Steps
First, dice the onions and bell peppers into bite-sized pieces.
To enhance the richness of the dish, consider adding a bit of European butter when sautéing the vegetables, as it will add a creamy texture and depth of flavor.
Next, sauté the onions and peppers in a large pot or Dutch oven until they're softened.
Then, add the spices and seasonings, stirring to coat the vegetables.
Once that's done, crumble in the ground meat and cook until browned.
Step 1. Dice Onions and Bell Peppers
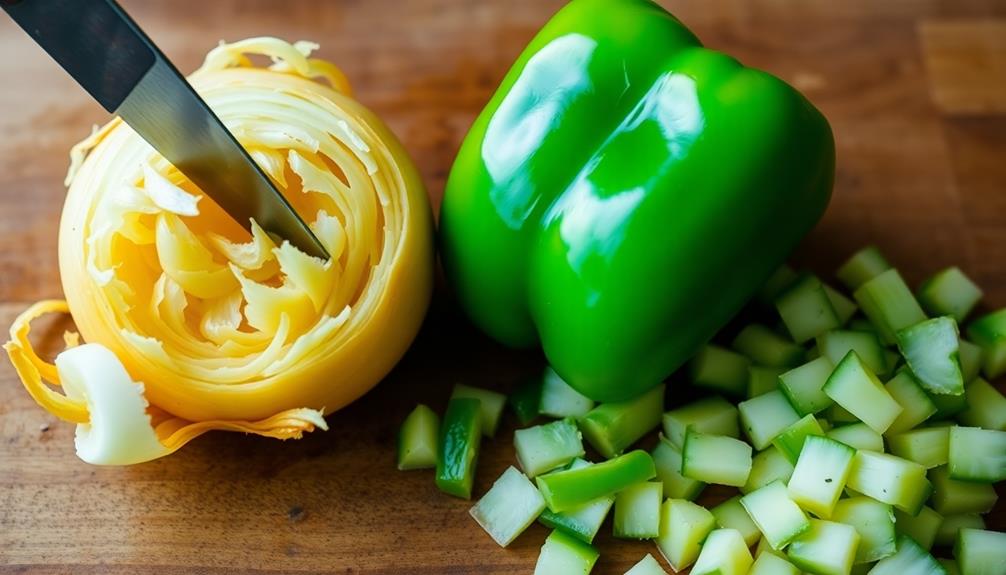
Next, dice the onions and bell peppers. Chop the onions into small, even pieces, about 1/4 inch in size. This will help them cook quickly and evenly in the chili. Be careful with the onions – they can make your eyes water, so have a tissue handy.
For the bell peppers, slice them in half lengthwise, remove the seeds and membranes, then dice them into 1/2-inch pieces. The diced peppers will add a wonderful crunch and subtle sweetness to the chili. Additionally, you might consider enjoying a cup of herbal tea, which can help alleviate any discomfort while cooking and enhance your overall well-being, thanks to its health benefits.
Ensure all the pieces are roughly the same size so they cook at the same rate. Have all your chopped vegetables ready to go before moving on to the next step. The key is to have everything prepped and at the ready, making the cooking process seamless and efficient.
Step 2. Sauté Onions and Peppers

Once the onions and bell peppers are diced, heat a large pot or Dutch oven over medium-high heat. Add a couple of tablespoons of oil and let it shimmer for a minute or two. Toss in the diced onions and peppers and sauté them, stirring frequently, until they start to soften and develop a bit of color, about 5-7 minutes.
For best results, consider using a pot with a non-porous surface to prevent sticking, making cleanup easier, similar to how proper installation and maintenance are crucial for toilet performance.
As the vegetables cook, you'll notice their aroma filling the air – the sweet, pungent scent of the onions and the crisp, slightly grassy notes of the bell peppers. Be sure to keep an eye on them, adjusting the heat as needed to prevent burning. You want the onions to become translucent and the peppers to start to lightly char around the edges.
Once the onions and peppers are nicely softened and caramelized, they're ready to be the foundation for the rest of your chili. The sautéed vegetables will add depth of flavor and a touch of sweetness to balance out the spices and heat to come.
Step 3. Add Spices and Seasonings
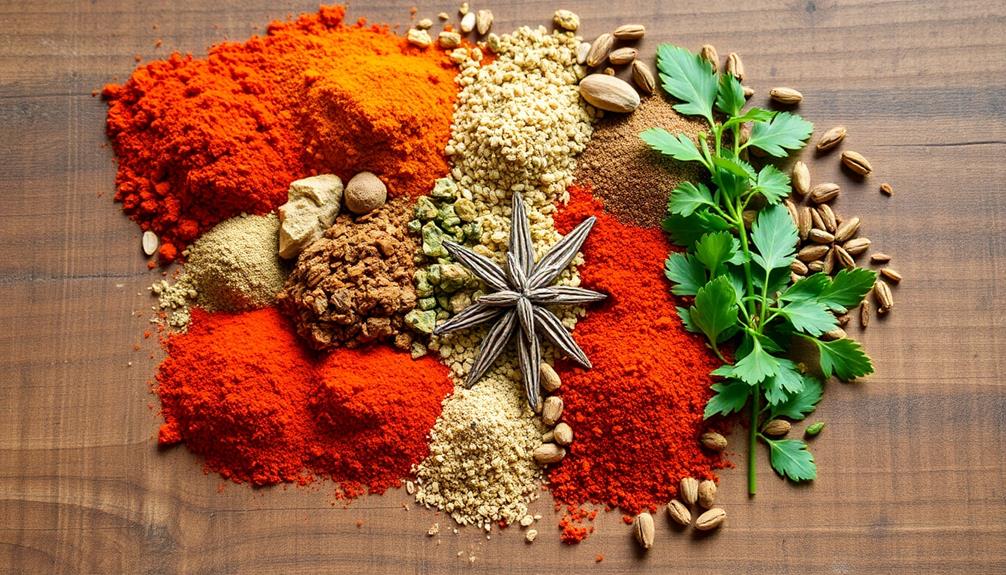
With the aromatic vegetables sizzling in the pot, it's time to introduce the bold flavors that will transform this chili into a bewitching delight.
First, add a generous heaping of chili powder, which will provide the signature heat and smokiness. Don't be shy – aim for around two to three tablespoons, adjusting to your desired spice level.
Next, sprinkle in some cumin, about a teaspoon or two, to lend an earthy, warm note. A dash of oregano, no more than half a teaspoon, will add a subtle herbal undertone.
For a touch of richness, stir in a tablespoon of unsweetened cocoa powder – this will deepen the flavor without making the chili taste chocolatey.
Finally, season with salt and freshly ground black pepper to taste. The key is to layer the spices, allowing each to shine and meld together into a harmonious blend.
With these aromatic additions, your chili is well on its way to becoming a bubbling cauldron of bewitching flavor.
Step 4. Add Ground Meat
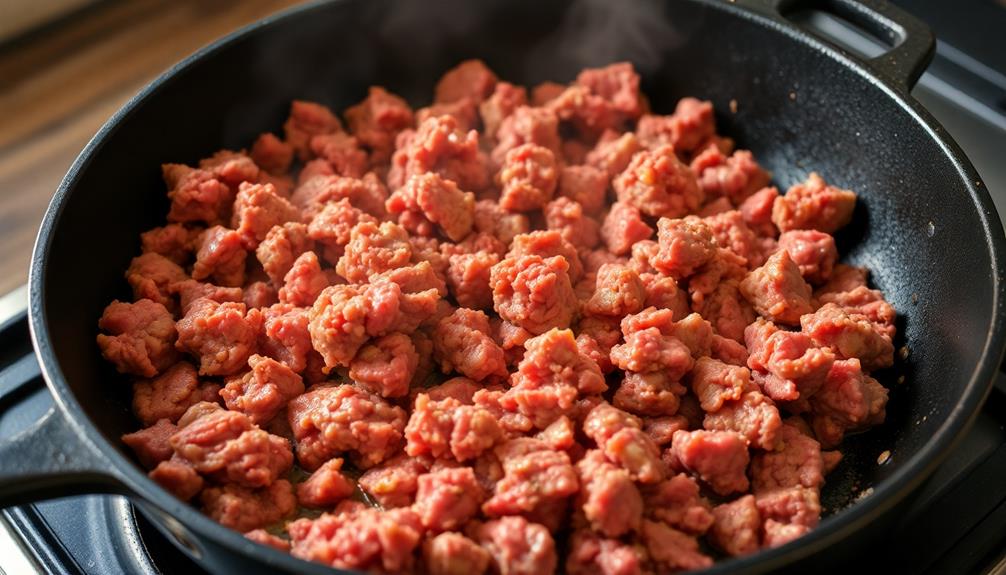
After seasoning the vegetables, it's time to add the ground meat. This is a crucial step that will infuse your chili with rich, savory flavors.
Choose a lean ground meat, such as ground beef or ground turkey, to keep the dish healthier. Gently crumble the meat into the pot, using a wooden spoon to break it up as it cooks.
Brown the meat over medium-high heat, stirring occasionally, until it's no longer pink. This should take about 5-7 minutes. Be careful not to overcrowd the pan, as that can steam the meat instead of browning it. Work in batches if needed to ensure even cooking.
Once the meat is browned, it's time to add the remaining ingredients. The ground meat will infuse the chili with savory umami notes, complementing the spices and vegetables beautifully.
With the meat incorporated, you're one step closer to a deliciously hearty and flavorful Witch's Brew Chili.
Step 5. Add Tomatoes and Beans
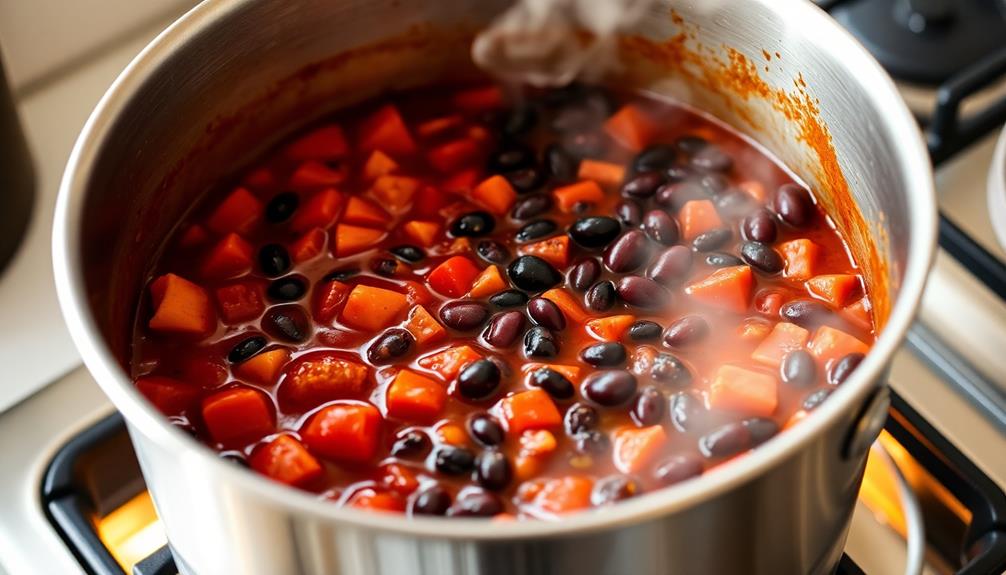
Next, you'll add the canned tomatoes and beans to the pot. Grab a couple of 15-ounce cans of diced tomatoes and a 15-ounce can of kidney beans or your preferred bean variety.
Drain and rinse the beans to remove any excess liquid. Toss the tomatoes and beans into the simmering chili mixture. The tomatoes will add a juicy, tangy flavor, while the beans will lend a satisfying, hearty texture.
Stir everything together until well combined. The tomatoes will break down further, creating a rich, tomato-y base for the chili. The beans will soak up all the delicious spices and seasonings, making each bite more flavorful.
Let the chili simmer for another 10-15 minutes, allowing the flavors to meld and the consistency to thicken to your desired level. Your kitchen will be filled with the irresistible aroma of this Witch's Brew Chili, enticing you to dive in and savor every spoonful.
Final Thoughts
The witch's brew chili recipe is sure to delight your taste buds, leaving you craving more of its fiery yet flavorful concoction. The final touches bring the dish together, elevating it to a level of deliciousness that'll have your family and friends raving.
Don't be intimidated by the long list of ingredients – the preparation is straightforward, and the payoff is well worth the effort.
Once you've added the tomatoes and beans, it's time to let the chili simmer and meld all the flavors. Resist the urge to lift the lid too often, as this can disrupt the cooking process. Instead, sit back, relax, and let the aromas fill your kitchen.
When the chili has reached the desired thickness, it's ready to serve. Ladle it into bowls, garnish with your favorite toppings, and enjoy the warm, comforting goodness.
This witch's brew chili is sure to become a new family favorite, so savor every spoonful and bask in the rave reviews.
Frequently Asked Questions
Is the Chili Recipe Vegetarian or Vegan-Friendly?
The chili recipe you're looking at may or may not be vegetarian or vegan-friendly, as those details aren't provided.
To determine if it suits your dietary needs, you'll want to carefully review the ingredient list. Look out for any animal-derived products like meat, dairy, or eggs.
If the recipe is free of those, then it should be suitable for vegetarian or vegan diets. Take a close look and make the call that works best for you.
How Long Does the Chili Need to Simmer?
The chili should simmer for at least 45 minutes to an hour to allow the flavors to fully develop and meld together.
This long simmering process helps tenderize the ingredients and allows the spices to infuse the dish.
Be sure to stir it occasionally and adjust the heat as needed to maintain a gentle simmer.
The longer it simmers, the more the flavors will deepen and the chili will thicken to your desired consistency.
Can the Recipe Be Scaled up for a Crowd?
Absolutely! Scaling up a recipe is a great way to feed a crowd.
When increasing the ingredients, you'll need to adjust the cooking time accordingly. Simmering the chili for a little longer ensures the flavors meld and the consistency is just right.
Just be sure to use a larger pot or divide the chili into multiple batches to maintain an even simmer.
With a little planning, you can easily transform this recipe into a crowd-pleasing feast.
What Is the Best Way to Store Leftover Chili?
Leftover chili is easy to store and enjoy later. First, let it cool completely.
Then, transfer the chili to airtight containers or resealable bags. Squeeze out any excess air to prevent freezer burn.
Chili can be stored in the fridge for 3-4 days or in the freezer for 2-3 months.
To reheat, simply thaw in the fridge overnight and gently warm on the stovetop or in the microwave. The flavors will have had time to meld, making the chili even tastier the second time around!
Can the Chili Be Frozen for Later Use?
Absolutely! Freezing chili is a fantastic way to preserve those tasty leftovers for later.
Simply let the chili cool completely, then transfer it to airtight containers or freezer bags. Be sure to label them with the date – that'll help you keep track of how long they've been in the freezer.
When you're ready to enjoy the chili again, just thaw it in the fridge overnight and reheat on the stove or in the microwave. Easy peasy!