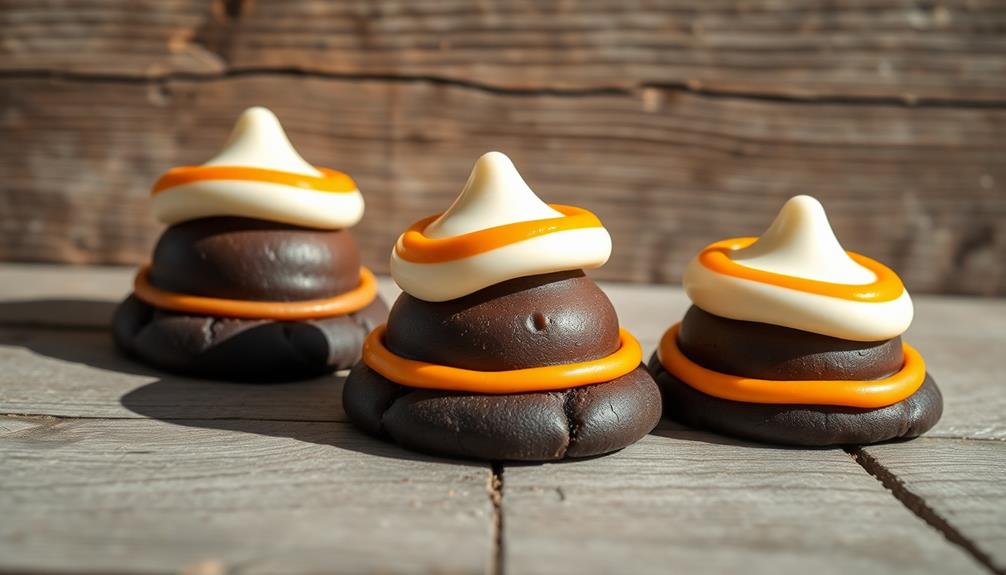
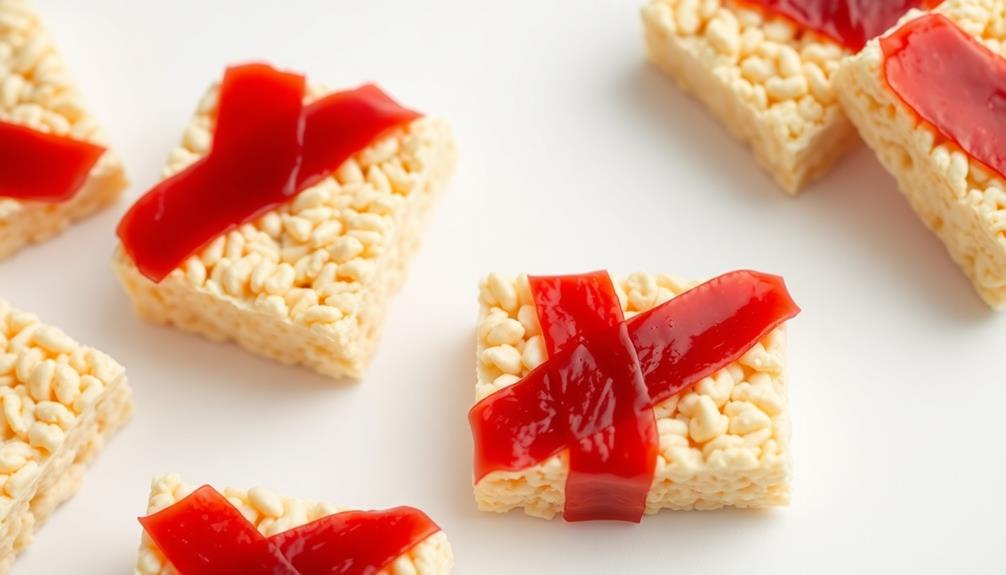
Whether you're hosting a spooky Halloween party or just craving a delightful seasonal treat, witch's hat cookies are a must-try. These charming, chocolate-dipped confections capture the essence of the holiday with their iconic pointed shape and vibrant orange and chocolate color scheme. Originating in the early 20th century, these cookies gained popularity as creative Halloween treats inspired by the witches' hats in folklore. The recipe features a chocolate cookie base topped with white chocolate and orange frosting, combining chocolate, vanilla, and citrus flavors for a delightful taste. With easy-to-follow instructions and helpful baking tips, you'll be whipping up these festive cookies in no time. And if you'd like to learn more about the history and variations of this beloved Halloween treat…
Key Takeaways
- Witch's Hat Cookies are traditional Halloween treats inspired by the iconic pointy hats worn by witches in folklore.
- The cookies feature a chocolate cookie base topped with white chocolate and orange frosting, creating a distinctive witch's hat shape.
- Baking Witch's Hat Cookies is an enjoyable activity for both children and adults, combining chocolate, vanilla, and citrus flavors.
- The recipe includes common baking ingredients and incorporates antioxidant-rich ingredients for enhanced health benefits.
- Proper baking techniques, such as maintaining the correct oven temperature and chilling the dough, ensure a crisp exterior and soft interior for the cookies.
Top picks for "witch cooky"
Open Amazon search results for this keyword.
As an affiliate, we earn on qualifying purchases.
History
The Witch's Hat Cookie's origins can be traced back to the early 20th century, when bakers began experimenting with creative Halloween treats.
These whimsical confections were inspired by the iconic pointy hats worn by witches in folklore and popular culture. As the Halloween tradition grew in the United States, the Witch's Hat Cookie became a beloved way to celebrate the spooky season, much like American breakfast favorites that bring warmth and comfort to families.
The distinctive shape of the cookie was achieved by piping or molding dough into a tall, tapered form, resembling a classic witch's hat. Bakers would then top the cookie with a vibrant icing, typically in shades of orange, purple, or black, to capture the otherworldly essence of Halloween.
These delightful treats quickly became a staple at Halloween parties, school functions, and family gatherings, delighting both children and adults with their playful appearance and delicious flavor.
Recipe
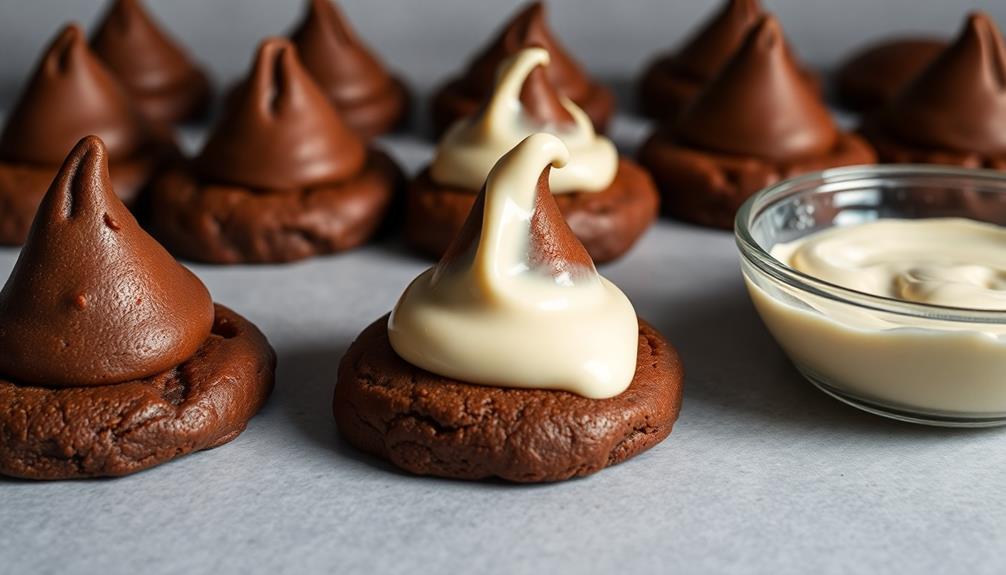
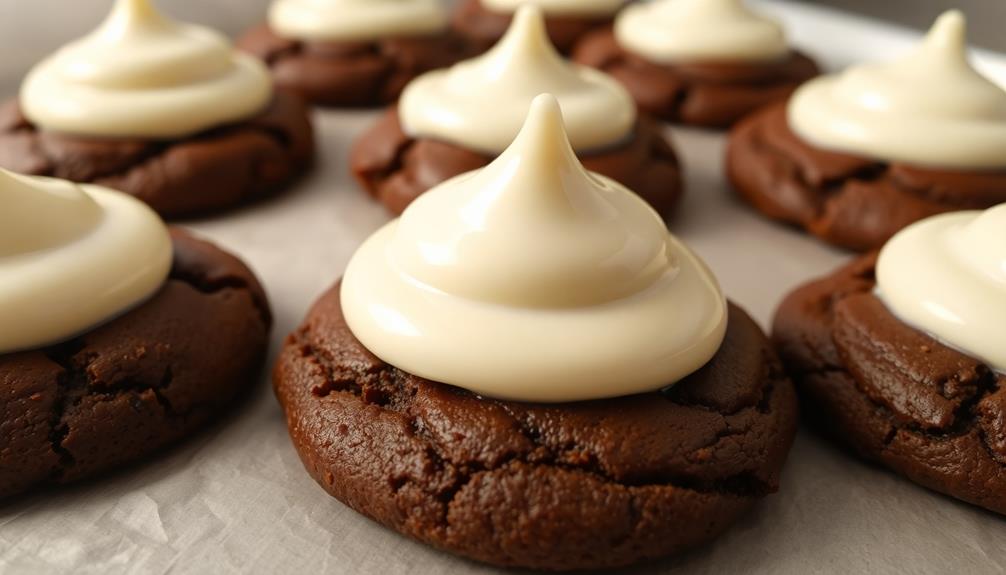
Witch's Hat Cookies are a fun and festive treat perfect for Halloween. These whimsical cookies feature a chocolate cookie base topped with a white chocolate "hat" and a touch of orange frosting for the perfect spooky effect.
Baking these cookies is a delightful activity for both children and adults. Not only are they visually striking, but the combination of chocolate, vanilla, and citrus flavors creates a delightful taste experience. Additionally, you can enhance your health by incorporating antioxidant-rich ingredients into your diet, such as celery juice, which is known for its benefits.
Ingredients:
- 1 cup unsalted butter, softened
- 1 cup granulated sugar
- 1 egg
- 2 teaspoons vanilla extract
- 2 cups all-purpose flour
- 1/2 cup unsweetened cocoa powder
- 1 teaspoon baking powder
- 1/4 teaspoon salt
- 12 ounces white chocolate, melted
- Orange food coloring
Instructions:
Preheat your oven to 375°F (190°C). In a large mixing bowl, cream together the butter and sugar until light and fluffy. Beat in the egg and vanilla.
In a separate bowl, whisk together the flour, cocoa powder, baking powder, and salt. Gradually add the dry ingredients to the wet ingredients, mixing until just combined.
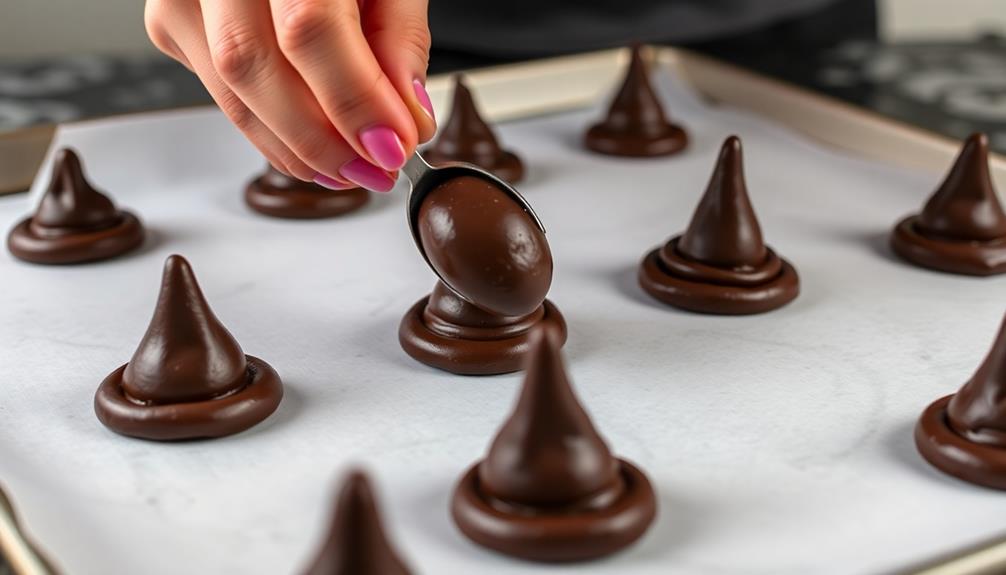
Scoop tablespoon-sized balls of dough onto a parchment-lined baking sheet, spacing them about 2 inches apart. Bake for 8-10 minutes, or until the cookies are set. Allow the cookies to cool on the baking sheet for 5 minutes before transferring them to a wire rack to cool completely.
Once the cookies are cooled, use a spoon or piping bag to drizzle the melted white chocolate over the top of each cookie, creating a "hat" shape. Allow the white chocolate to set, then use a small amount of orange food coloring mixed with a few drops of water to paint a band around the "hat" of each cookie, creating the witch's hat effect.
Cooking Steps
First, preheat your oven to 350°F.
For a delightful breakfast treat, consider pairing your Witch's Hat Cookies with a sweet and swirled breakfast treat like Milk Bar Cinnamon Roll Bread.
Then, mix the dough according to the recipe instructions.
Next, roll the dough into cone shapes, dip them in melted chocolate, and bake until the chocolate has set.
Step 1. Preheat Oven to 350°F
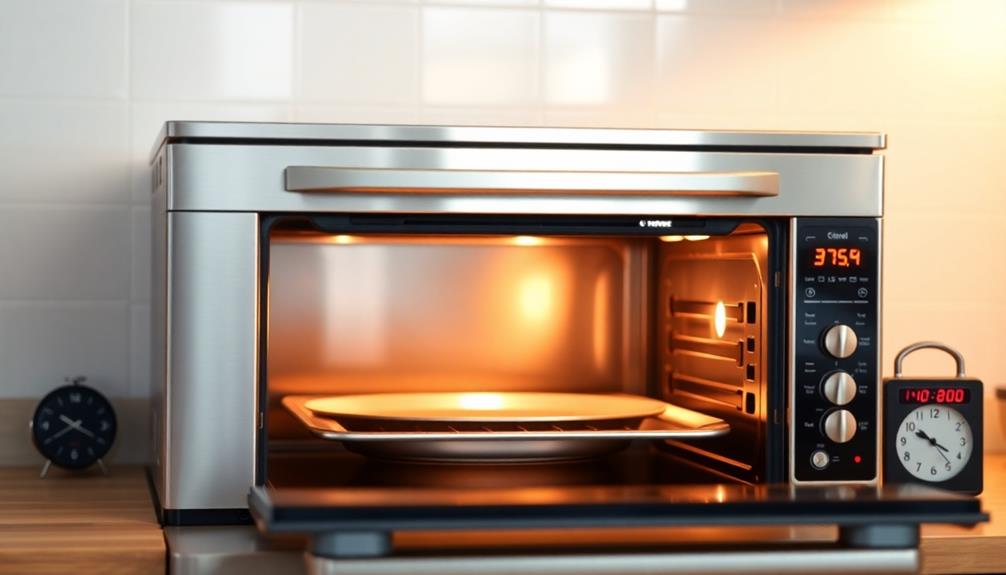
Preheat your oven to 350°F, ensuring the temperature is accurately set. This crucial first step lays the foundation for your delectable witch's hat cookies.
As the oven heats up, you can begin gathering your ingredients and tools. Proper oven temperature is essential for achieving the perfect balance of a crisp exterior and a soft, chewy interior.
Additionally, having a well-planned budget can help you manage expenses when purchasing ingredients for your baking project, making it easier to enjoy the process without financial stress (creating a personal budget).
Once the oven reaches the desired temperature, you'll know it's time to begin baking. This step sets the stage for the rest of the cooking process, so pay close attention.
With the oven ready, you can now move on to mixing your cookie dough and shaping the hats. Keeping a keen eye on the oven throughout the baking time will ensure your witch's hat cookies emerge from the oven in all their spooky glory, ready to delight your family and friends.
Step 2. Mix the Dough
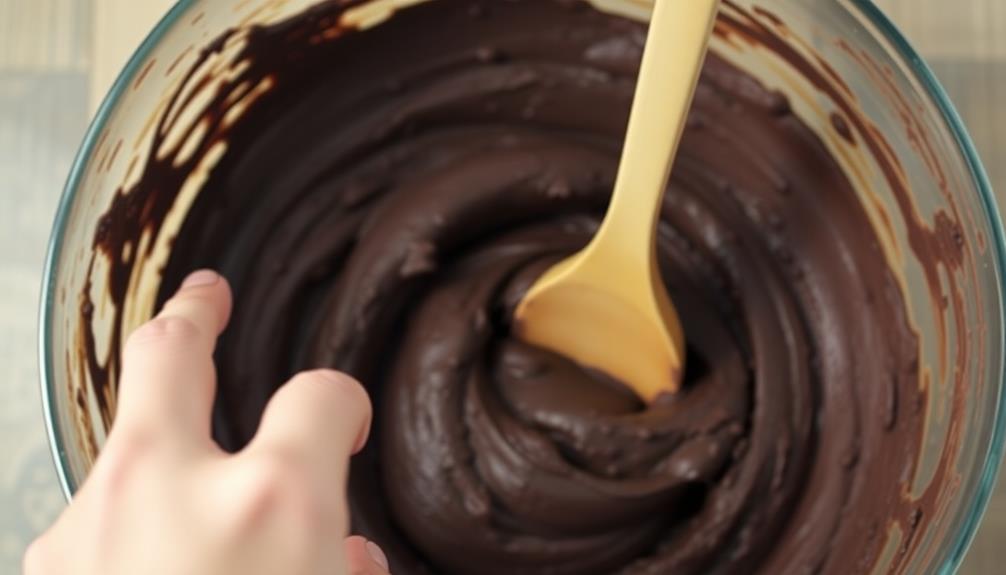
In a large mixing bowl, combine the softened butter and granulated sugar. Using a hand mixer or a sturdy whisk, cream the butter and sugar together until light and fluffy, about 2-3 minutes. Be sure to scrape down the sides of the bowl as needed to ensure even mixing.
To elevate your gathering, consider pairing these cookies with a savory appetizer like crab cakes, which are perfect for festive occasions.
Next, crack the eggs into the bowl one at a time, beating well after each addition. Then, stir in the vanilla extract.
In a separate bowl, whisk together the all-purpose flour, baking powder, and salt. Gradually add the dry ingredients to the wet ingredients, mixing just until combined. Be careful not to overmix, as this can result in tough cookies.
Once the dough is ready, cover it with plastic wrap and refrigerate for at least 30 minutes. This will help the dough firm up and make it easier to work with when shaping the witch's hats.
Step 3. Roll Dough Into Cones
After the dough has chilled, you can begin shaping the witch's hats. Take a small portion of the dough and roll it between your palms to form a smooth cone shape. The cone should be about 3-4 inches tall and tapered towards the top.
As you roll, apply gentle pressure to maintain the cone's form and prevent the dough from cracking. Once you've shaped the cone, place it on the prepared baking sheet, spacing the cones about 2 inches apart.
Repeat this process with the remaining dough, creating as many witch's hat shapes as possible. Remember to keep the dough chilled between batches to ensure the cones hold their shape during baking.
With all the hats formed, you're ready to bake them to crisp, golden perfection. Keep a close eye on the oven, as the thin, tapered design can cause the cookies to bake quickly.
Adjust the baking time as needed to achieve your desired level of doneness.
Step 4. Dip the Cones in Chocolate
With the witch's hat cookies baked and cooled, it's time to dip them in chocolate.
Prepare a small bowl filled with melted chocolate – you can use milk, dark, or even white chocolate, depending on your preference.
Carefully hold each cone-shaped cookie by the pointed tip and dip it into the chocolate, covering the entire surface.
Gently shake off any excess chocolate to create a smooth, even coating.
Place the dipped cookies on a parchment-lined baking sheet to let the chocolate set.
You can speed up the process by popping the tray in the refrigerator for a few minutes.
Once the chocolate has hardened, your witch's hat cookies are ready to be enjoyed!
The contrast between the crisp cookie and the rich, smooth chocolate creates a delightful treat that's sure to impress.
Get creative and try different chocolate varieties or add sprinkles or decorations for an extra spooky touch.
Step 5. Bake Until Chocolate Sets
Once the cookies are dipped in chocolate, you'll want to let the chocolate set before enjoying them. This step is crucial, as it ensures the chocolate hardens and creates that satisfying snap when you take a bite.
Place the chocolate-dipped cookies on a parchment-lined baking sheet or wire rack and let them sit at room temperature for about 15-20 minutes. Alternatively, you can pop them in the refrigerator for 5-10 minutes to speed up the process.
Keep an eye on the cookies, as you don't want the chocolate to become too hard and brittle. The ideal consistency is a smooth, glossy finish that's firm to the touch.
Once the chocolate has set, your witch's hat cookies are ready to serve and enjoy. Feel free to get creative with additional decorations, like sprinkles or edible glitter, to really make them stand out.
Just be sure not to disturb the chocolate until it's completely set, or you may end up with a messy, uneven coating.
Final Thoughts
Crafting the perfect witch's hat cookies is a delightful way to celebrate the spooky season. With the baking and decorating steps behind you, you can sit back and admire your handiwork.
These whimsical treats are sure to delight family and friends, capturing the enchanting spirit of Halloween. The contrast of the chocolatey cap against the vibrant orange cone creates a striking visual that's both festive and fun.
Guests will be impressed by your baking skills and creative flair. Plus, the cookies' bite-sized portions make them perfect for sharing or indulging in a few yourself.
Whether you're hosting a Halloween party or simply want to enjoy a sweet seasonal snack, these witch's hat cookies are a winning choice. With their irresistible flavors and spooky-yet-adorable appearance, they're sure to cast a spell on all who try them. If you’re looking for more festive treats to add to your Halloween spread, consider trying out our haunted haystack cookies recipe. These creepy confections are a fun and easy way to satisfy your sweet tooth while getting into the holiday spirit. With their crunchy texture and ghostly appearance, they’re sure to be a hit at any Halloween gathering.
Frequently Asked Questions
Can I Use a Different Type of Chocolate for the Coating?
Absolutely! You can use a variety of chocolate types for the coating on your cookies.
Dark, milk, or white chocolate would all work well, depending on your personal preference and the flavor profile you're going for.
Keep in mind that different chocolates may have varying levels of sweetness and cocoa content, so you may need to adjust the recipe accordingly.
Have fun experimenting and find the chocolate that best suits your taste buds!
How Do I Store the Cookies and Keep Them Fresh?
To keep your cookies fresh, store them in an airtight container at room temperature. This prevents them from drying out or absorbing unwanted flavors.
You can also place a piece of paper towel in the container to absorb any excess moisture.
For longer storage, freeze the cookies in an airtight bag or container for up to 3 months. Let them thaw at room temperature before serving.
With proper storage, you can enjoy your delicious cookies for days to come.
Can I Make the Witch's Hats in Advance Before an Event?
Yes, you can absolutely make the witch's hats in advance before an event!
The great thing about these cookies is that they hold their shape well, so you can prepare them a few days ahead of time.
Just be sure to store them in an airtight container to keep them fresh.
This way, you can get a head start on your baking and have one less thing to worry about as the event approaches.
Enjoy the convenience of making them in advance!
Can I Use a Different Shape Mold for the Cookies?
Absolutely! You can use a different shaped mold to make your cookies.
Get creative and try out various fun shapes like stars, moons, or even mini cauldrons. Just be sure to adjust the baking time as needed, since the size and shape of the cookies will affect how quickly they bake.
Have fun experimenting and see what unique designs you can come up with! The possibilities are endless when you think outside the traditional cookie cutter.
Are the Cookies Suitable for People With Dietary Restrictions?
The cookies can be suitable for those with dietary restrictions, depending on the ingredients used.
If you make them dairy-free, gluten-free, or with alternative sweeteners, they can accommodate various needs.
However, it's best to check the specific recipe and adjust accordingly.
This way, everyone can enjoy the festive treats.
Just be mindful of your guests' dietary requirements and make the necessary modifications to ensure everyone can indulge safely and happily.