To truly influence your bread’s quality, focus on settings like kneading cycles, fermentation time, and dough temperature. Adjusting kneading can improve gluten development, while longer fermentation boosts flavor and rise. Selecting the right cycle for your bread type affects texture and crumb. Paying attention to these features allows you to customize your loaves and achieve bakery-quality results. Keep exploring how each setting impacts your bread for consistently better loaves every time.
Key Takeaways
- Different bread maker settings adjust kneading, rising, and baking times, directly impacting bread texture and crust.
- Selecting specific modes like whole wheat or gluten-free alters cycle durations for optimal results.
- Proper yeast activation and temperature control during initial steps influence fermentation quality.
- Modifying kneading cycles can improve gluten development and dough elasticity for dense or specialty breads.
- Rapid bake settings shorten total time but may compromise loaf volume and crumb structure.

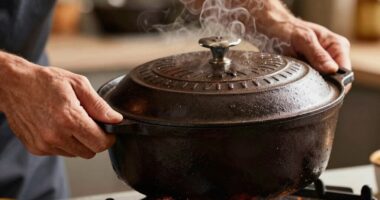
Bread makers have become a popular kitchen appliance for home bakers looking to simplify their bread-making process. They eliminate much of the guesswork, but understanding how to optimize their settings can take your bread from good to exceptional. One of the most critical steps in bread-making is yeast activation. When you add yeast to your ingredients, ensure it’s at the right temperature—warm, not hot—to activate it properly. This initial activation is essential because it kicks off fermentation, which helps your dough rise effectively. If the yeast isn’t activated correctly, your bread might turn out dense or flat. Many bread makers have a dedicated yeast dispenser or a preheat cycle to help with this, but you can also manually activate yeast by mixing it with a small amount of warm water and a pinch of sugar before adding it to the machine. This step guarantees that your yeast is lively and ready to work its magic.
Additionally, the temperature at which you activate the yeast can influence the fermentation process, so maintaining the correct environment is crucial for optimal results. Once the yeast is activated, kneading techniques come into play, especially if you’re customizing your bread or making recipes that require specific textures. Most bread makers have a kneading paddle that does the work for you, but understanding the kneading process can help you troubleshoot or improve your results. For instance, some machines have adjustable kneading cycles—shorter or longer—to develop the dough’s gluten structure properly. If your bread turns out dense or uneven, you might need to extend the kneading cycle or choose a different setting. Proper kneading ensures the dough develops elasticity and strength, which is essential for a good rise and a nice crumb. During kneading, the ingredients are thoroughly mixed and kneaded, which helps distribute the yeast evenly and develop the gluten network necessary for trapping gases produced during fermentation.
Many bread makers also allow you to select specific settings based on the type of bread you’re making—whole wheat, gluten-free, or rapid bake. These settings affect the kneading and rising cycles, so choosing the correct one makes a noticeable difference. For instance, whole wheat bread often needs a longer kneading time to develop the dense flour’s structure, while rapid cycles skip some steps to shorten baking time but might compromise texture. By understanding how these settings influence fermentation, kneading, and rising, you get better control over the final product. Keep in mind that experimenting with these settings, especially in relation to yeast activation and kneading techniques, will help you learn what works best for your taste and bread preferences. With a bit of practice, your bread maker becomes a powerful tool to produce bakery-quality loaves right in your own kitchen.
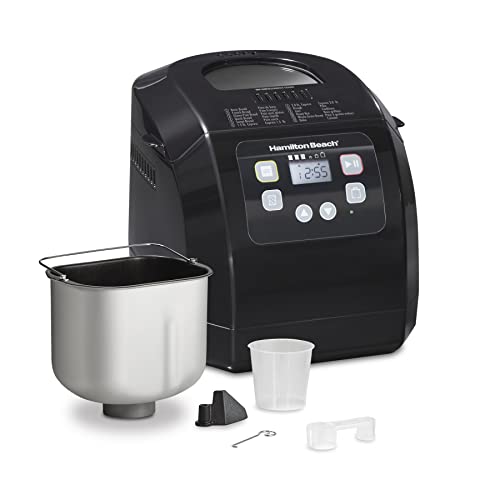
Hamilton Beach Automatic Bread Maker Machine, Digital, Programmable, 12 Settings + Gluten Free, PFAS-Free Nonstick Pan + Kneading Paddle, 2 lb Capacity, Black
- Easy to Use: Add ingredients, select cycle, press start
- 14 Baking Settings: Includes Basic, French, Gluten-Free, and more
- Customizable Loaves: Choose loaf size and crust darkness
As an affiliate, we earn on qualifying purchases.
As an affiliate, we earn on qualifying purchases.
Frequently Asked Questions
Can Bread Makers Bake Gluten-Free Bread Effectively?
Yes, your bread maker can bake gluten-free bread effectively if you follow the right gluten-free tips. Use a gluten-free setting if available, or manually adjust the kneading and baking times. Keep in mind, gluten-free bread often has a different bread texture—more crumbly or dense—so experimenting with ingredients like xanthan gum or adding extra moisture helps improve results. Properly managing these factors guarantees your gluten-free bread turns out delicious.
How Do I Troubleshoot Uneven Baking Results?
You can troubleshoot uneven baking results by first checking the baking temperature; make certain it’s set correctly, as fluctuations can cause inconsistent crust and crumb. Also, adjust the kneading speed—if it’s too fast or slow, it affects dough development, leading to uneven texture. Regularly clean your bread maker to prevent heat transfer issues, and consider leveling the machine to promote even heat distribution for perfect loaves every time.
Are There Specific Settings for Making Artisan or Sourdough Bread?
Ever wonder if your bread maker can handle artisan or sourdough recipes? Yes, it can! Use the ‘artisan’ or ‘dough’ setting, which often incorporates longer kneading and fermentation times. For sourdough, incorporate your sourdough cultures during the initial mixing, and select a setting that allows for extended proofing. These specialized settings help develop the complex flavors and chewy textures characteristic of true artisan bread.
How Do I Adjust Settings for Different Bread Loaf Sizes?
To modify for different bread loaf sizes, select the appropriate setting on your bread maker. Larger loaves need extra time for dough kneading and rising, so increase the kneading cycle if possible. Keep an eye on crust coloration; a larger loaf may require a longer bake time for a golden crust. For smaller loaves, reduce the cycle to prevent overbaking and ensure even crust development.
What Maintenance Is Required to Keep Settings Consistent?
To keep your settings consistent, regularly clean your bread maker and check the paddle and pan for wear. Use high-quality flour to guarantee reliable results, as flour quality impacts texture and rising. Also, monitor the kneading speed; a consistent kneading speed helps maintain uniform dough consistency. By maintaining these components and ingredients, you’ll ensure your bread maker produces the same great results every time.
Conclusion
Now that you understand the settings, you can confidently customize your bread. You’ll choose the perfect crust, set the right size, and select the ideal loaf type. With each adjustment, you’ll see your bread turn out just how you like it—crisp or soft, large or small. By mastering these settings, you’ll uncover endless baking possibilities, transforming simple ingredients into bakery-quality bread. So go ahead, experiment, and enjoy every delicious, personalized loaf you create.