Creepy Crawler Cupcakes are a spooky Halloween treat that'll delight both kids and adults. You'll start with a moist chocolate cupcake base, then top it with vibrant green frosting. The fun part comes with decorating: add gummy worms, crushed chocolate cookies for a "dirt" effect, and other candy insects for extra creepiness. These cupcakes have been popular since the late 1990s and have evolved to include various creepy-crawly designs. You can customize them for different themes and events, making them perfect for Halloween parties or monster-themed gatherings. With a few simple steps, you'll create a treat that's both delicious and visually striking. Discover how to take your cupcake game to the next level of spookiness.
Key Takeaways
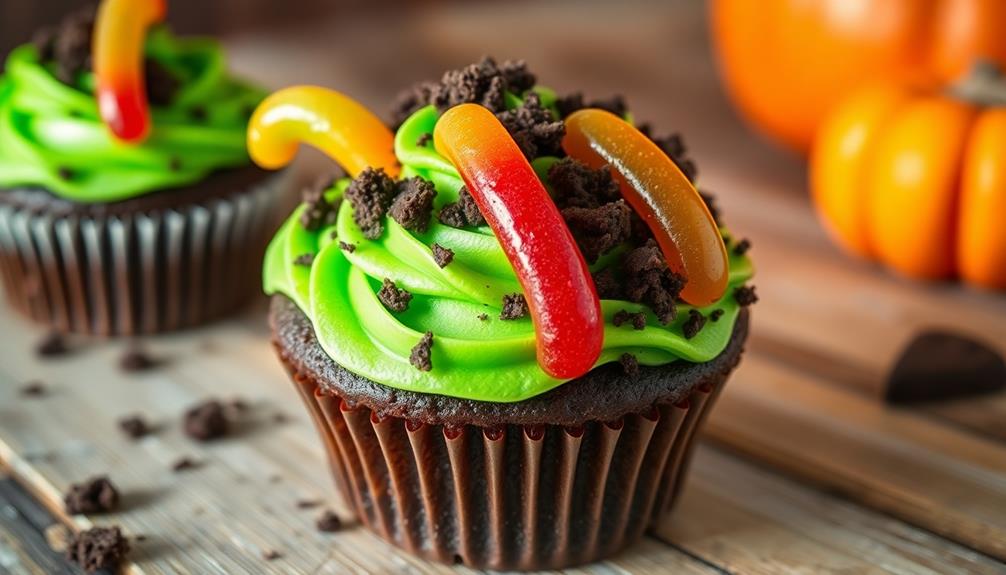
- Creepy Crawler Cupcakes feature a chocolate base with green frosting, gummy worms, and crushed cookies for a "dirt" effect.
- These Halloween-inspired treats have been popular since the late 1990s and have evolved to include various insect designs.
- Decoration techniques involve partially embedding gummy worms in frosting and using crushed cookies to enhance the dirt appearance.
- The cupcakes are versatile and can be customized for different themes, appealing to both children and adults.
- Chilling the decorated cupcakes for 30 minutes improves texture and enhances the overall presentation.
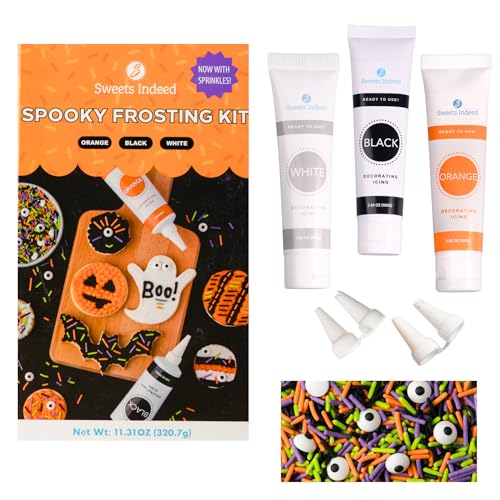
Halloween Frosting Kit with Sprinkles & Eyeballs – 11.31 oz Decorating Set with 3 Frosting Tubes (Orange, Black, White), 4 Nozzles & 2 oz Sprinkle Mix – Cookie & Cupcake Kit for Kids & Families
- Complete Decorating Kit: Includes frosting tubes, nozzles, and sprinkles
- Festive Sprinkle Mix: Crunchy jimmies and candy eyeballs
- User-Friendly Design: Mess-free squeeze tubes and nozzles
As an affiliate, we earn on qualifying purchases.
As an affiliate, we earn on qualifying purchases.
History
Creepy Crawler Cupcakes have been a popular Halloween treat since the late 1990s. You'll find that these spooky sweets gained traction as home bakers and party planners sought creative ways to celebrate the holiday. The trend started with simple spider designs, using licorice for legs and candy eyes for an eerie effect.
Interestingly, high-quality content around baking has significantly influenced the creativity behind these cupcakes, inspiring bakers to elevate their designs.
As the years went by, you've probably noticed the designs becoming more elaborate. Bakers began experimenting with different creatures like worms, centipedes, and even scorpions. They've used various candies, frostings, and edible decorations to bring these creepy crawlers to life.
You'll be interested to know that the popularity of cooking shows and the rise of social media have played a significant role in spreading these creepy cupcake ideas. Pinterest boards and Instagram posts have inspired countless home bakers to try their hand at creating these spooky treats.
Today, you'll find Creepy Crawler Cupcakes at Halloween parties, school events, and even some bakeries. They've become a staple of Halloween baking, offering a perfect blend of sweet treats and playful scares for all ages.
Recipe
Creepy Crawler Cupcakes are a delightfully spooky treat perfect for Halloween parties or any ghoulish gathering. These cupcakes feature a moist chocolate base topped with vibrant green frosting and adorned with gummy worms and crushed chocolate cookies to create the illusion of dirt and crawling insects.
This recipe isn't only visually striking but also incredibly tasty, appealing to both children and adults alike. The combination of rich chocolate cake, sweet frosting, and chewy gummy worms creates a textural experience that's sure to tantalize the taste buds while simultaneously sending a playful shiver down the spine of your guests.
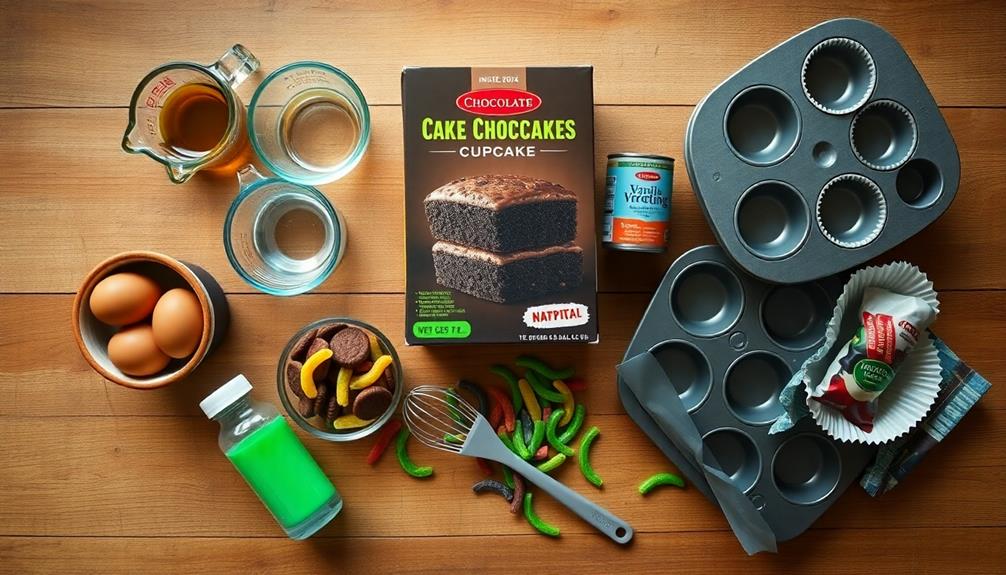
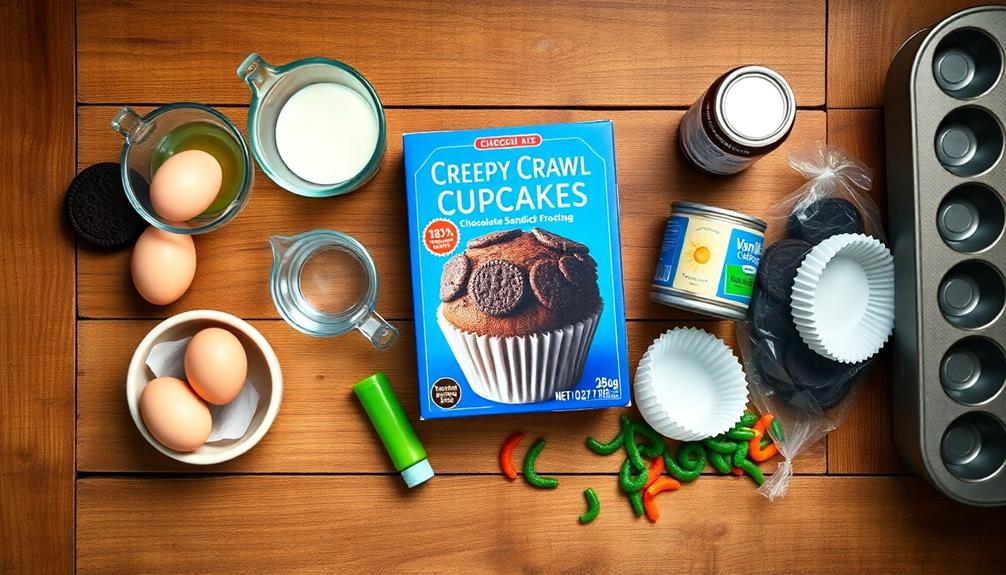
Ingredients:
- 1 box chocolate cake mix
- 3 eggs
- 1/3 cup vegetable oil
- 1 cup water
- 1 package chocolate sandwich cookies
- 1 can vanilla frosting
- Green food coloring
- Gummy worms
Preheat the oven to 350°F (175°C) and line a muffin tin with cupcake liners. In a large bowl, mix the cake mix, eggs, oil, and water according to package instructions. Fill each cupcake liner about 2/3 full with batter and bake for 18-20 minutes or until a toothpick inserted in the center comes out clean. Allow cupcakes to cool completely.
Meanwhile, crush the chocolate sandwich cookies into fine crumbs. Mix green food coloring into the vanilla frosting until you achieve the desired shade. Once cupcakes are cool, frost them generously with the green frosting. Sprinkle cookie crumbs over the frosting to resemble dirt, then top each cupcake with 1-2 gummy worms, partially burying them in the "dirt" for a creepy-crawly effect.
For best results, chill the cupcakes for about 30 minutes before serving to allow the frosting to set. This will make the gummy worms easier to bite into without pulling off all the frosting. If you want to amp up the creepy factor, consider using different types of candy insects in addition to or instead of gummy worms.
Cooking Steps
You're ready to start baking your spooky treats!
First, preheat your oven to 350°F and mix all the dry ingredients together in a large bowl.
Slowly add the wet ingredients, stirring until you've got a smooth batter, then pour it into cupcake liners and top with gummy worms before baking.
Step 1. Preheat Oven to 350°F
To kick off your spooky baking adventure, start by preheating your oven to 350°F (175°C). This crucial step ensures your creepy crawler cupcakes will bake evenly and rise properly.
While your oven's heating up, it's the perfect time to gather your ingredients and prepare your baking tools.
Don't forget to check if your oven's temperature is accurate. You can use an oven thermometer to confirm it's reached the right heat. If you're using a convection oven, you might want to lower the temperature by 25°F, as these ovens tend to cook faster and hotter.
While you're waiting, line your cupcake tin with spooky-themed liners or grease the cups if you're not using liners. This prevents your cupcakes from sticking and makes cleanup easier.
Step 2. Mix Dry Ingredients Together

Generally, the next step in creating your creepy crawler cupcakes involves mixing the dry ingredients. You'll need to gather all-purpose flour, baking powder, baking soda, and salt.
In a medium-sized bowl, combine these ingredients using a whisk or a fork. It's important to mix them thoroughly to ensure even distribution, which will result in a better texture for your cupcakes.
As you're mixing, you might notice small lumps forming. Don't worry – that's normal! Just keep whisking until the mixture looks uniform. If you're feeling adventurous, you can add a pinch of cinnamon or nutmeg to give your cupcakes a subtle spice flavor.
This step is crucial because it helps to evenly distribute the leavening agents throughout the flour, ensuring your cupcakes rise properly.
Once you've finished mixing, set the bowl aside. You'll be adding this dry mixture to your wet ingredients later.
Step 3. Add Wet Ingredients Slowly

With the dry ingredients mixed and set aside, it's time to focus on the wet ingredients. You'll need to gather your eggs, vegetable oil, milk, and vanilla extract. It's crucial to add these wet ingredients slowly to ensure a smooth batter without lumps.
Start by cracking the eggs into a separate bowl and whisking them lightly. This step helps distribute the eggs evenly throughout the batter.
Next, add the vegetable oil to your main mixing bowl. Gradually pour in the whisked eggs, stirring constantly to combine.
Now, it's time for the milk. Add it in small increments, mixing well after each addition. This method prevents the batter from becoming too runny too quickly.
Step 4. Pour Batter Into Liners

The final step before baking is pouring your prepared batter into cupcake liners. You'll want to fill each liner about two-thirds full to allow room for the cupcakes to rise. If you're using a standard muffin tin, this usually means adding about 3 tablespoons of batter per cup.
To make this process easier and less messy, consider using an ice cream scoop or a large spoon. As you're pouring, try to keep the amount of batter consistent across all the cups. This will help ensure even baking and uniform cupcake sizes.
If you're feeling creative, you can alternate colors or flavors of batter to create a marbled effect. Once you've filled all the liners, gently tap the muffin tin on the counter a few times. This will help remove any air bubbles trapped in the batter and create a smoother texture in your finished cupcakes.
Don't forget to clean up any spills on the tin or between the liners, as these can burn during baking and affect the flavor of your creepy crawler cupcakes.
Step 5. Decorate With Gummy Worms
After baking and cooling your cupcakes, it's time to transform them into creepy crawler treats. Start by gathering your gummy worms and any additional decorations you'd like to use. You'll want to have a variety of colors and sizes to create a realistic, squirmy effect.
Begin by spreading a thin layer of frosting on each cupcake. This will serve as the "dirt" for your worms to crawl through.
Next, take your gummy worms and partially press them into the frosting, leaving some parts sticking out. Arrange them in different directions to make it look like they're wriggling around.
For an extra creepy touch, you can use chocolate cookie crumbs to create a soil-like texture on top of the frosting. Sprinkle these around the worms to enhance the illusion of dirt. To take it a step further, consider adding small edible decorations like candy tombstones or ghost-shaped gummies to make it look like a mini haunted graveyard. This detail ties the look together and makes it perfect for Halloween parties or spooky-themed gatherings. This graveyard dirt cake recipe is sure to leave your guests impressed and maybe just a little spooked!
If you're feeling adventurous, add some edible sugar eyes or small candy rocks to complete the scene. Don't forget to place a few worms so they appear to be emerging from the cupcake's center. This will give your treats a truly spine-tingling appearance that's perfect for Halloween parties or spooky-themed events.
Final Thoughts
As you finish creating these spooky and fun Creepy Crawler Cupcakes, you'll find they're perfect for Halloween parties or any monster-themed event. They're sure to be a hit with both kids and adults, offering a delightful mix of sweetness and creepiness.
Remember, you can easily adjust the level of "spookiness" by changing up the decorations or using different colors of frosting.
Don't be afraid to get creative with your cupcakes. You might want to experiment with different flavors of cake or frosting to complement the creepy crawler theme.
Consider adding some edible glitter or sprinkles for extra sparkle, or use food coloring to create marbled effects in the frosting.
If you're making these for a party, you can set up a decorating station where guests can add their own gummy worms or other candy decorations. This interactive element adds to the fun and allows everyone to personalize their treats.
Lastly, don't forget to store your cupcakes properly to keep them fresh.
With these tips in mind, you're ready to wow your guests with these deliciously eerie Creepy Crawler Cupcakes!
Frequently Asked Questions
Are Creepy Crawler Cupcakes Suitable for Children's Parties?
You'll find creepy crawler cupcakes perfect for kids' parties. They're fun, visually appealing, and sure to delight young guests. Just be mindful of any allergies or dietary restrictions. Consider offering alternative options for picky eaters too.
Can I Use Different Colors for the Gummy Worms?
Absolutely! You can use various colored gummy worms to make your treats more vibrant. Mix and match different hues or stick to a specific color scheme. It's your creation, so feel free to get creative with the colors!
How Long Do Creepy Crawler Cupcakes Stay Fresh?
You'll want to eat your creepy crawler cupcakes within 2-3 days for the best taste and texture. Store them in an airtight container at room temperature. If you've used cream cheese frosting, refrigerate them and consume within 3-4 days.
Are There Any Allergen-Free Alternatives for the Cupcake Ingredients?
You can find allergen-free alternatives for most cupcake ingredients. Try using gluten-free flour, dairy-free milk, egg replacers, and nut-free toppings. There are many options available, so you'll be able to create delicious treats that everyone can enjoy.
Can I Make a Larger Cake Version of Creepy Crawler Cupcakes?
Yes, you can definitely make a larger cake version. You'll need to adjust the baking time and increase the ingredient quantities. Don't forget to scale up your decorations too. It'll be a showstopper at your next party!